Crispy Air Fryer Cantonese-Style Pork Belly (Siu Yuk)
Let’s prepare to indulge in the irresistible allure of this crispy air fryer Cantonese-style pork belly. This well-known Cantonese BBQ dish combines crispy crackling pork rind with tender, juicy meat.
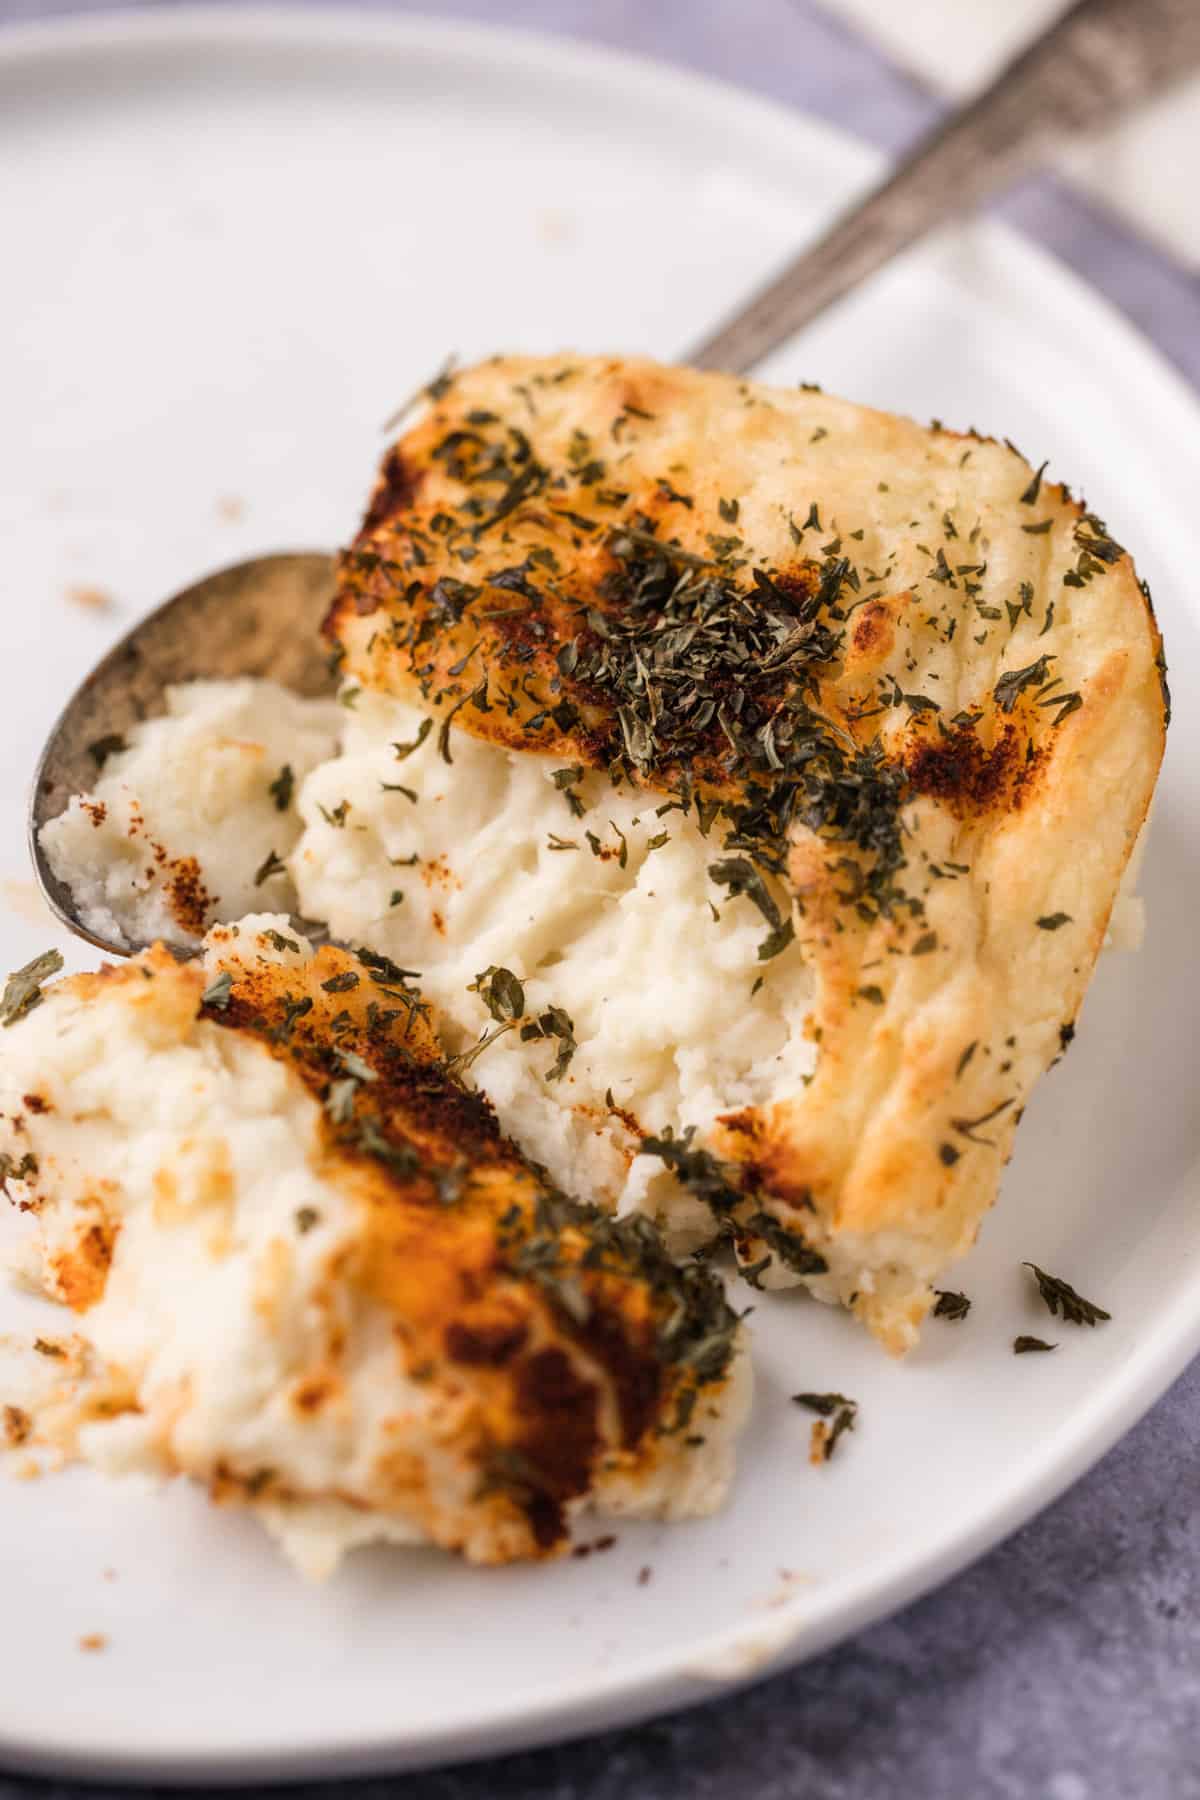
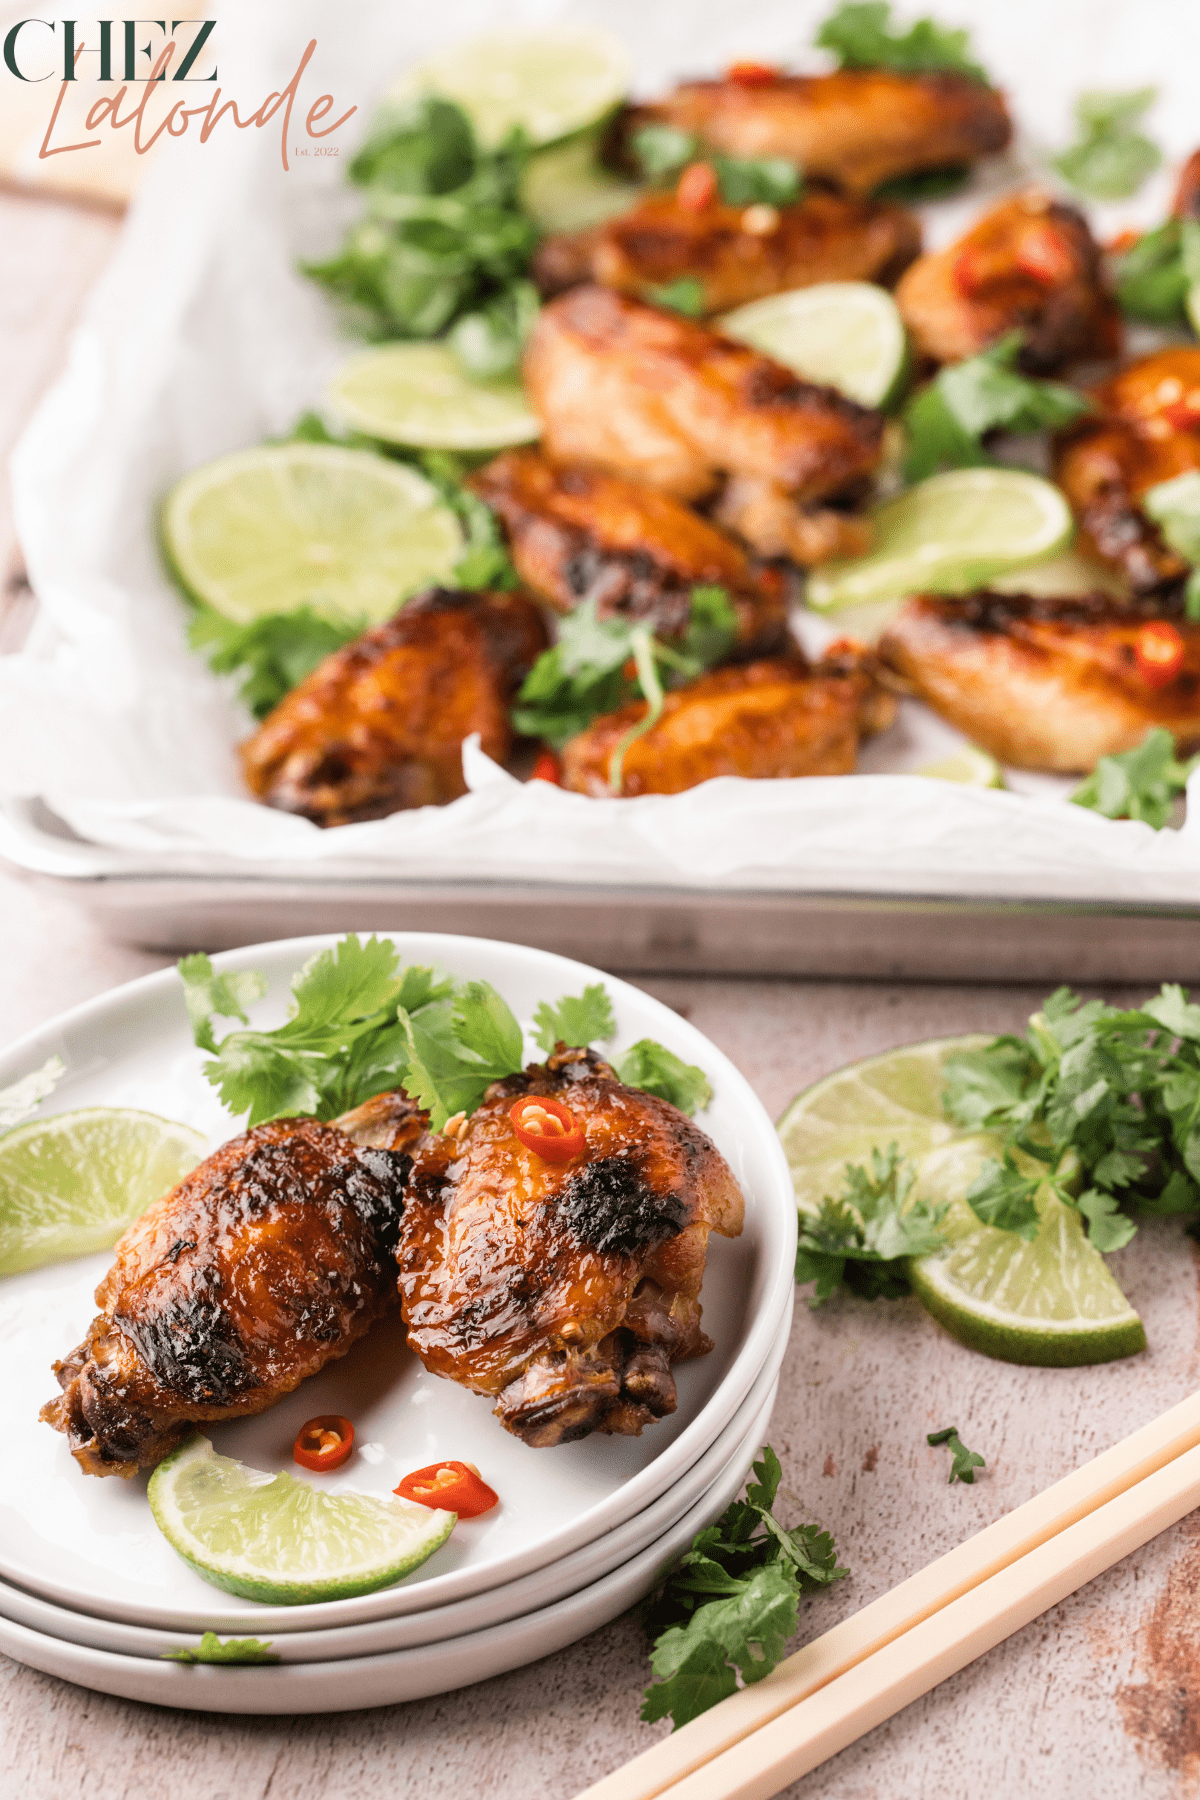
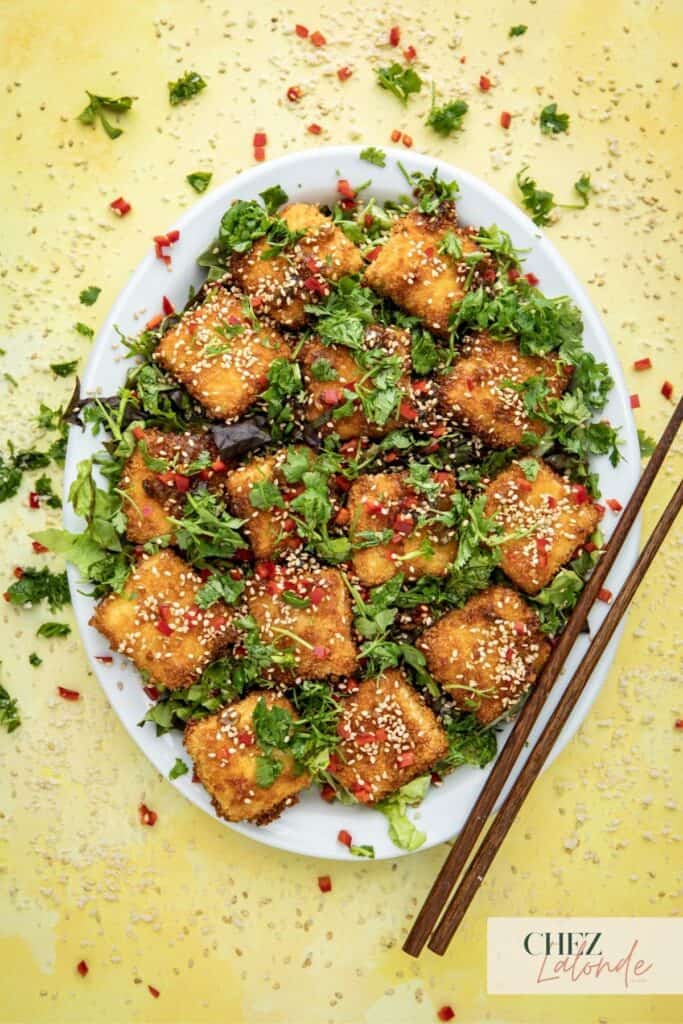
I am here to guide you through selecting the perfect cut of pork belly and reveal my secrets to achieving restaurant-quality results in the comfort of your kitchen. Also, don’t forget to check out two of my recent air fryer chicken wings and tofu with panko recipes because those recipes pair well with this pork belly dish.
Let’s prepare your apron and embark on another flavorful culinary journey as we unravel the magic of making this iconic Cantonese dish.
Disclaimer Notice: This website contains affiliate links. If you make a purchase through these links, I may earn a commission at no extra cost to you. I only endorse products or services I believe will be valuable to my readers. I appreciate your support.
Besides indulging in the delicious Hong Kong Bubble Waffles, Chinese BBQ Pork (Char Siu), and Char Siu fried rice while living in Hong Kong, I was lucky enough to savor this mouthwatering delight of crispy roast pork belly on regular bases as well.
However, after I moved to Texas, finding an authentic Cantonese-style barbecue joint that served this iconic dish was like searching for a needle in a haystack.
Luckily, thanks to today’s culinary advancements, I can whip up this lip-smacking Cantonese pork belly right in the cozy confines of my kitchen with the help of an air fryer and toaster oven.
I am so happy to share this air fryer recipe with you today. Believe me; it’s a breeze! I guarantee your friends and family will fight over every piece when you serve this succulent masterpiece at lunch or dinner.
Get ready to bring the vibrant flavors of Hong Kong cuisine into your home and become the ultimate culinary star of your next gathering!
Recipe Snapshot
EASE: It is not hard; you just need patience and to follow each step thoroughly.
PROS: It’s lip-smacking good and will make you crave more.
CONS: This dish takes 2 days to prep, and it is not a quick and easy 30 mins meal.
WOULD I MAKE THIS AGAIN? Absolutely.
What is Cantonese-style pork belly?
In Cantonese cuisine, pork belly is a prized cut known for its rich flavor and succulent texture. It is obtained from the pig’s underside, specifically the belly region. This cut of meat has alternating layers of tender meat and a thick layer of fat, which adds depth and juiciness to the final dish. Traditionally, this recipe calls for a slab of pork belly with the skin intact to achieve the coveted crispy crackling rind. The skin is the star of the show as it crisps up beautifully, creating a delightful contrast with the tender meat. This combination of flavors and textures makes Cantonese-style pork belly an irresistible dish many enjoy.
Where does the Cantonese-style roasted pork belly (Siu Yuk – 燒肉) originate?

Cantonese roasted pork belly, also known as “Siu Yuk – 燒肉” in Cantonese, is a beloved dish in Southern China, particularly in Guangdong province. Cantonese cuisine is renowned for its emphasis on fresh ingredients and delicate flavors. Siu Yuk has been a staple in Cantonese cuisine for centuries, tracing its roots back to traditional Chinese roasting methods. This delectable dish has gained popularity not only in Cantonese-speaking regions but also across China and beyond, thanks to its irresistible combination of crispy crackling skin and tender, juicy meat. Countries such as Vietnam and Thailand also have their unique versions and serving style of roasted pork belly.
How to identify the quality and the proper cut of the pork belly?
Finding the specific cut of pork belly at the supermarket can be daunting. To help you navigate the selection process effortlessly, let me provide a quick guide on choosing the proper pork belly. Simply consider the following characteristics:
The proper quality of the meat:

- Freshness: Opt for a fresh pork belly with a bright pink color and minimal odor.
- Fat-to-meat ratio: A good balance of meat and fat is crucial for flavor and texture. Look for a pork belly with a generous layer of fat, as it adds moisture and richness to the dish.
- Skin: Choose pork belly with intact, unblemished skin. This is essential for achieving a crispy crackling rind during roasting.
The Proper Cut of the Meat:

- Always choose with a skin-on belly: Choosing a pork belly with the skin still attached is essential. The skin transforms into crispy crackling when properly cooked.
- Thickness: Aim for a pork belly with a uniform thickness to ensure even cooking. This allows for consistent texture and prevents overcooking or undercooking.
- Size matters: Choose a piece of pork belly that suits your needs depending on your recipe and the required servings. Consider the size of your roasting pan or air fryer basket as well.
Why you’ll love this air-fried pork belly recipe?
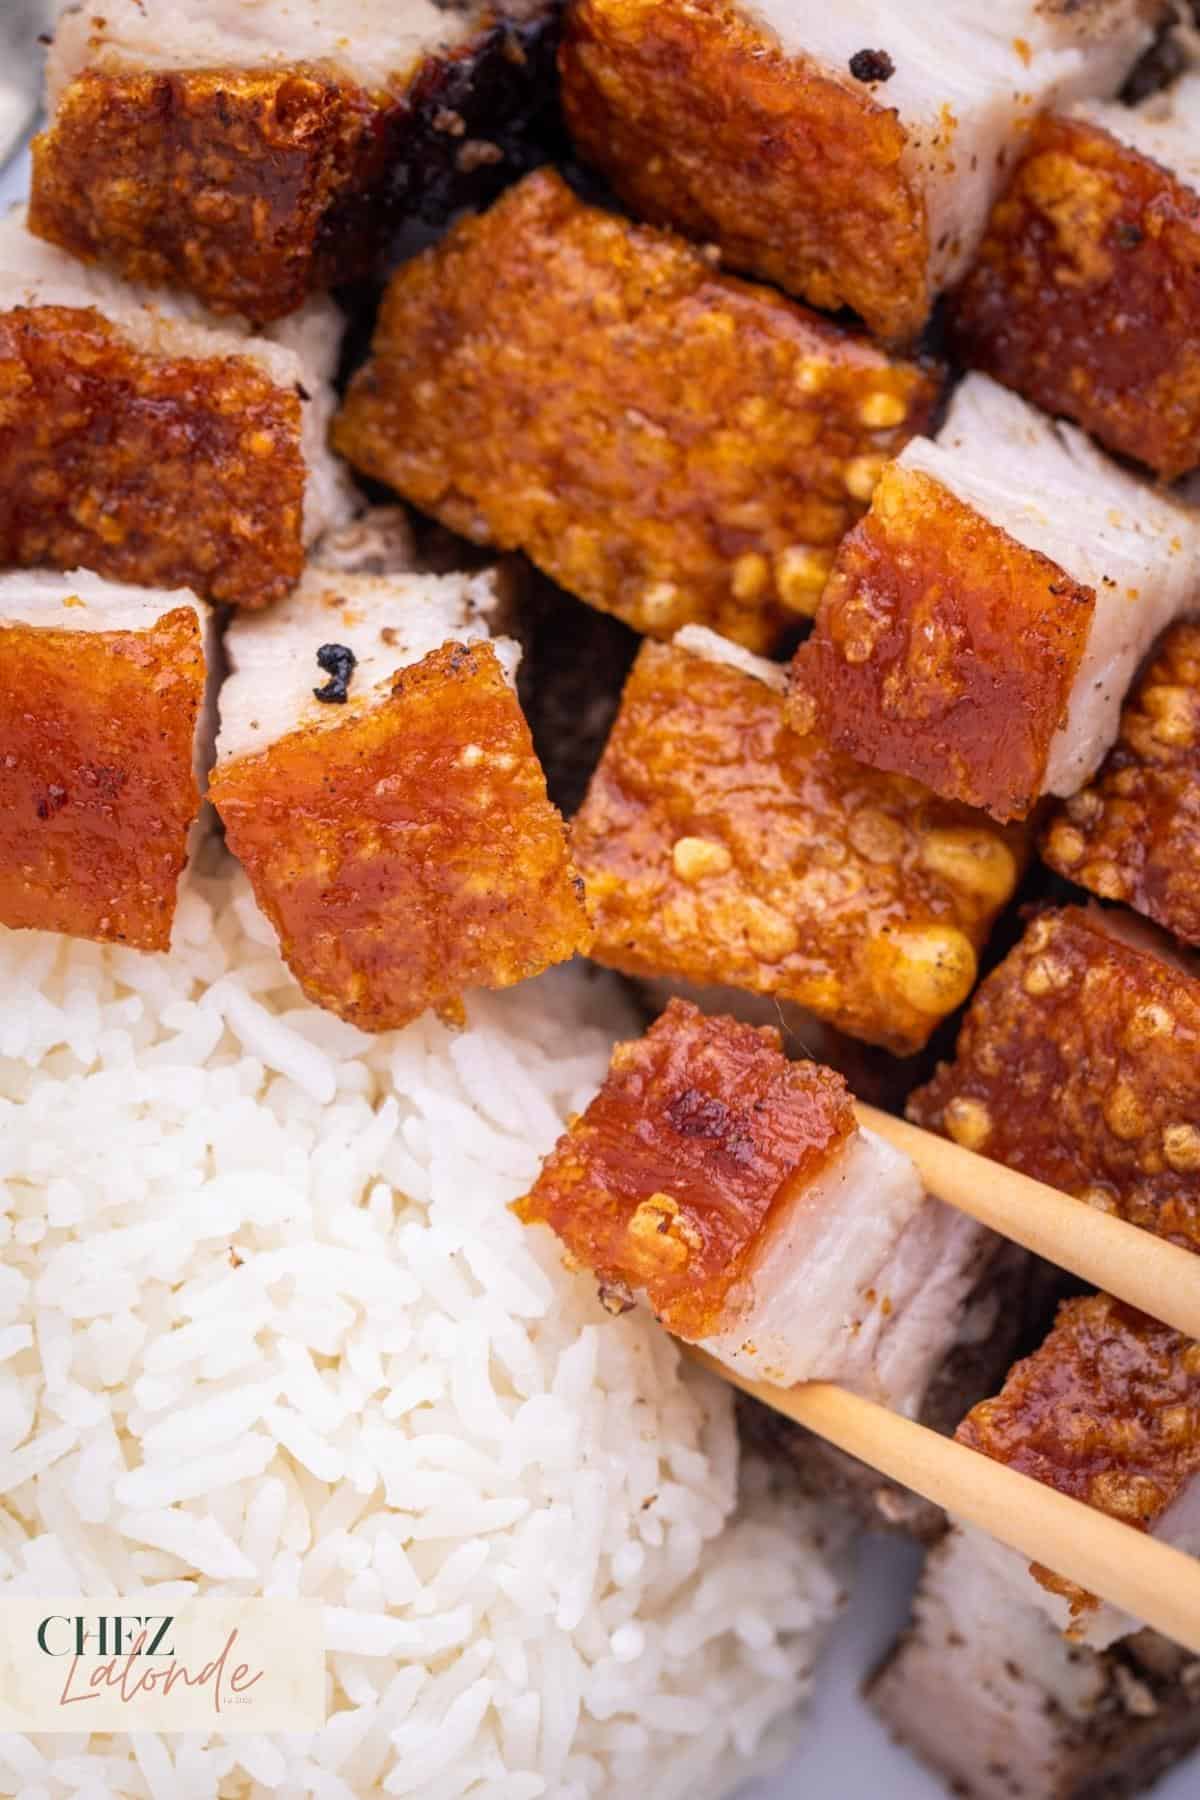
- Crispy and Juicy: Get ready to be amazed by the irresistible combination of crispy crackling skin and tender, juicy meat. It’s a culinary delight that will leave you and your loved ones wanting more.
- Convenient Air-Frying: Embrace the modern cooking techniques of air-frying, which perfectly balance convenience and deliciousness. Say goodbye to the mess and hassle associated with traditional methods while still achieving professional-level results.
- Authentic Chinese Flavors: Experience the authentic taste of a Cantonese roasted pork belly right in your kitchen. Impress your family and friends with this classic dish that captures the essence of Cantonese cuisine.
What is the secret to perfect crackling rind?
Following these tips and instructions will increase your chances of achieving that perfect crackling rind and elevate your Cantonese pork belly to a new level of deliciousness.

Remove moisture from the skin:
Start by rubbing sea salt onto the pork belly to remove excess moisture and enhance the crackling. Let it sit for 15 to 20 minutes, allowing the salt to work magic. Afterward, gently pat the skin dry with paper towels, removing moisture and salt. This step prepares the skin for optimal crisping during the cooking process.
Let it marinate overnight:
Once you have applied the wet seasoning and dry rubbing ingredients to the pork belly, leaving it uncovered in the foil tray inside the fridge overnight is crucial. This step allows the dry air in the fridge to work its magic, drawing out even more moisture from the pork belly. By giving it ample time to rest and dry, you set the stage for a crispy and delicious result when you cook the pork belly the next day.
Poke holes on the skin:
Creating numerous holes on the surface of the pork belly skin is crucial for achieving that iconic bubbled and cracking rind. This allows the white vinegar to penetrate the skin and work its magic. While you can use a sharp skewer, I highly recommend investing in a specialized tool available on Amazon. This tool is designed to speed up the process and ensure consistent results.
Cook with skin-side up:
Place the pork belly in the air fryer with the skin side up. This allows the hot air to act on the skin, promoting crispiness directly.
Get the belly with skin intact:
Choosing cuts with intact skin is essential when selecting pork belly for this recipe. The skin is the star of the show and crucial for achieving that classic crispy rind. So, when purchasing your pork belly, carefully read the label and ensure it includes the skin. This way, you can guarantee the best results and enjoy the irresistible texture of the crispy skin that makes this dish unique.
Ingredients that you’ll need for this recipe:
Important Note:
To ensure you get the optimal result for this dish, I have organized three distinct groups of seasonings for different parts of the pork belly. It is crucial to follow the recipe instructions carefully and apply each seasoning to its designated section of the meat.
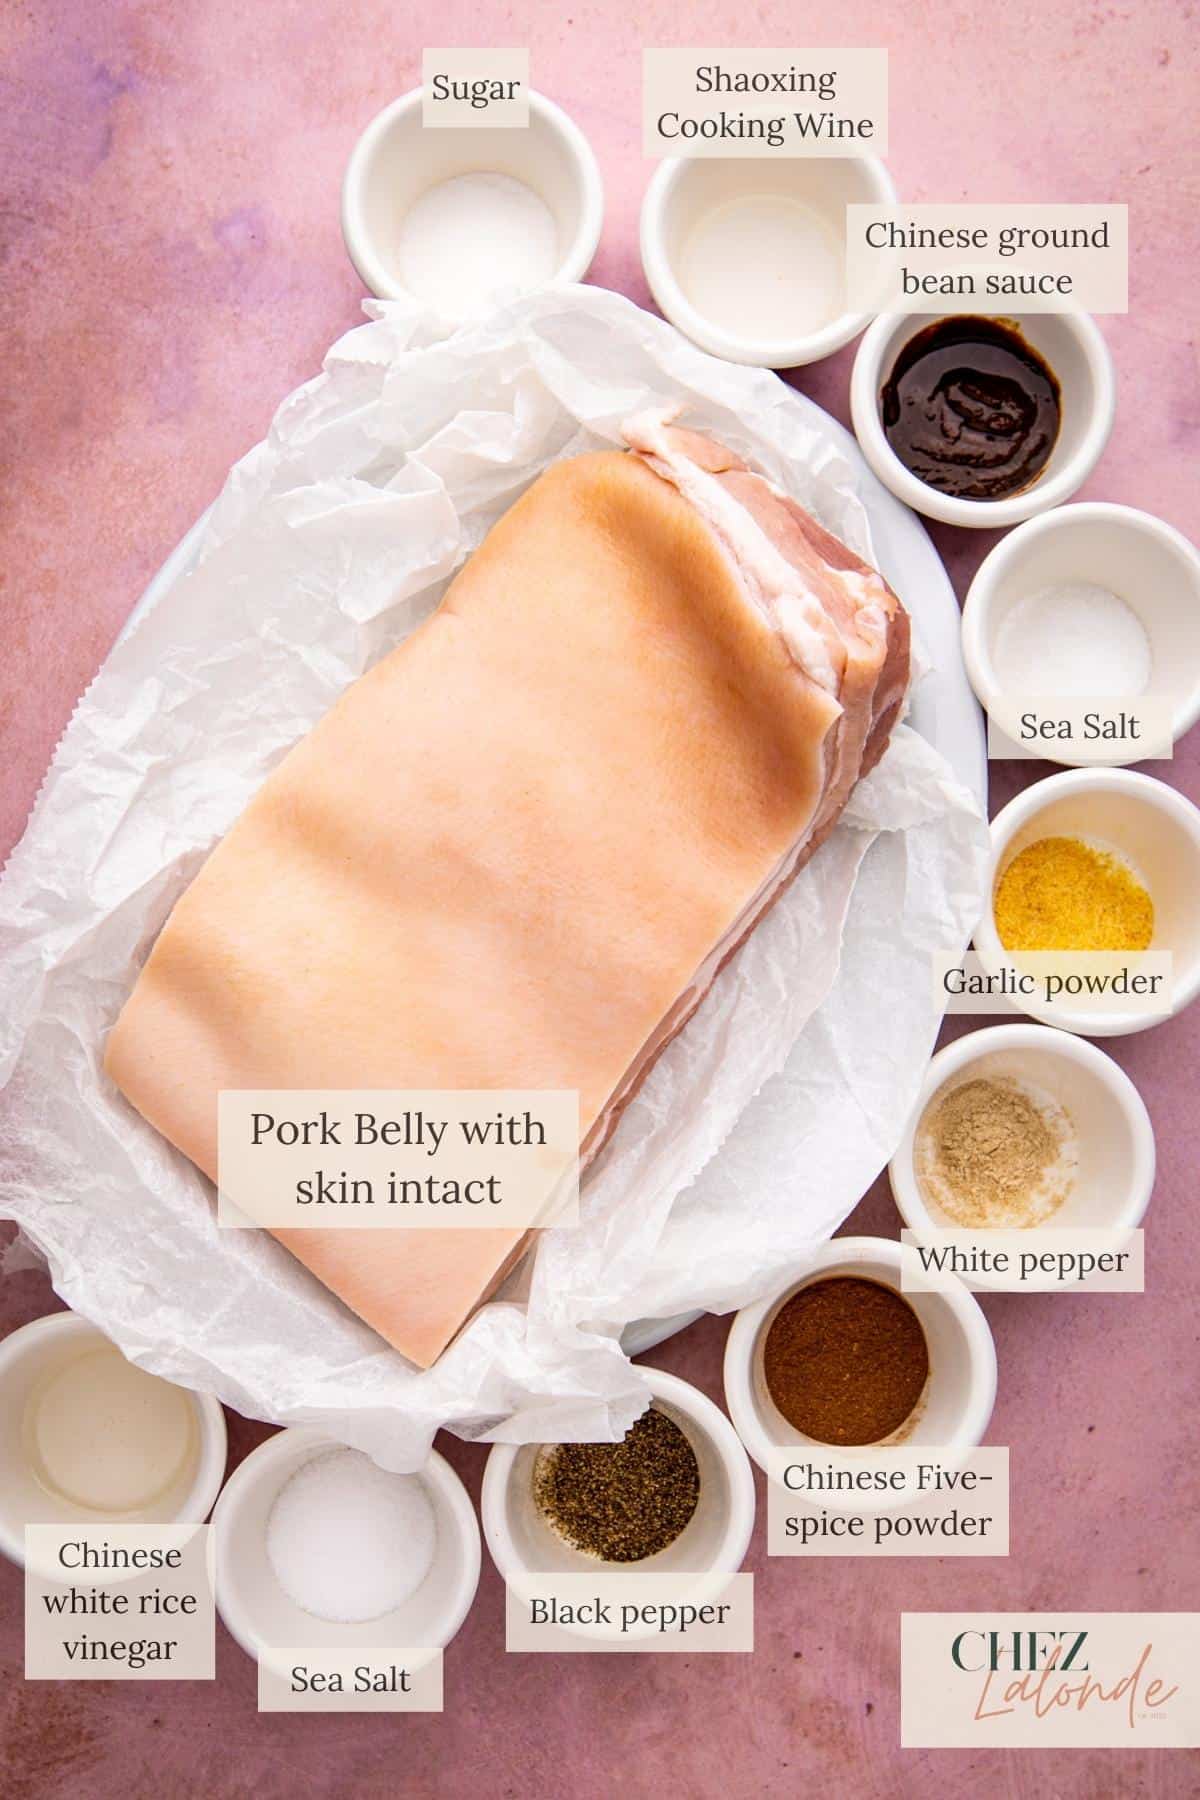
Pork Belly with skin intact:
This recipe has no substitute for the star ingredient: Pork belly with skin. Other cuts of pork or proteins won’t deliver the same result. The skin is the true hero here, providing that irresistible crunch in its unparalleled texture and flavor that other types of meat won’t be able to deliver.
Dry seasonings for the meat side only:
These dry seasoning ingredients create a harmonious blend of flavors, giving the pork belly a rich, savory, and aromatic taste characteristic of Chinese cuisine. Here is the list of dry seasoning ingredients:
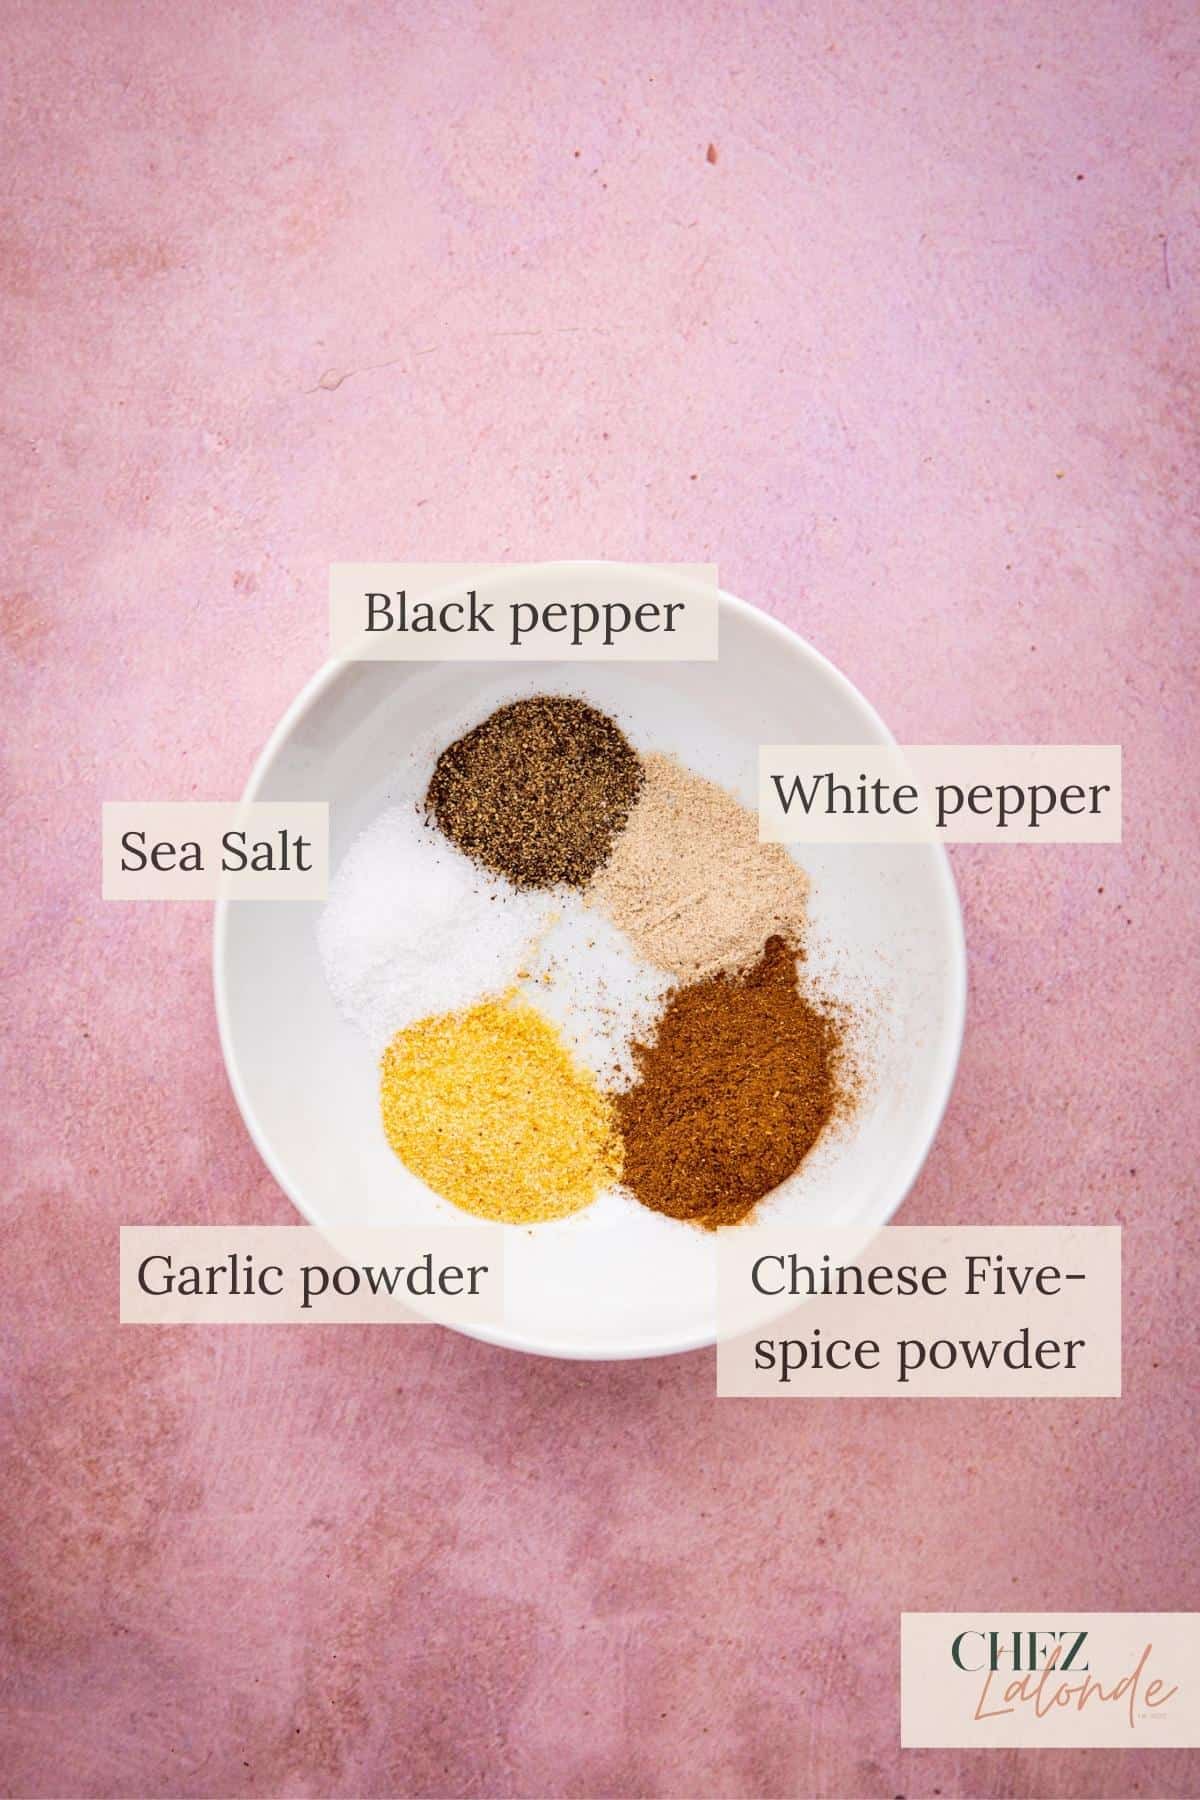
- Chinese five-spice powder: This traditional Chinese spice blend consists of star anise, cloves, cinnamon, Szechuan peppercorns, and fennel seeds. It adds a complex and aromatic flavor with hints of sweetness and warmth.
- Black pepper: Known for its bold and pungent taste, it adds a robust and slightly spicy kick to the pork belly. It complements the other flavors and adds a pleasant heat.
- White pepper powder: White pepper has a milder flavor than black pepper, providing a subtle heat and a distinct earthy taste. It adds depth to the seasoning and complements the other spices.
- Garlic powder: Brings its characteristic savory and umami notes to the mix. It enhances the overall flavor profile of the pork belly and adds a delicious savory element.
- Sea salt: Sea salt not only seasons the meat but also helps draw out excess moisture; it enhances the natural flavors of the pork belly and balances the other seasonings.
Wet seasonings for the meat side only:
The wet seasoning ingredients are crucial in adding depth, balance, and complexity to the meat part of the pork belly. Here’s why each ingredient is used:
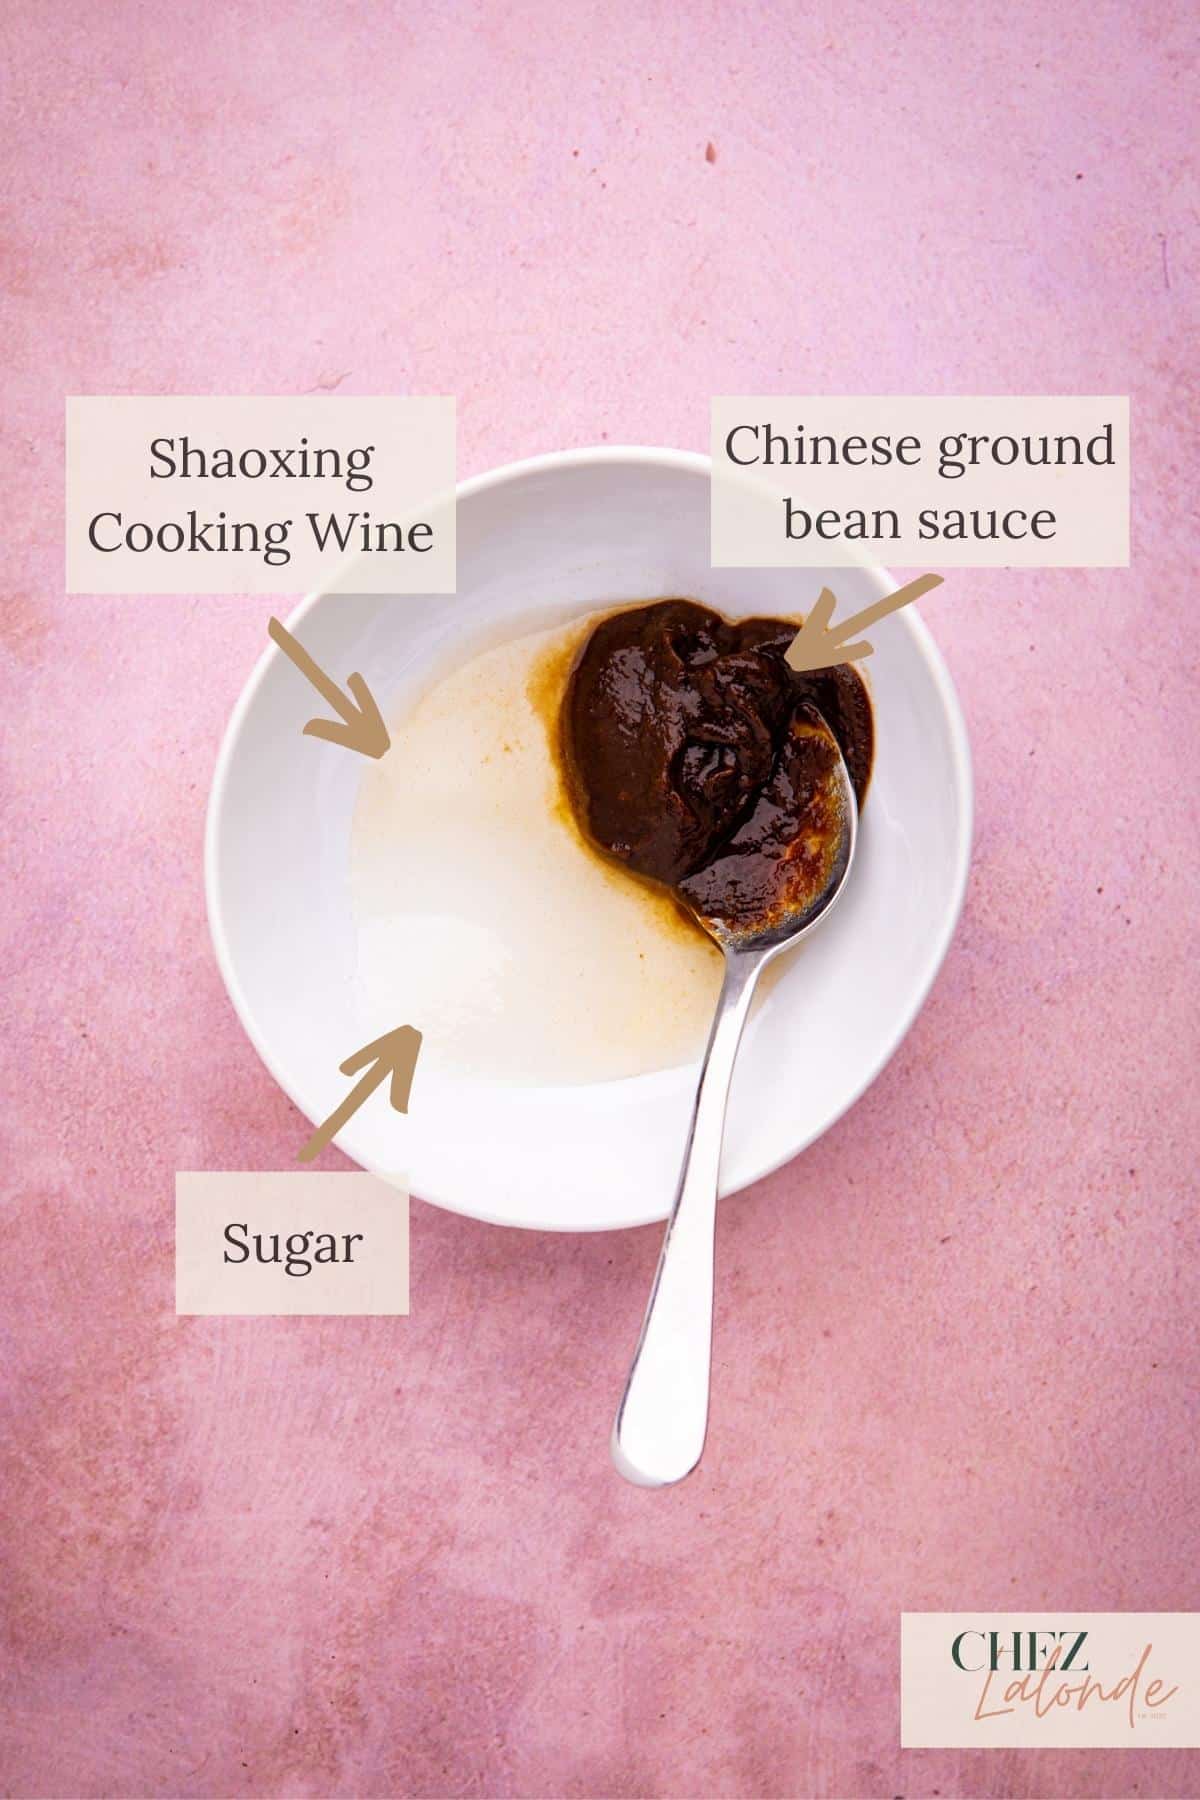
Sugar: contributes sweetness to the pork belly, balancing the savory and umami flavors.
Shaoxing cooking wine: is a critical ingredient in Chinese cuisine, known for its rich and aromatic flavor. It adds depth and complexity to the pork belly, enhancing its overall taste. The wine also helps tenderize the meat and remove any unpleasant odors.
Chinese ground bean sauce: Adds a rich umami flavor to the pork belly, enhancing its taste and providing a depth of savory notes.
Seasonings for the skin side only:
The seasoning ingredients used on the skin part of the pork belly serve specific purposes to enhance the texture and flavor. Here’s why each ingredient is included:
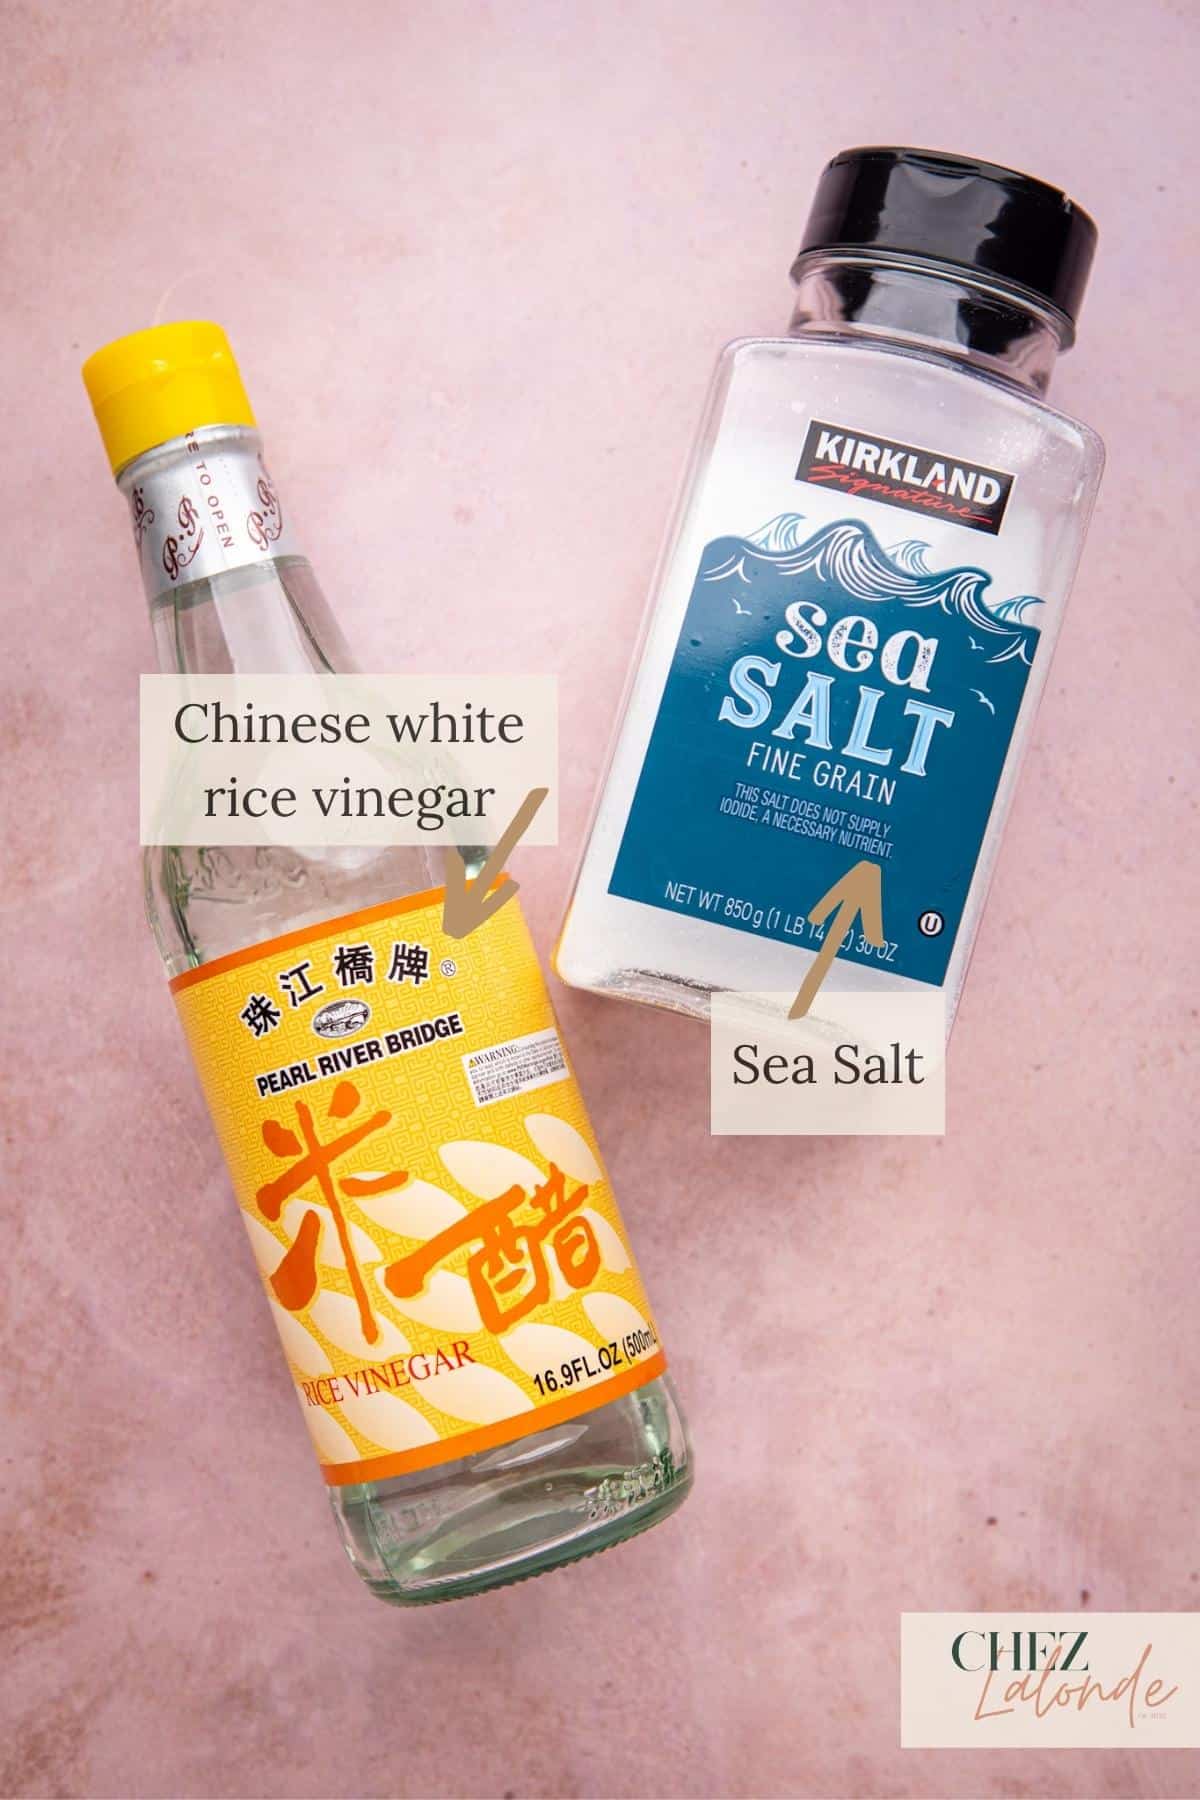
Sea Salt: It helps draw out moisture from the skin, resulting in a drier surface. It is essential for achieving that coveted crispy and crackling texture.
Chinese white rice vinegar: Chinese white rice vinegar is applied to the skin to create an acidic environment. The acidity helps break down proteins and promotes the formation of bubbles and cracks during the cooking process. This vinegar is crucial in achieving the pork belly’s signature bubbled and crispy skin.

Don’t know how to use these Asian sauces & condiments?
Check Out My Chinese Pantry Essential Guide To Learn More
Tools that are required for this recipe:

Meat tenderizer with steel needles:
This special tool creates deep cuts or holes in the pork belly’s skin. The steel needles help puncture the skin, allowing better heat distribution and reducing excess fat during cooking. These cuts are crucial for achieving the final dish’s desired crispy and crackling skin texture.
(I got this meat tenderizer from Amazon, and I highly recommend it.)

Toaster Oven with Roast setting:
Using a toaster oven with even heat distribution is essential to maintaining the juicy and tender meat of the pork belly. Initially cooking the meat in the toaster oven before transferring it to the air fryer, you can achieve a perfect balance of moistness and crispiness, ensuring a delicious final dish.
(For this recipe, I used the Breville Smart Oven from Williams Sonoma)

Air fryer:
An air fryer is vital for perfect cooking pork belly. It uses hot air circulation and convection cooking to provide a similar result to deep-frying but with significantly less oil. The air fryer ensures even cooking and helps to achieve a crispy exterior while maintaining the juiciness and tenderness of the meat.
(I used the Philips Air fryer from Williams Sonoma and loved it!)
Recipe Substitutions and Variations
- If you can’t find a meat tenderizer at the store or online, don’t worry! You can use a bundle of wood or bamboo skewers to puncture holes in the skin. This alternative method works just as well to prepare the pork belly for that perfect crispy skin.
- If you can’t find ground bean paste at your local supermarket, don’t worry! It is an optional ingredient, so you can omit it from the recipe. However, if available, the ground bean paste adds a delightful flavor to the meat part and enhances the dish’s overall taste.
How to make delicious air-fryer Cantonese-style pork belly?
This recipe requires two days to process for the best flavor and results. The pork belly must be prepared and seasoned, cured, and dry overnight before cooking. While it may require some patience, the wait will be well worth it for the incredible taste that awaits.
Day 1
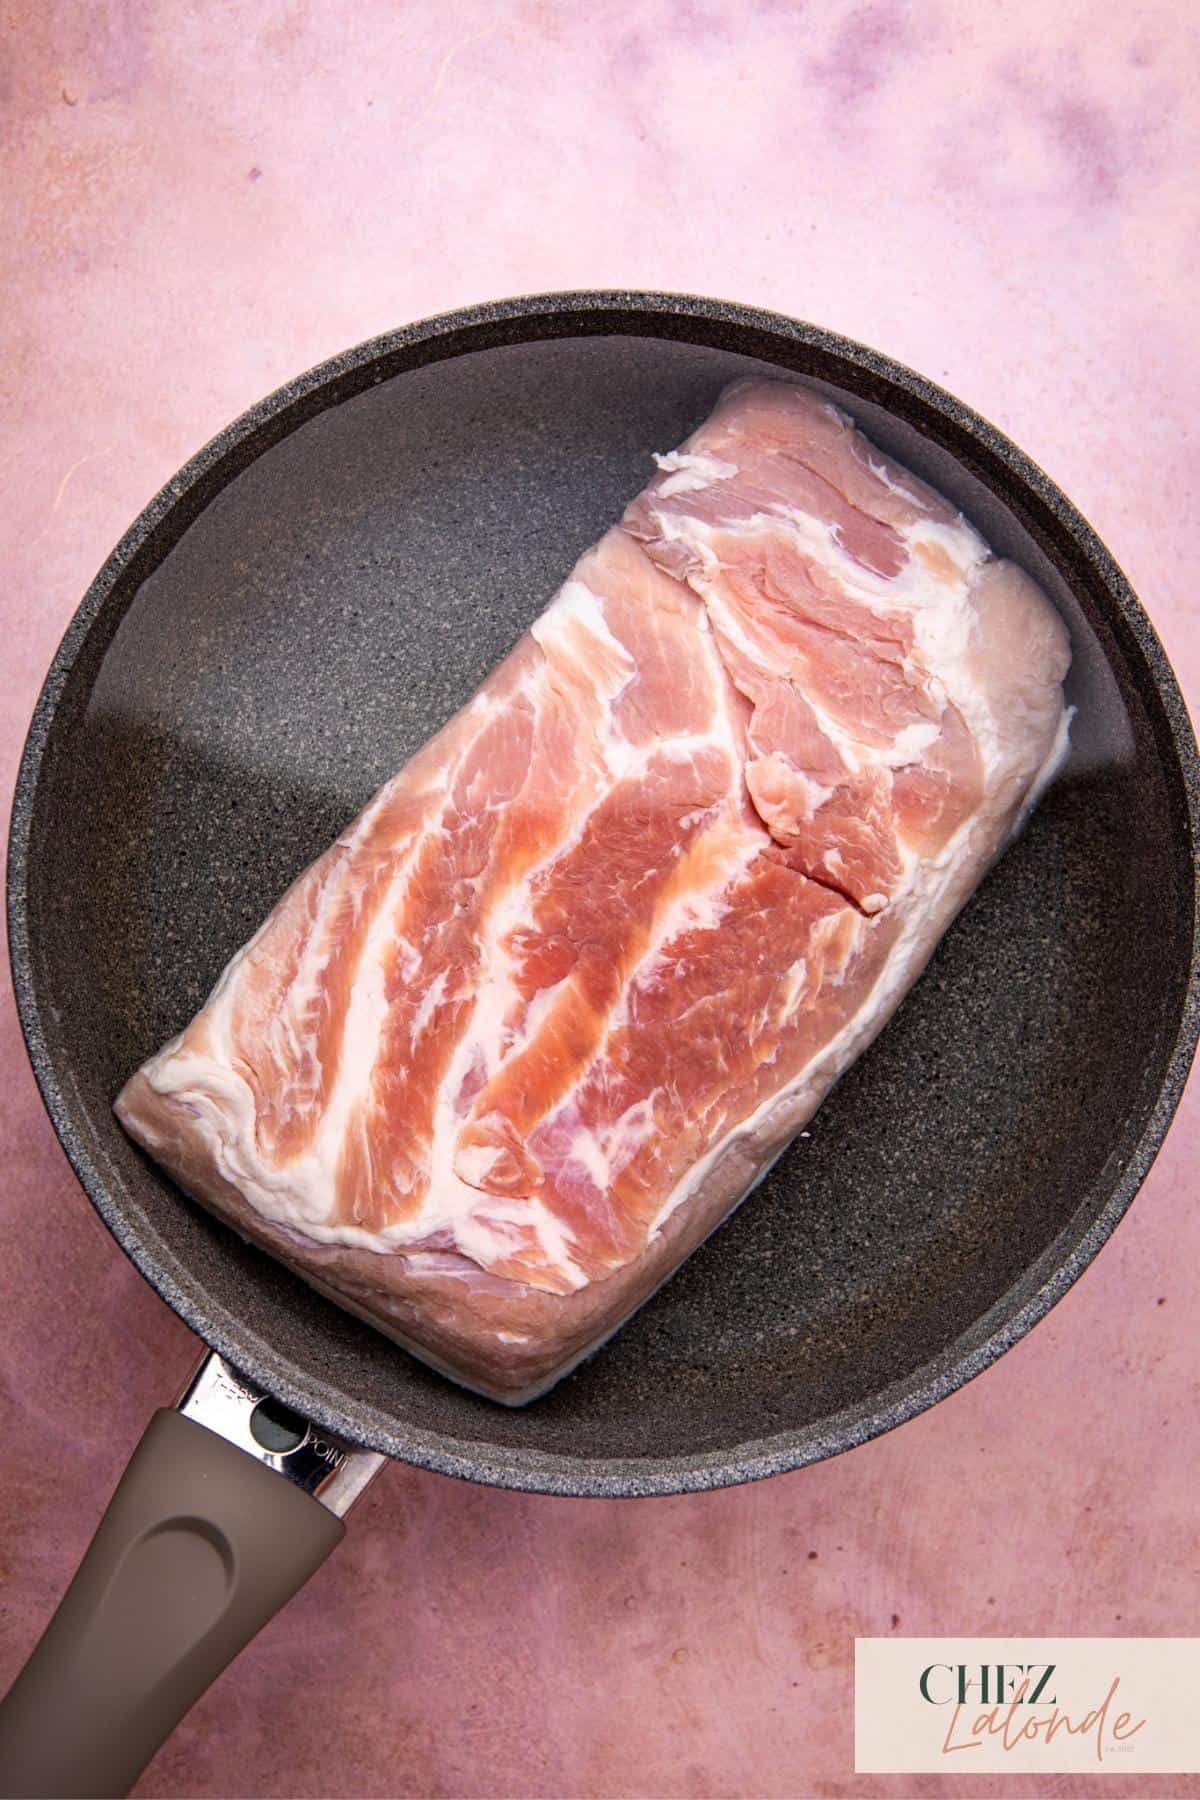
Step 1: Wash and pre-boil the belly:
To prepare the pork belly, boil 4 to 5 cups of water in a shallow wok or saucepan. Rinse the pork belly and place it skin-side down in boiling water, submerging it fully. Cover and cook for 5 minutes. This step tenderizes the meat and removes impurities before proceeding with the recipe.
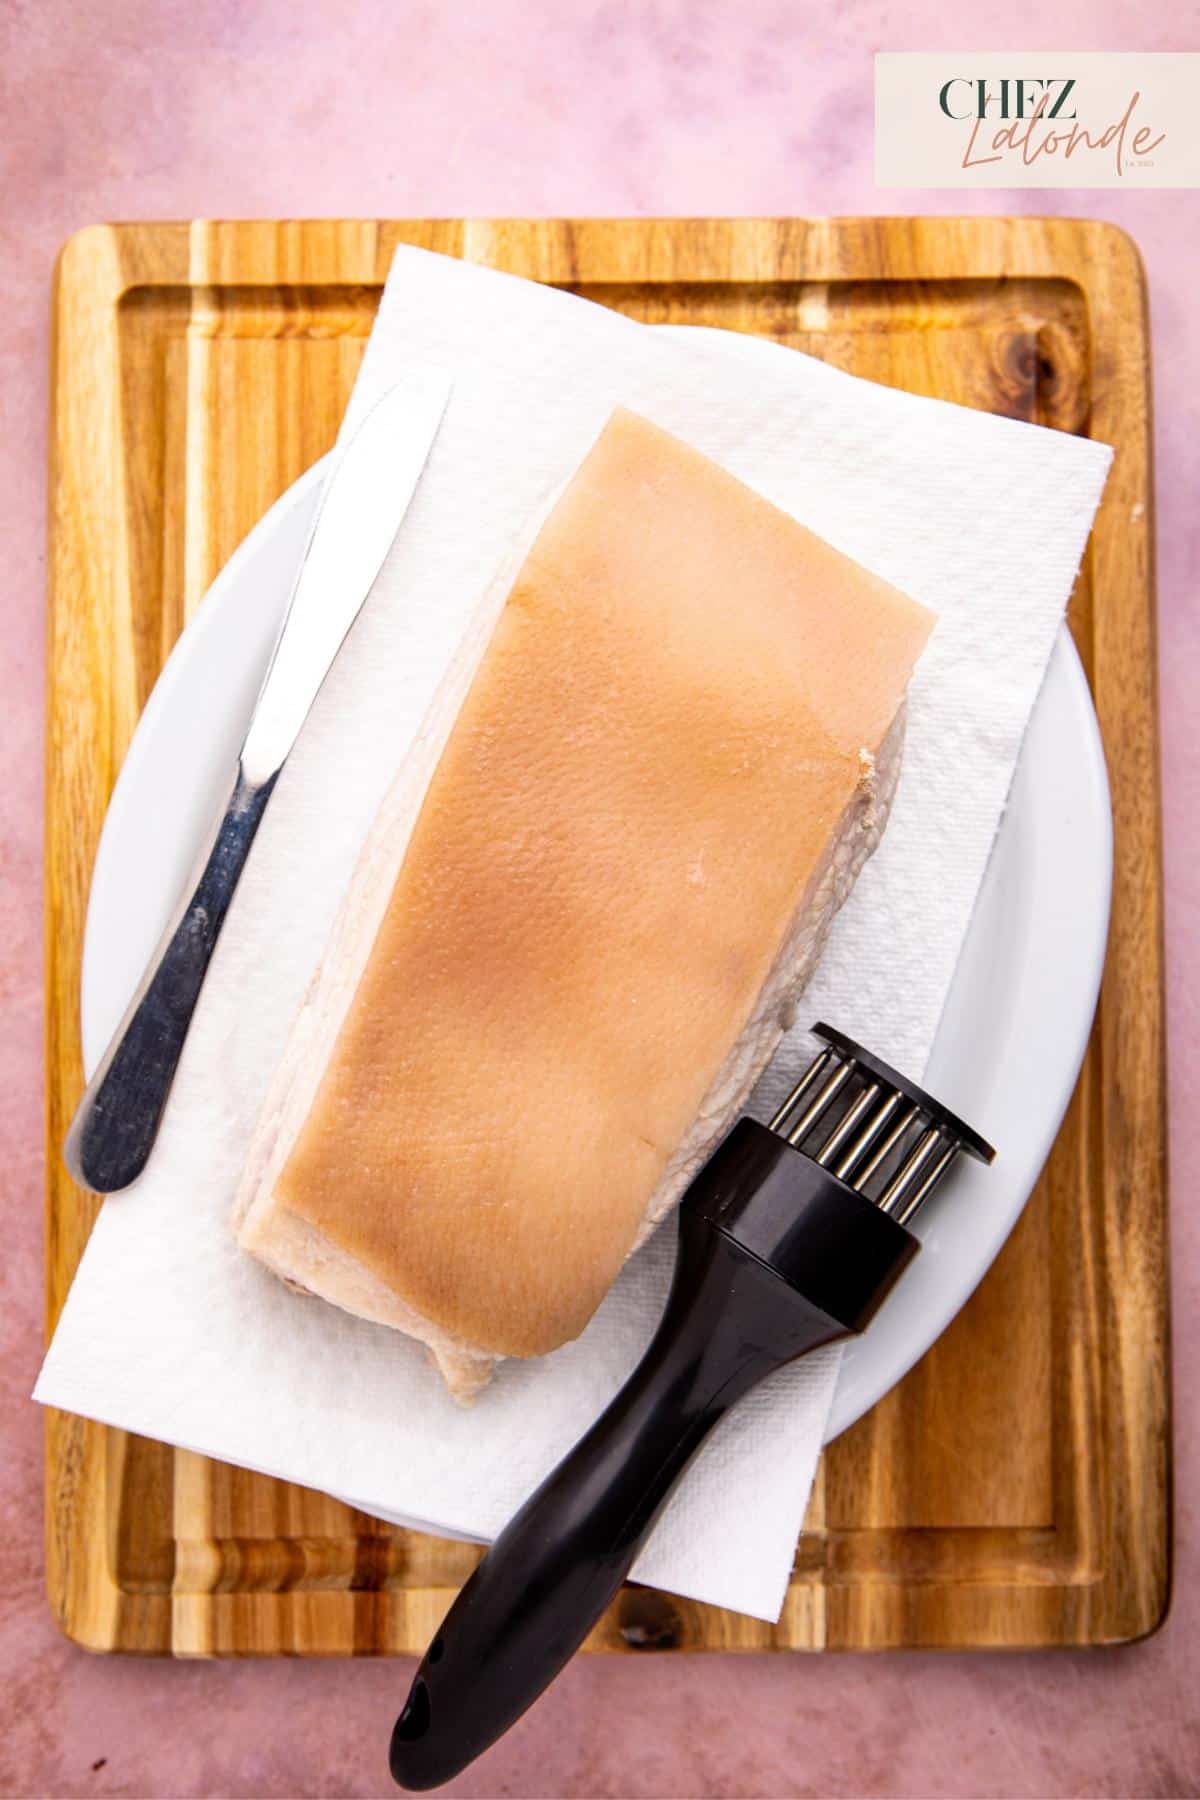
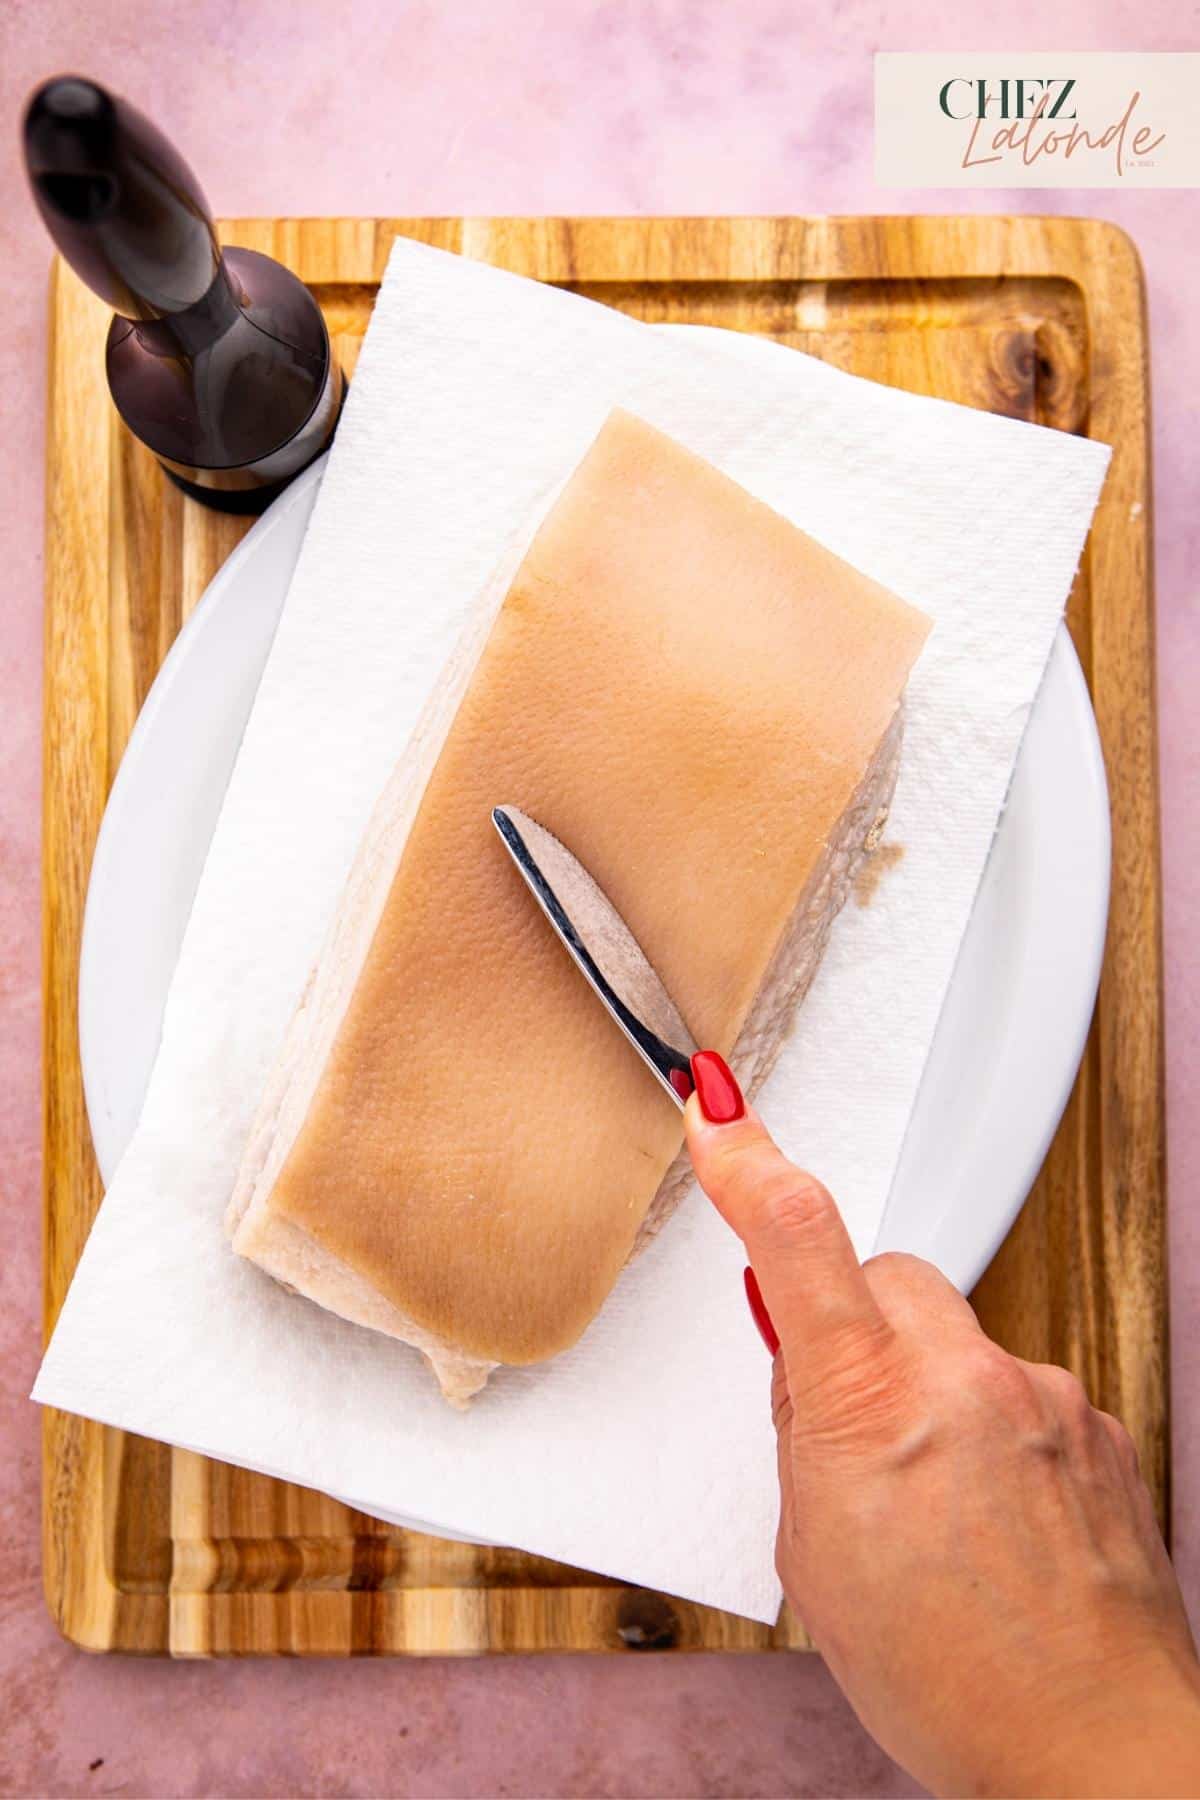
Step 2: Clean the skin:
Once the pork belly has boiled for 5 minutes, carefully remove it from the hot water and transfer it to a plate to cool down. Once it is safe to handle, take a butter knife and gently scrape off any hair or impurities from the skin. Rinse the pork belly once again and use clean paper towels to pat it dry. This step ensures a clean and prepared surface for the next stage of the recipe.

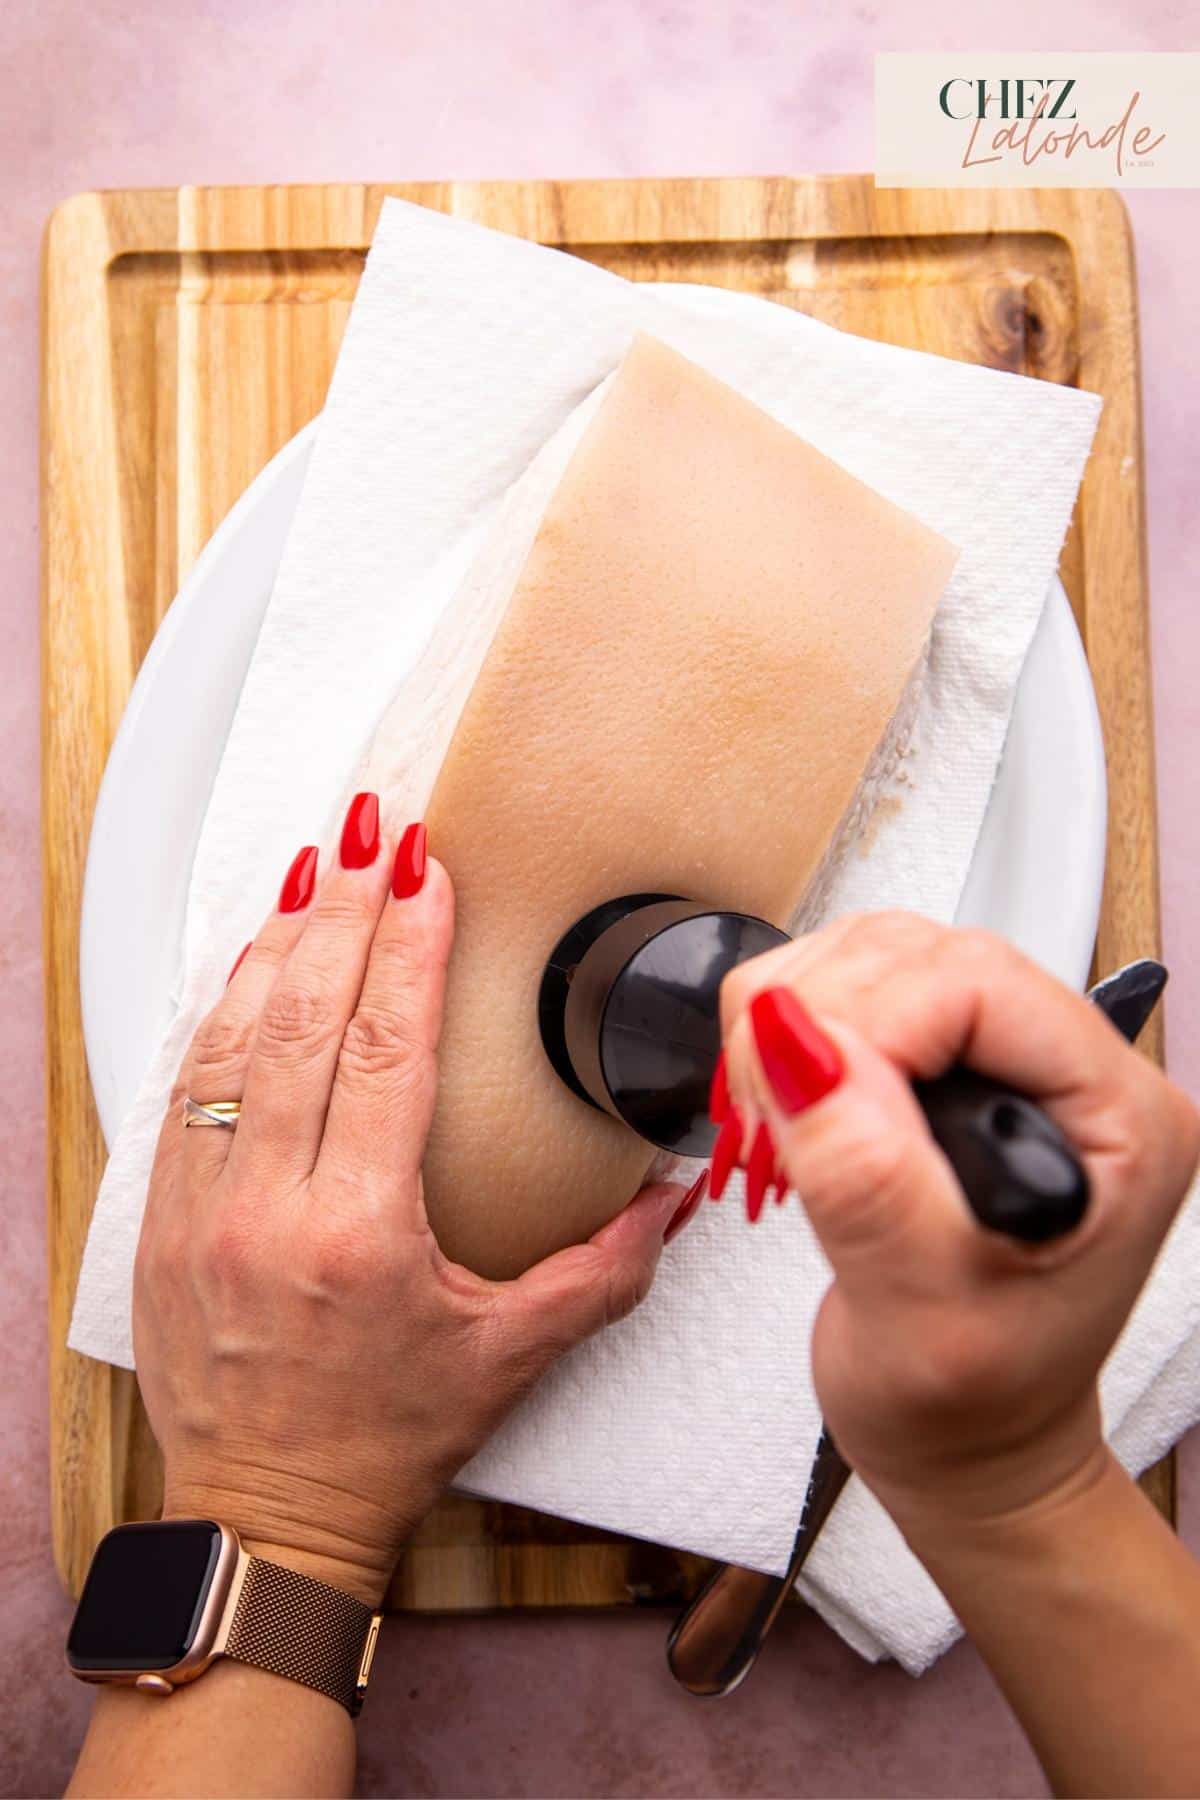
Step 3: Poke holes with tenderizer:
Take the meat tenderizer with steel needles and use it to punch as many holes as possible into the pork skin, ensuring they are closely spaced together. Focus solely on the skin and avoid piercing through the meat.

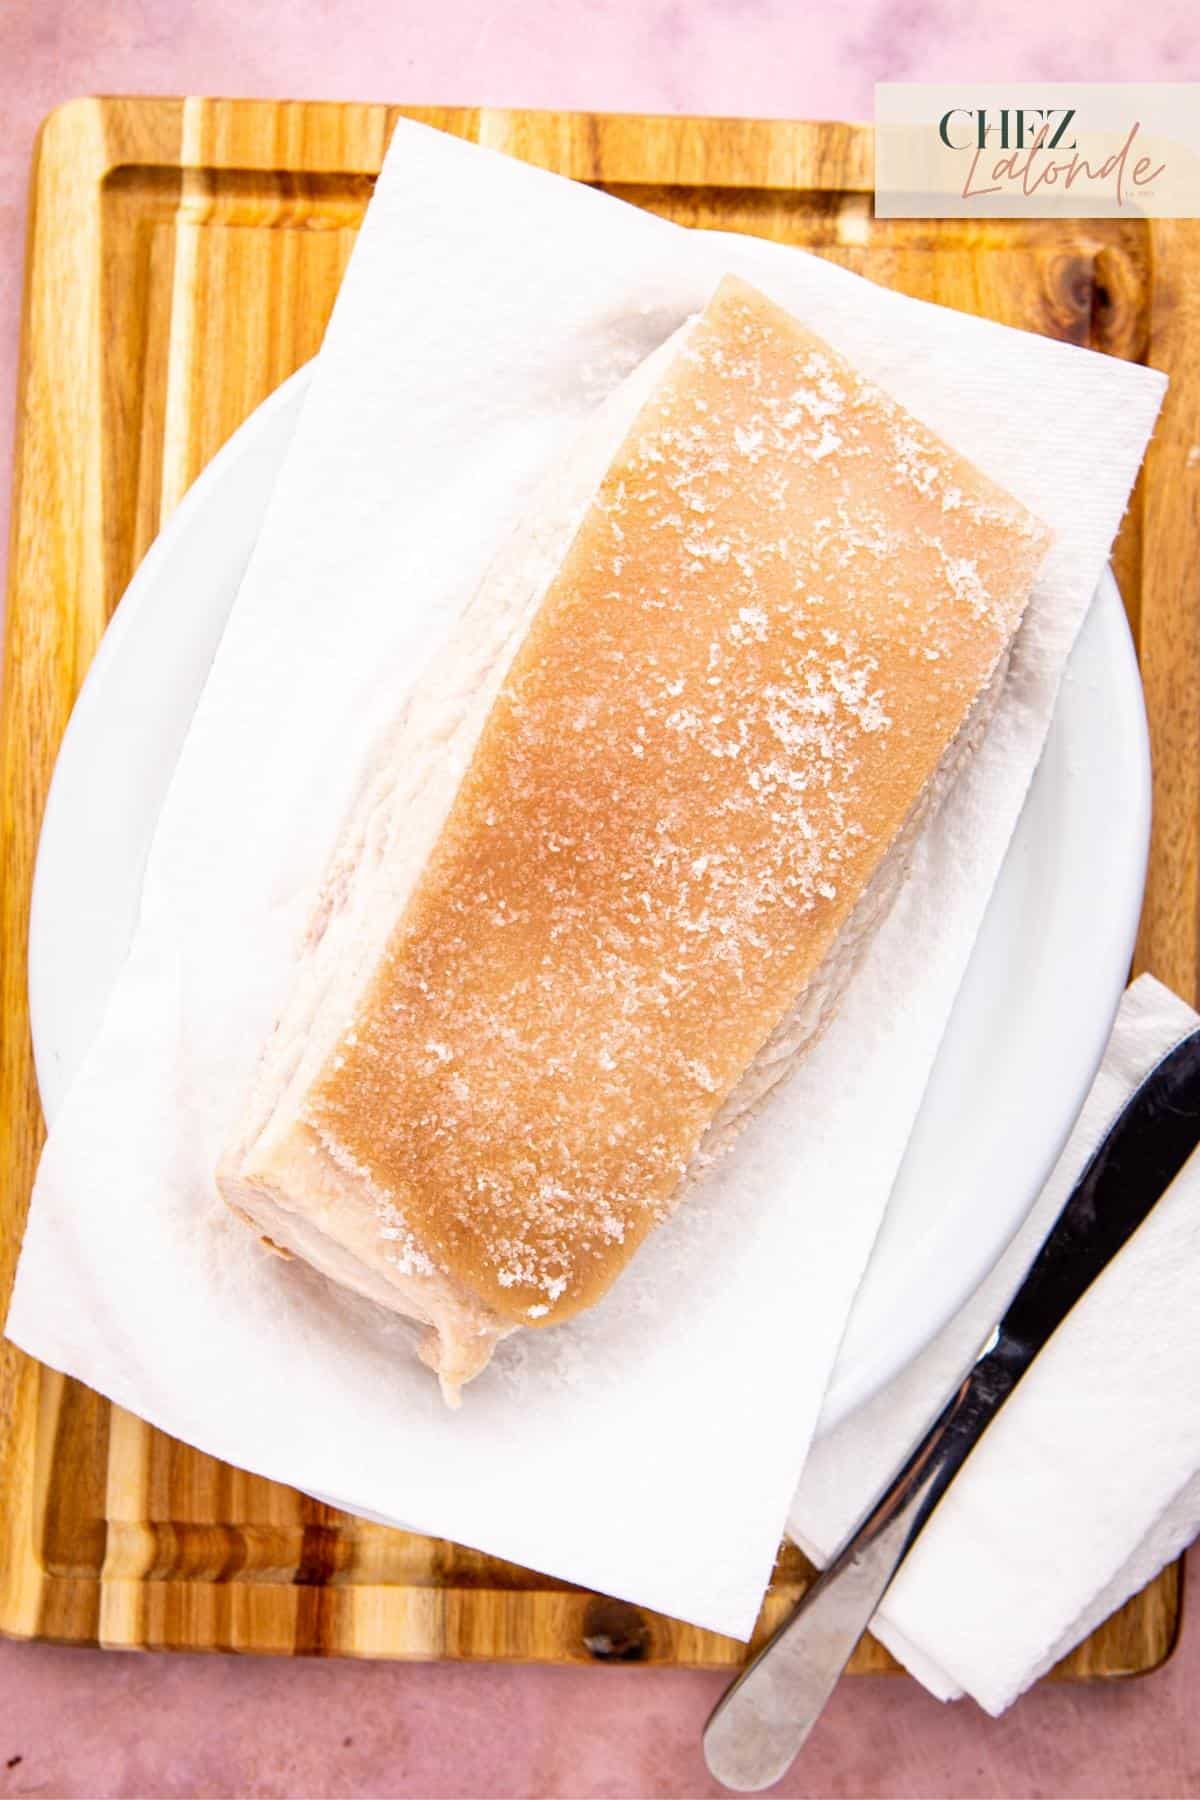
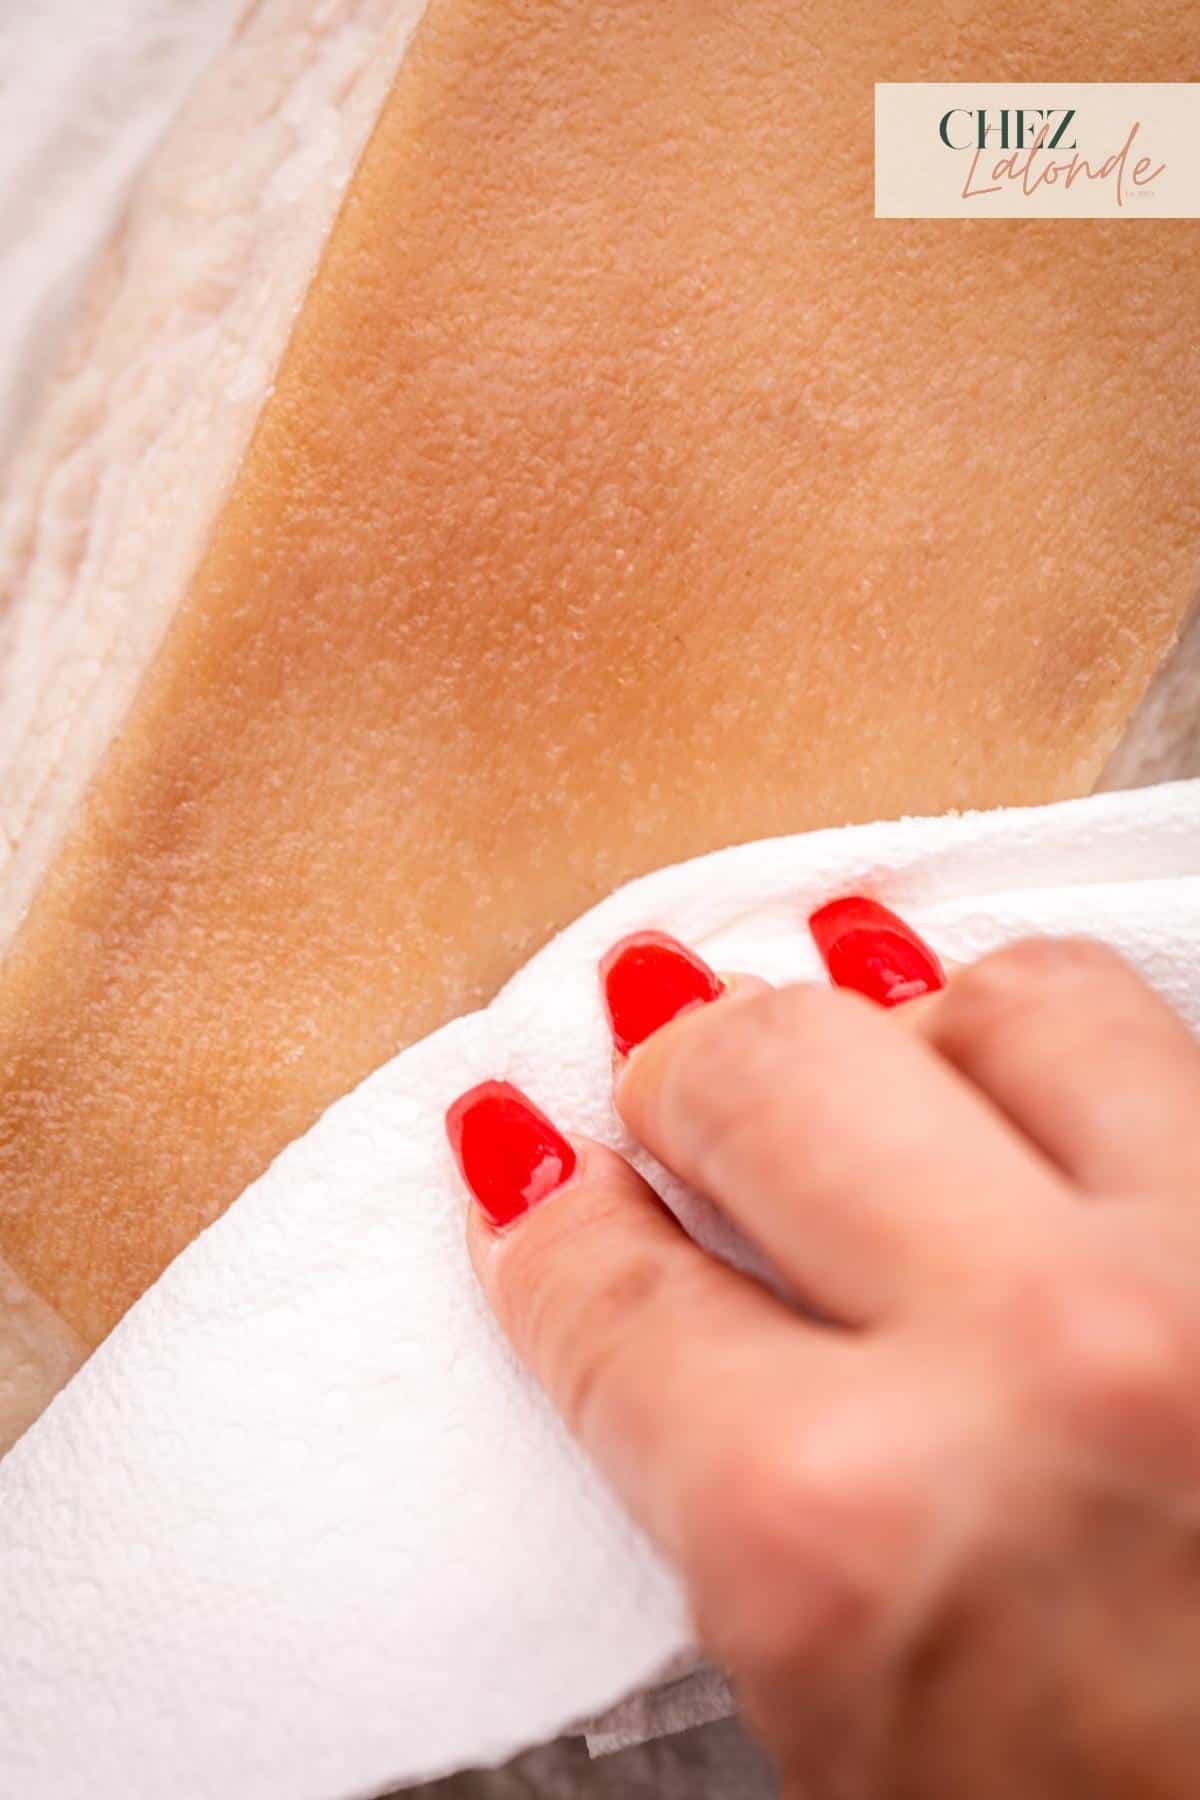
Step 4: Salt the skin:
After puncturing the skin side, gently rub half a tablespoon of sea salt onto the skin, ensuring even distribution. The sea salt aids in extracting moisture from the skin, resulting in a dry and crispy texture. Avoid rubbing salt on the meat side. Let the salt sit on the skin for 15 minutes, and the surface becomes moist. After 15 minutes, use a butter knife to scrape off the salt and a paper towel to absorb any excess moisture from the skin.

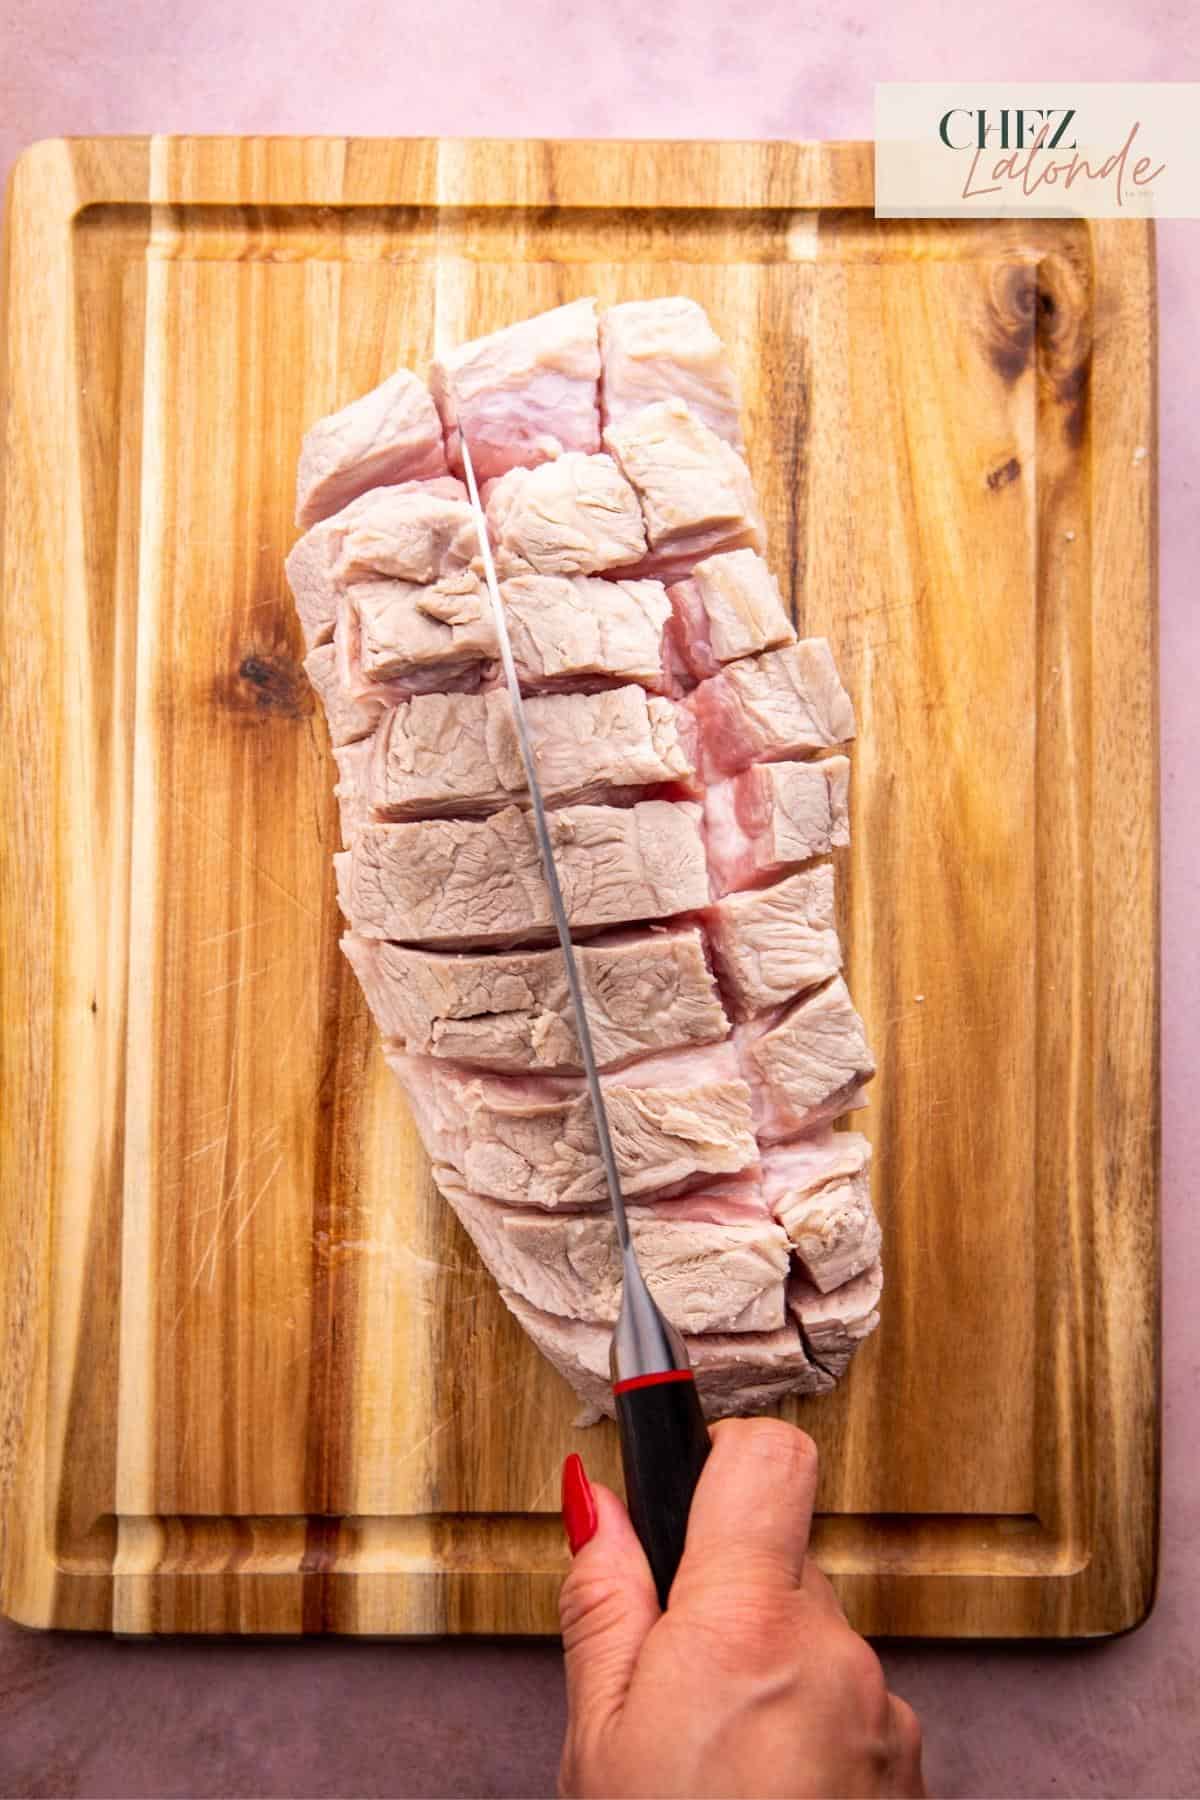
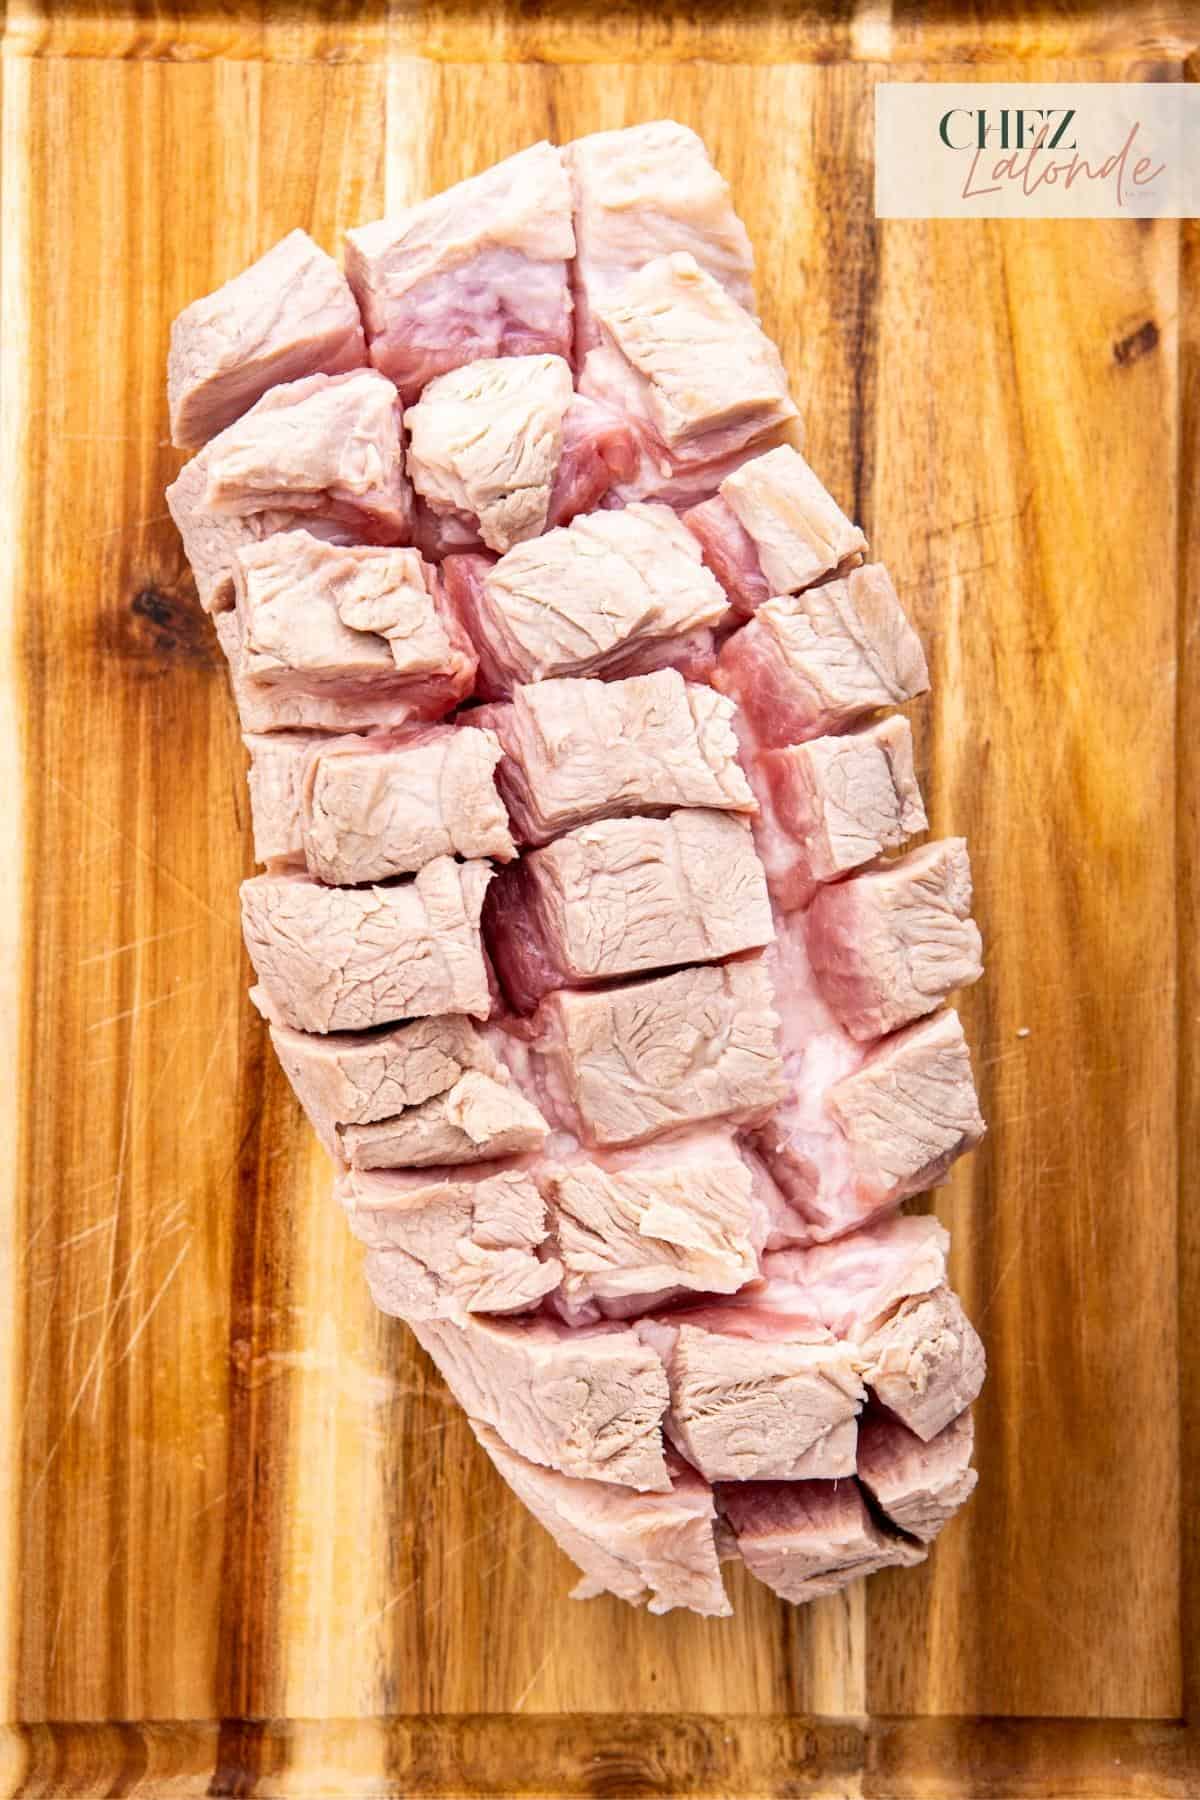
Step 5: Score the meat:
Once you have removed the salt from the skin side, flip the pork belly upside down and place it on the cutting board. Score the meat lengthwise, followed by perpendicular scoring to create a checkerboard pattern with approximately 1-inch by 1-inch squares.
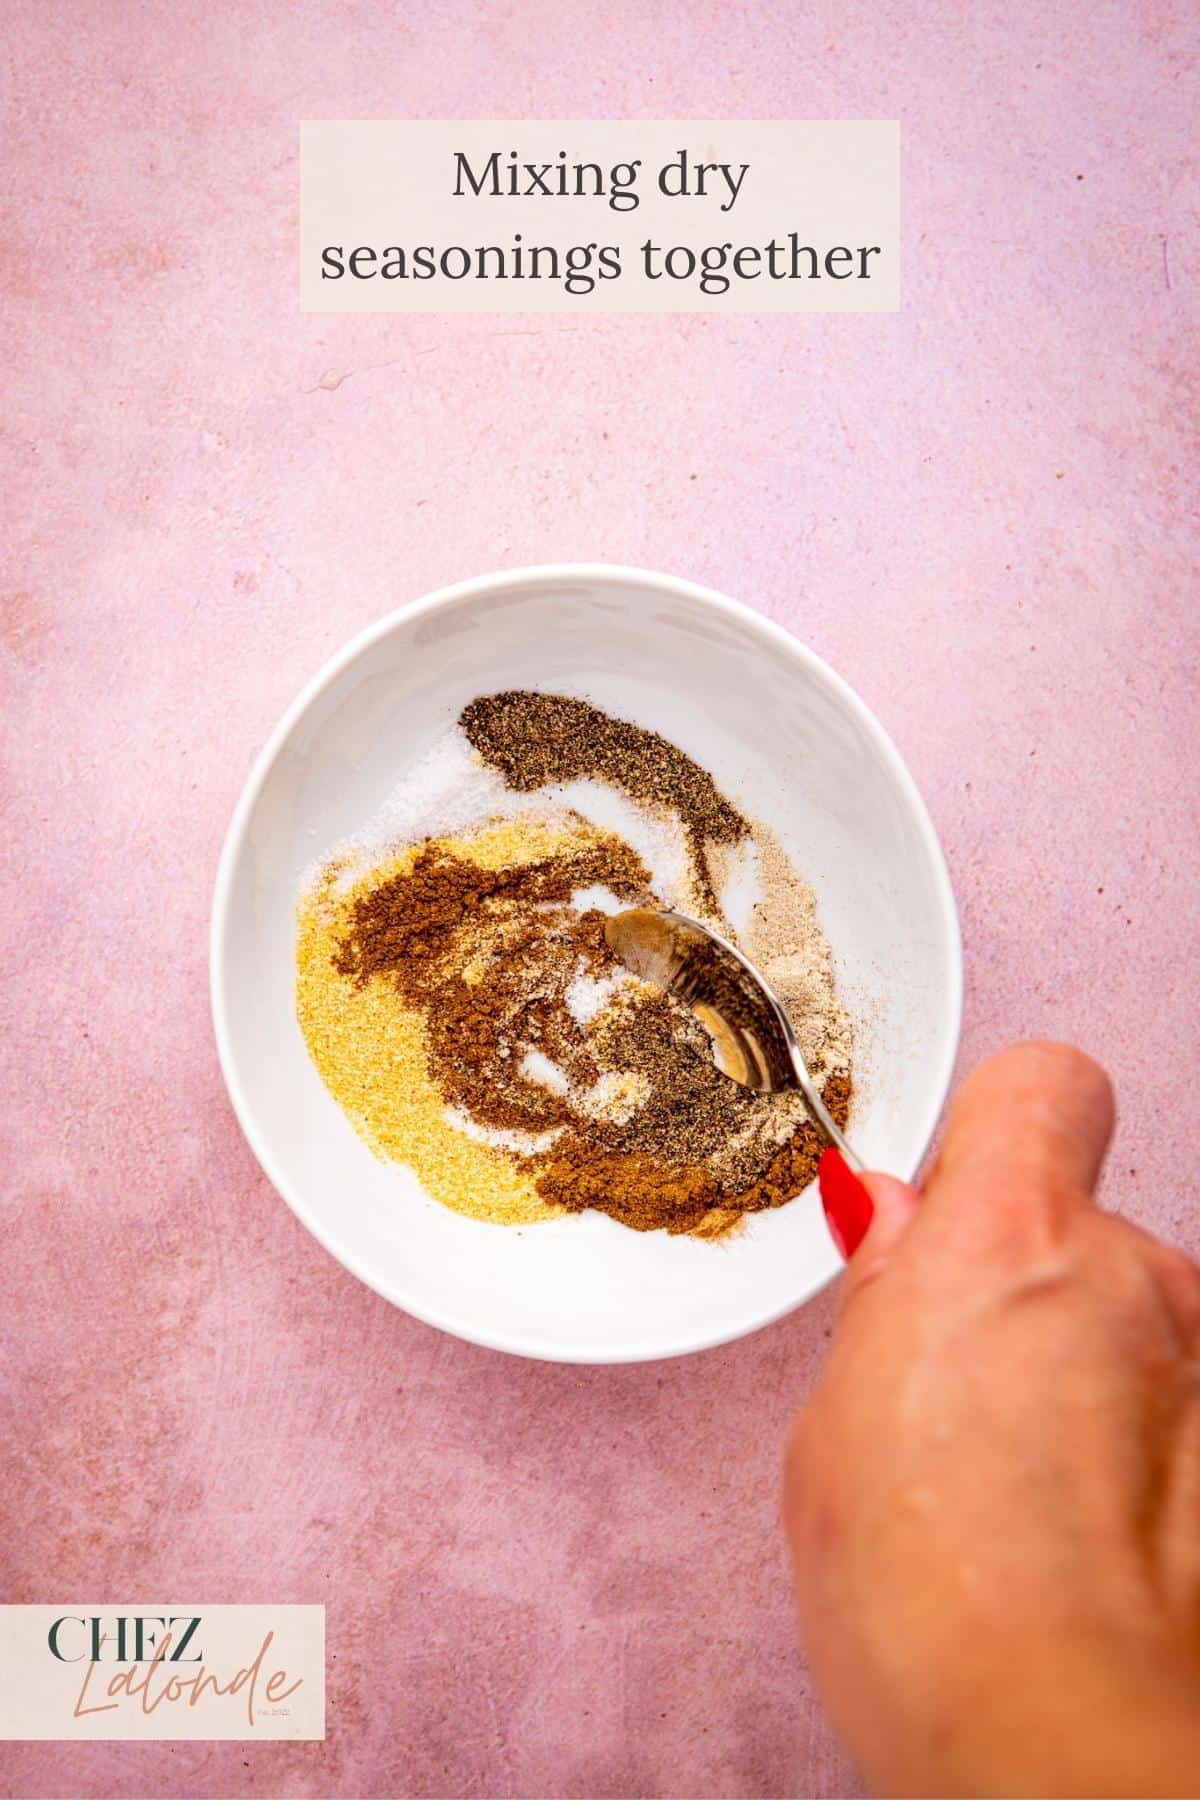
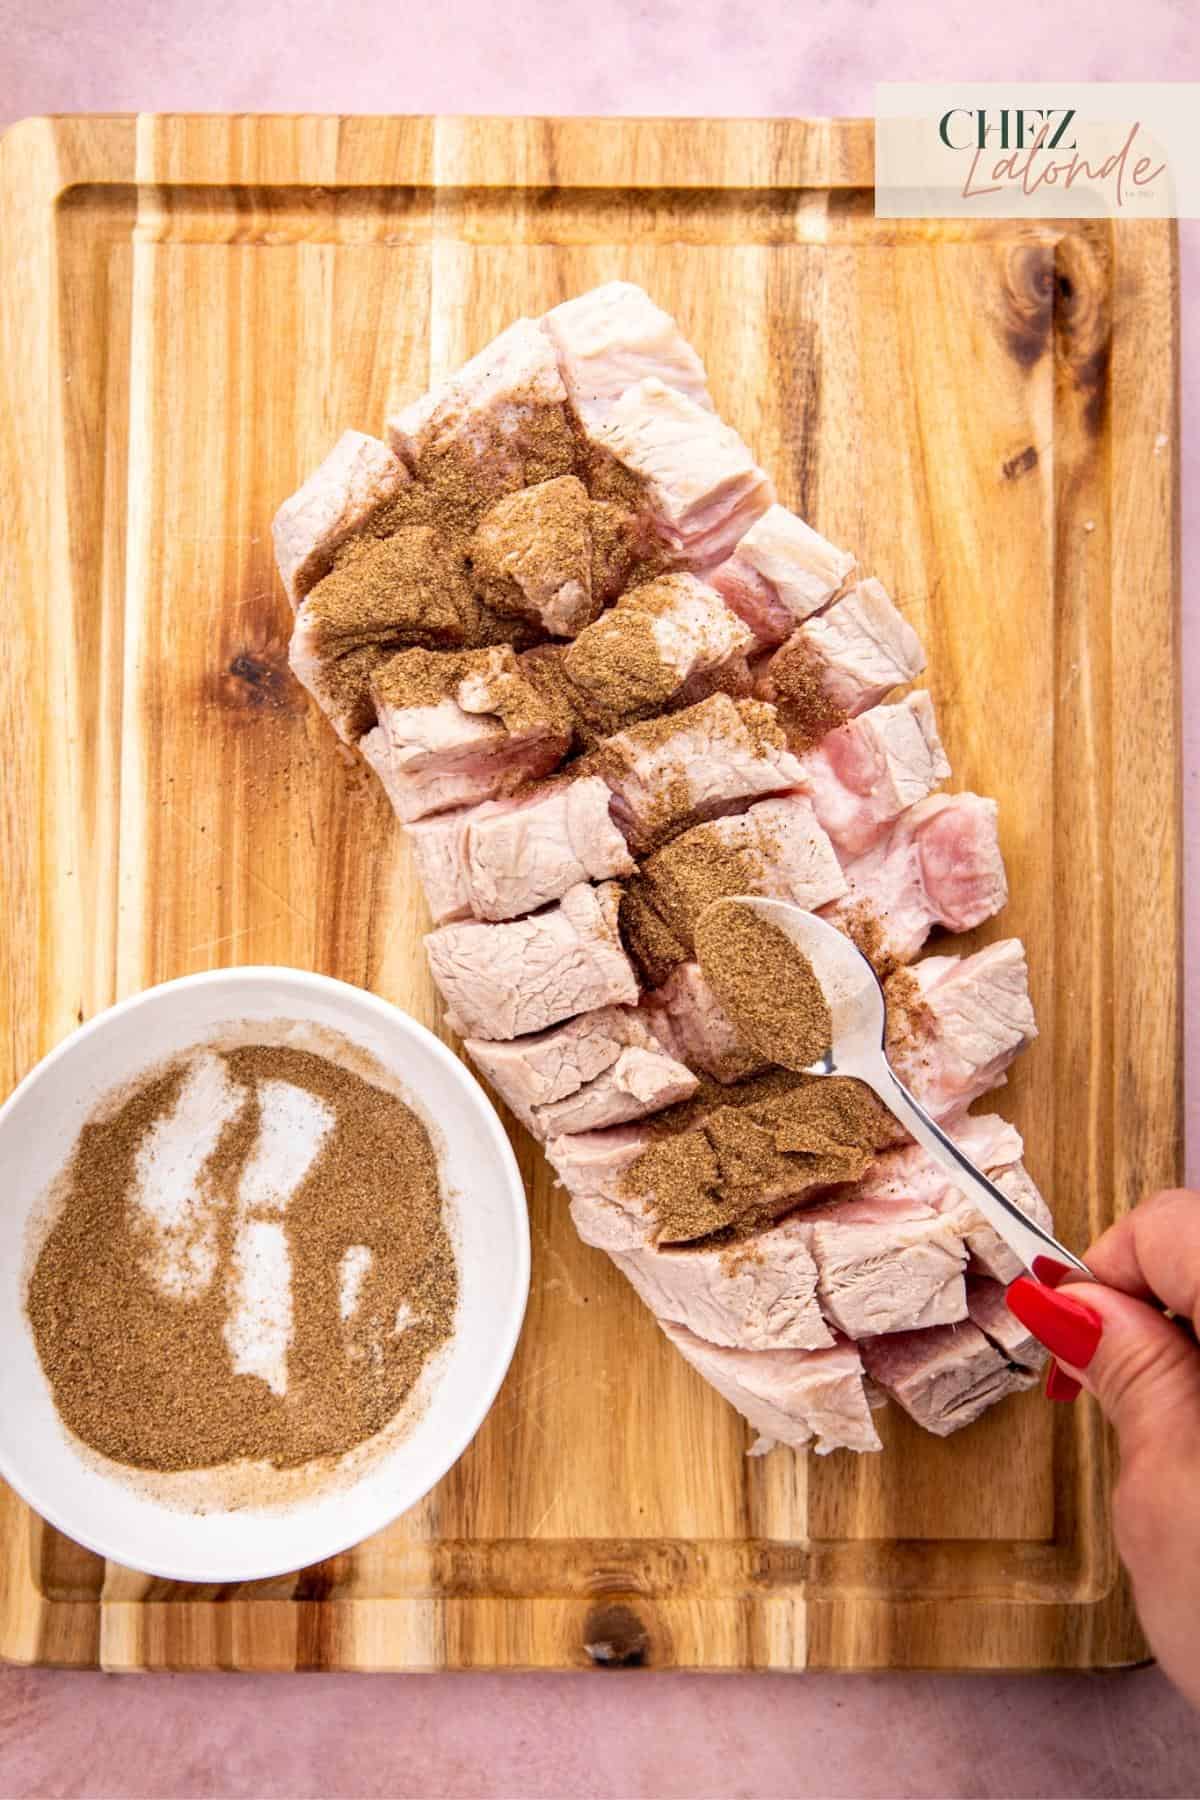
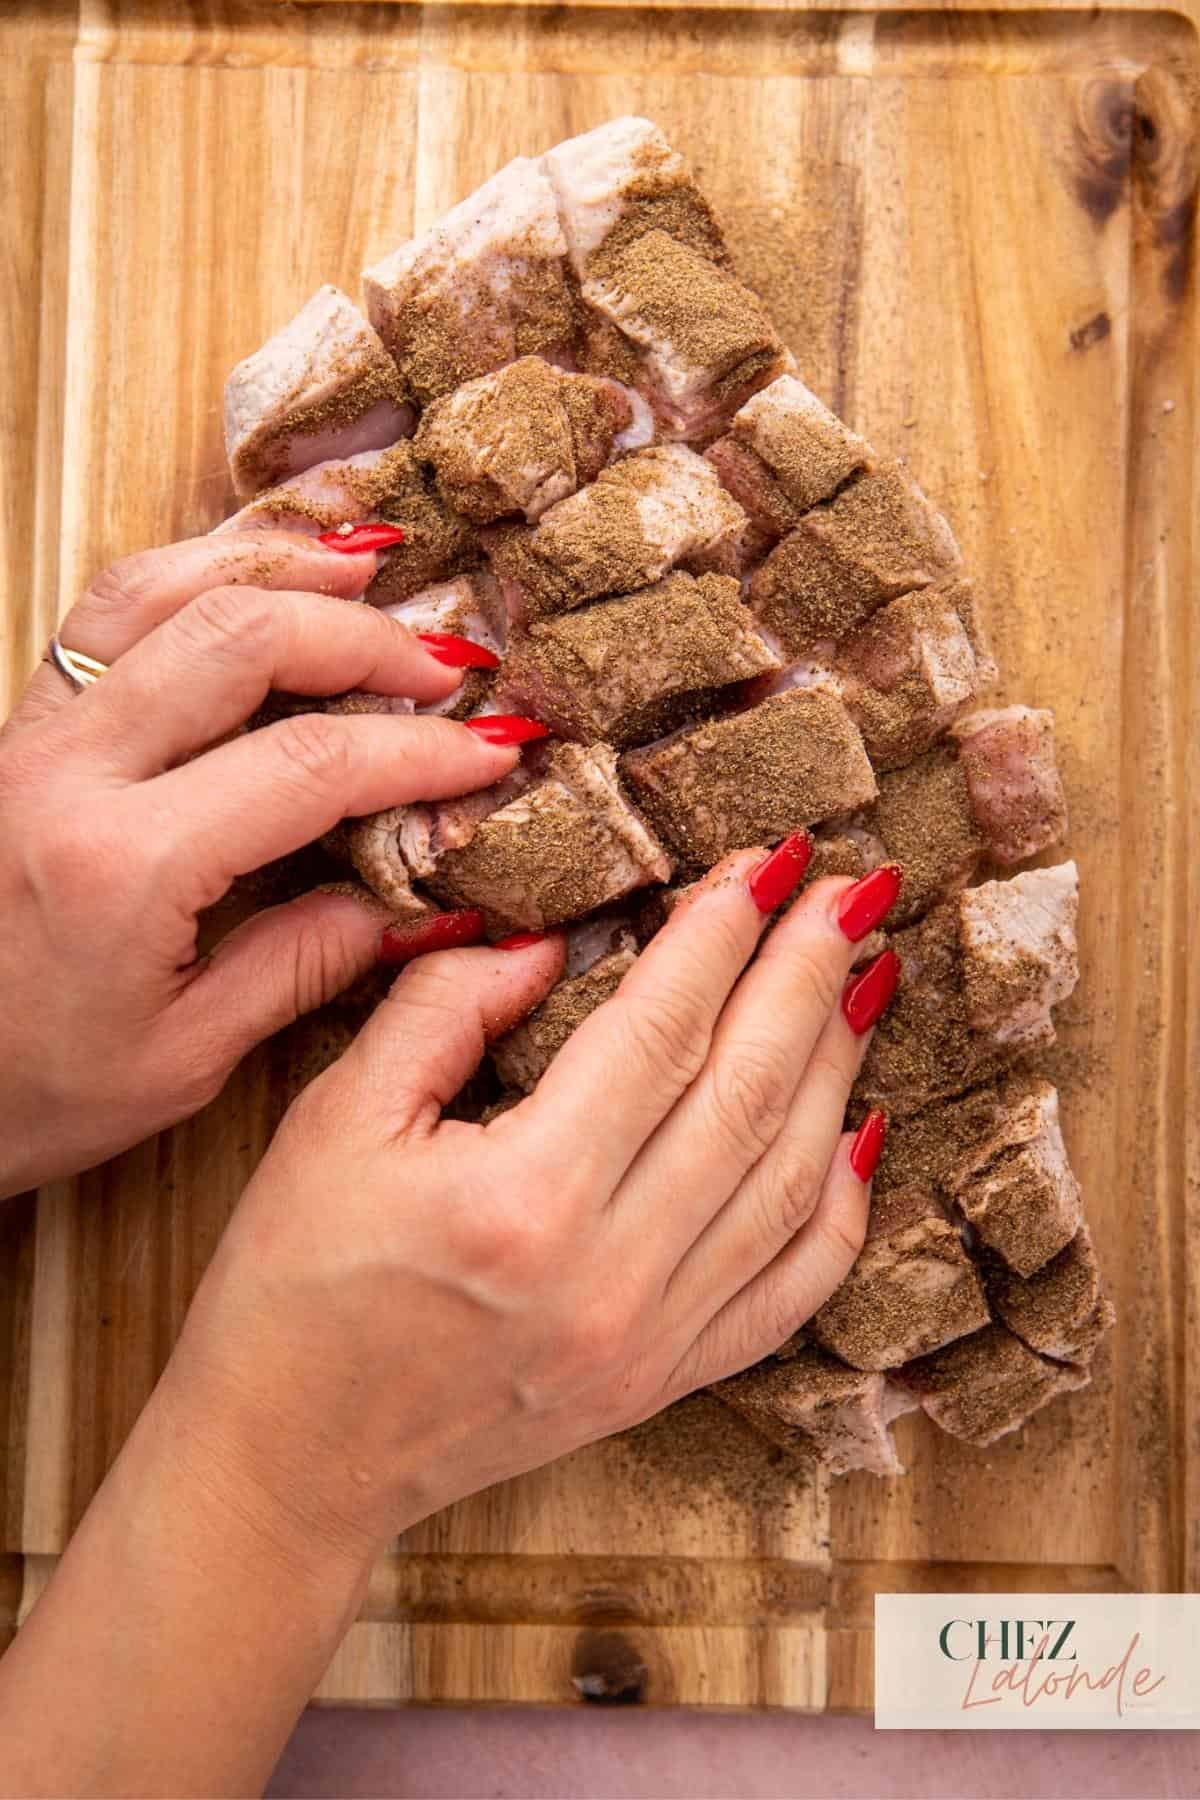
Step 6: Season the meat with dry seasonings:
In a small bowl, combine all the dry ingredients. Sprinkle the mixture onto the meat side of the pork belly, ensuring that it covers all areas, including the nooks and gaps. Use your hands to rub the seasonings to ensure even distribution.
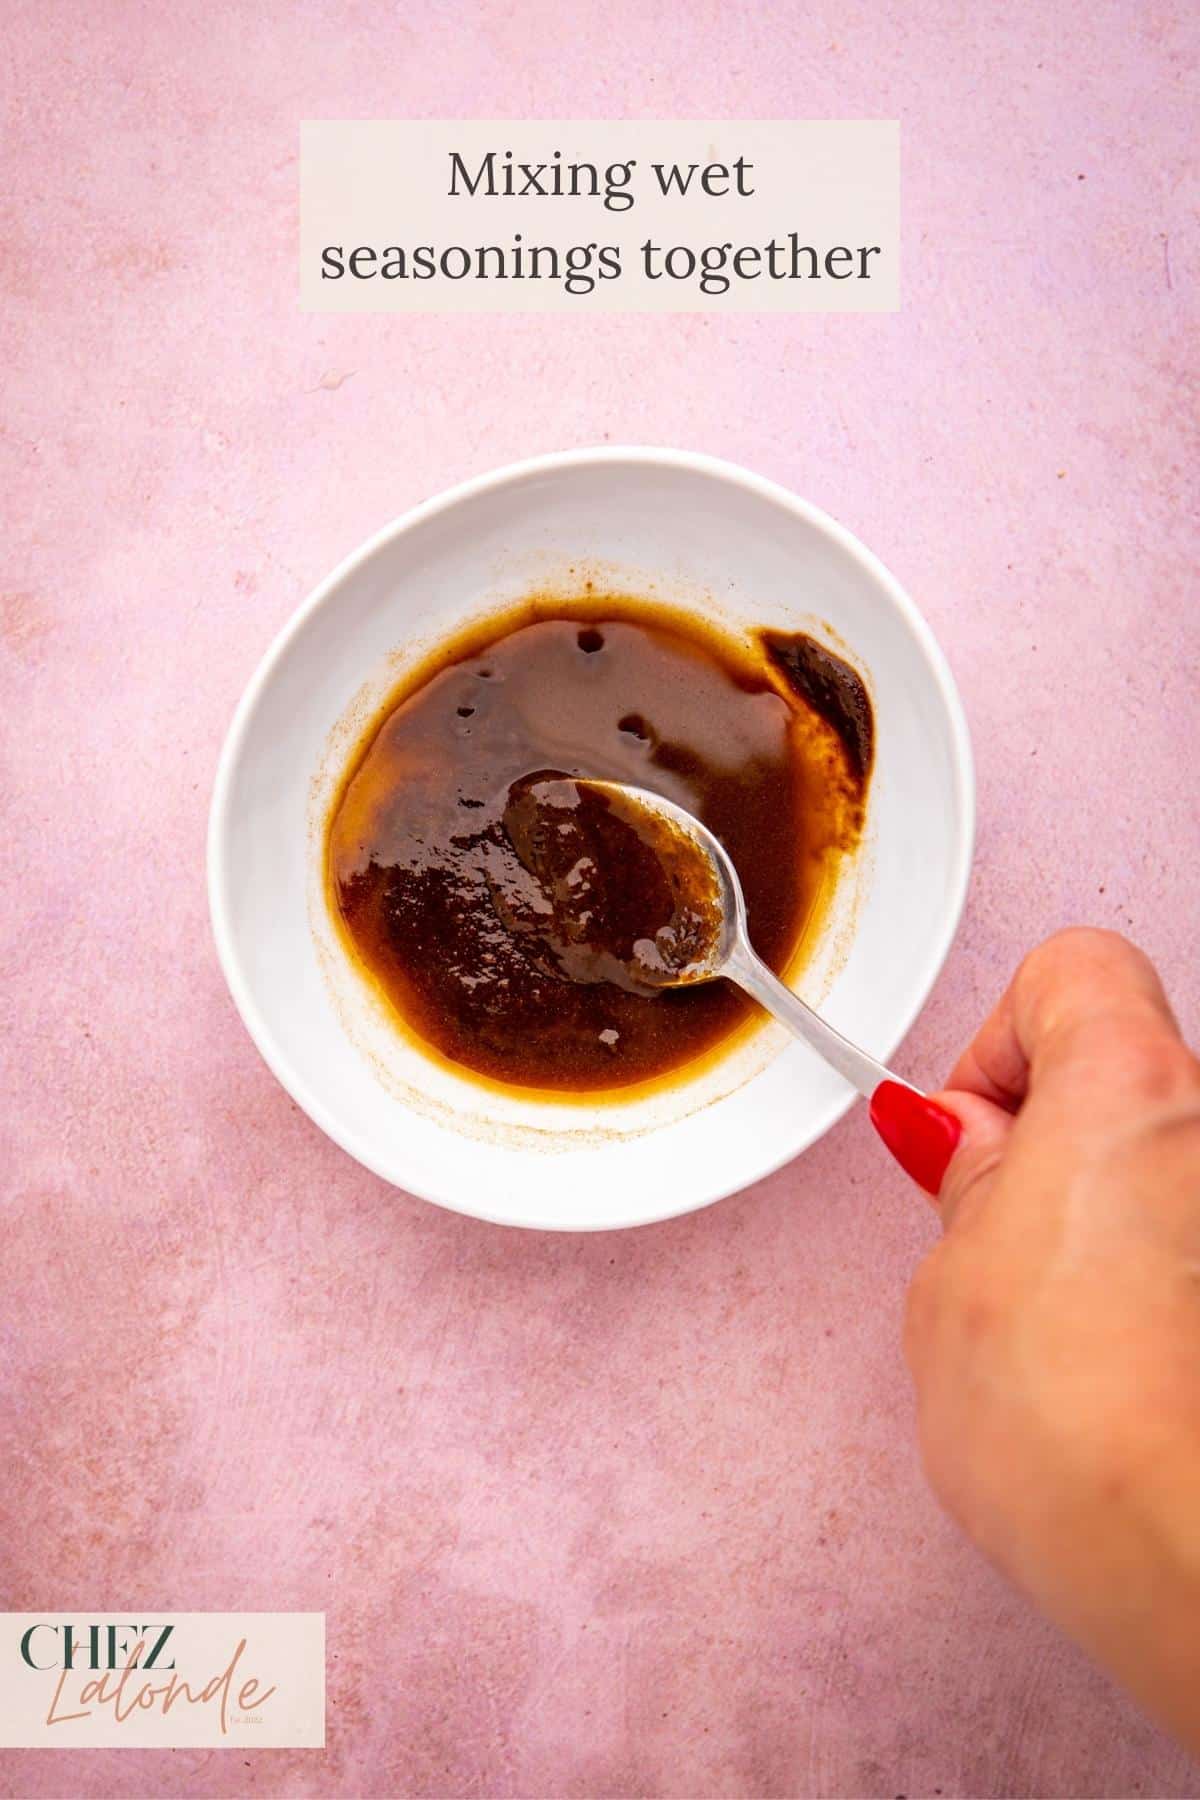
Step 7: Brush wet seasoning on the meat:
Mix the sugar, Shaoxing wine, and ground bean paste in a separate small bowl until the paste forms. Using a silicone brush, apply the seasoning paste onto the meat side of the pork belly, ensuring it covers all areas, including the nooks and gaps in the meat. Be thorough in coating the meat with the seasoning paste for optimal flavor.


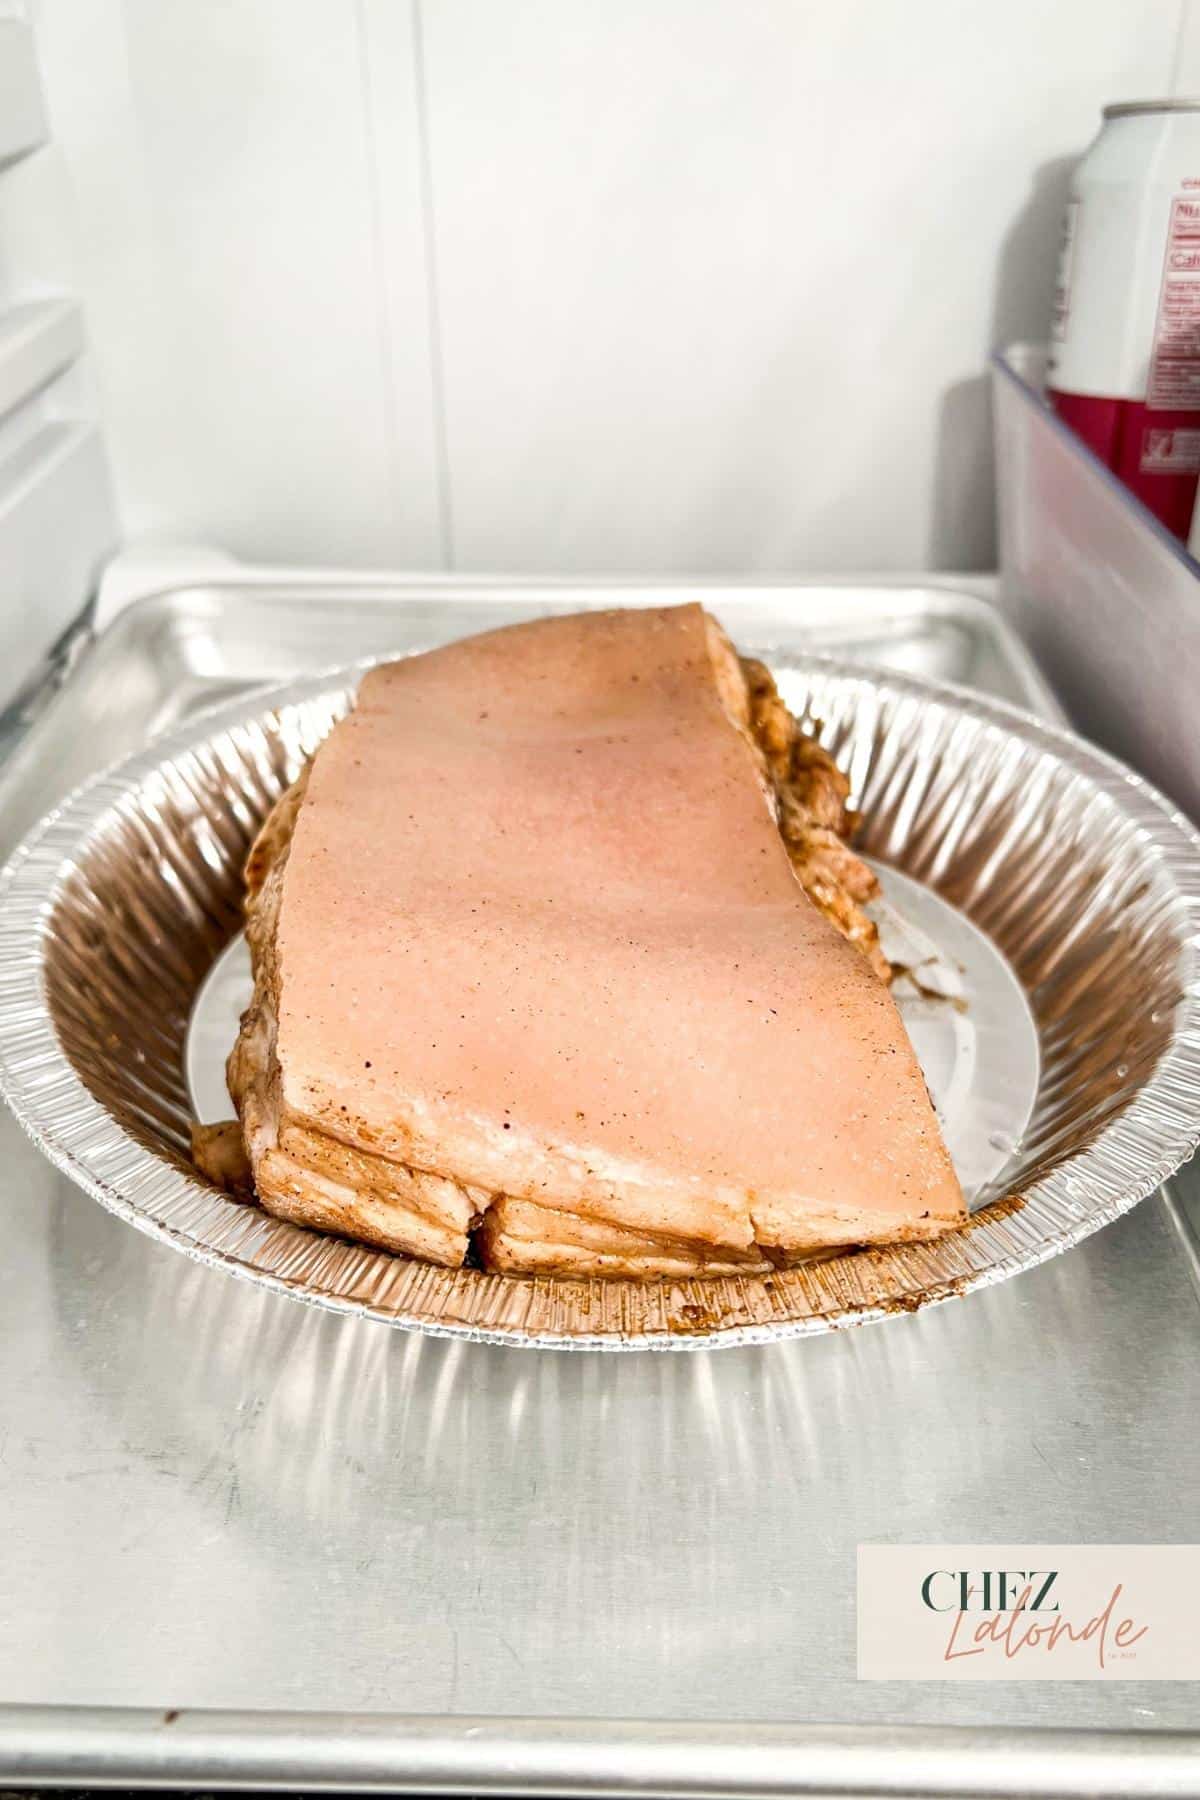
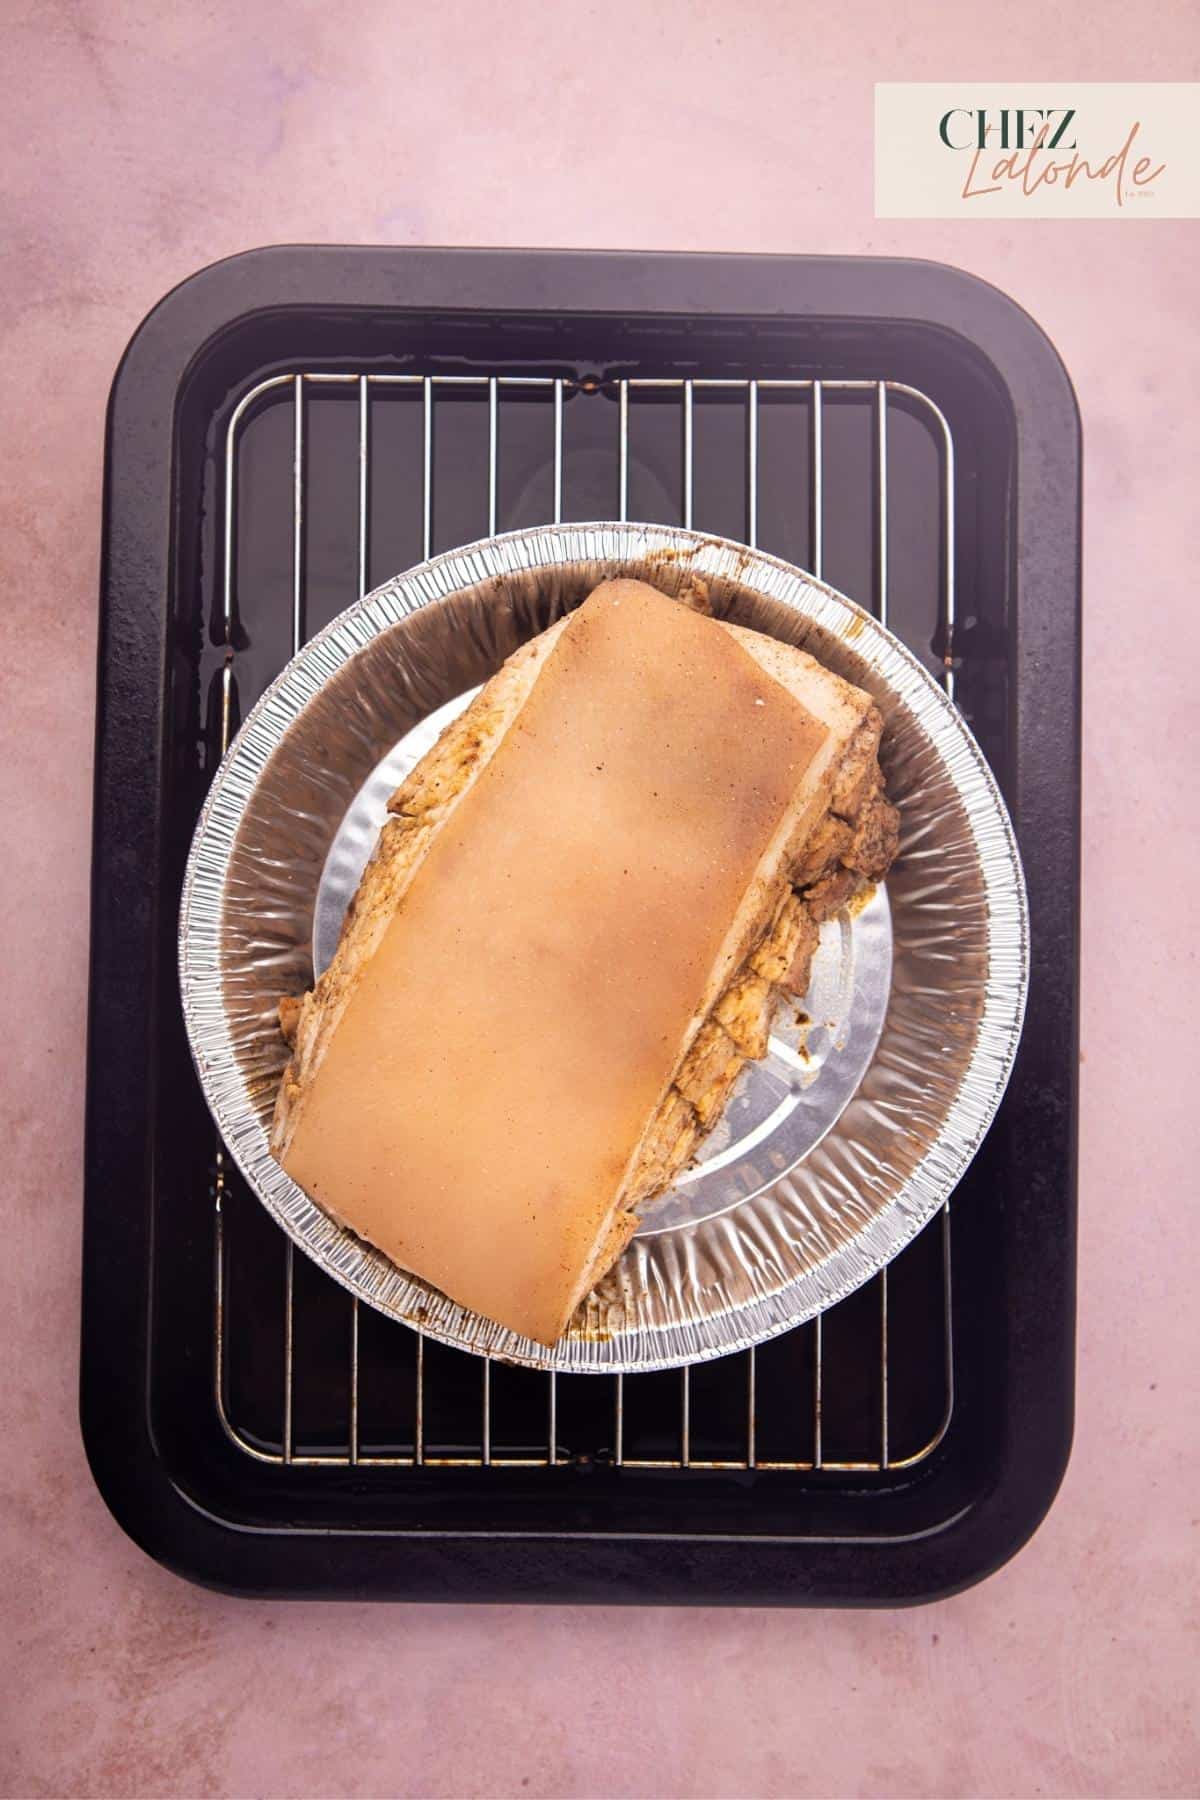
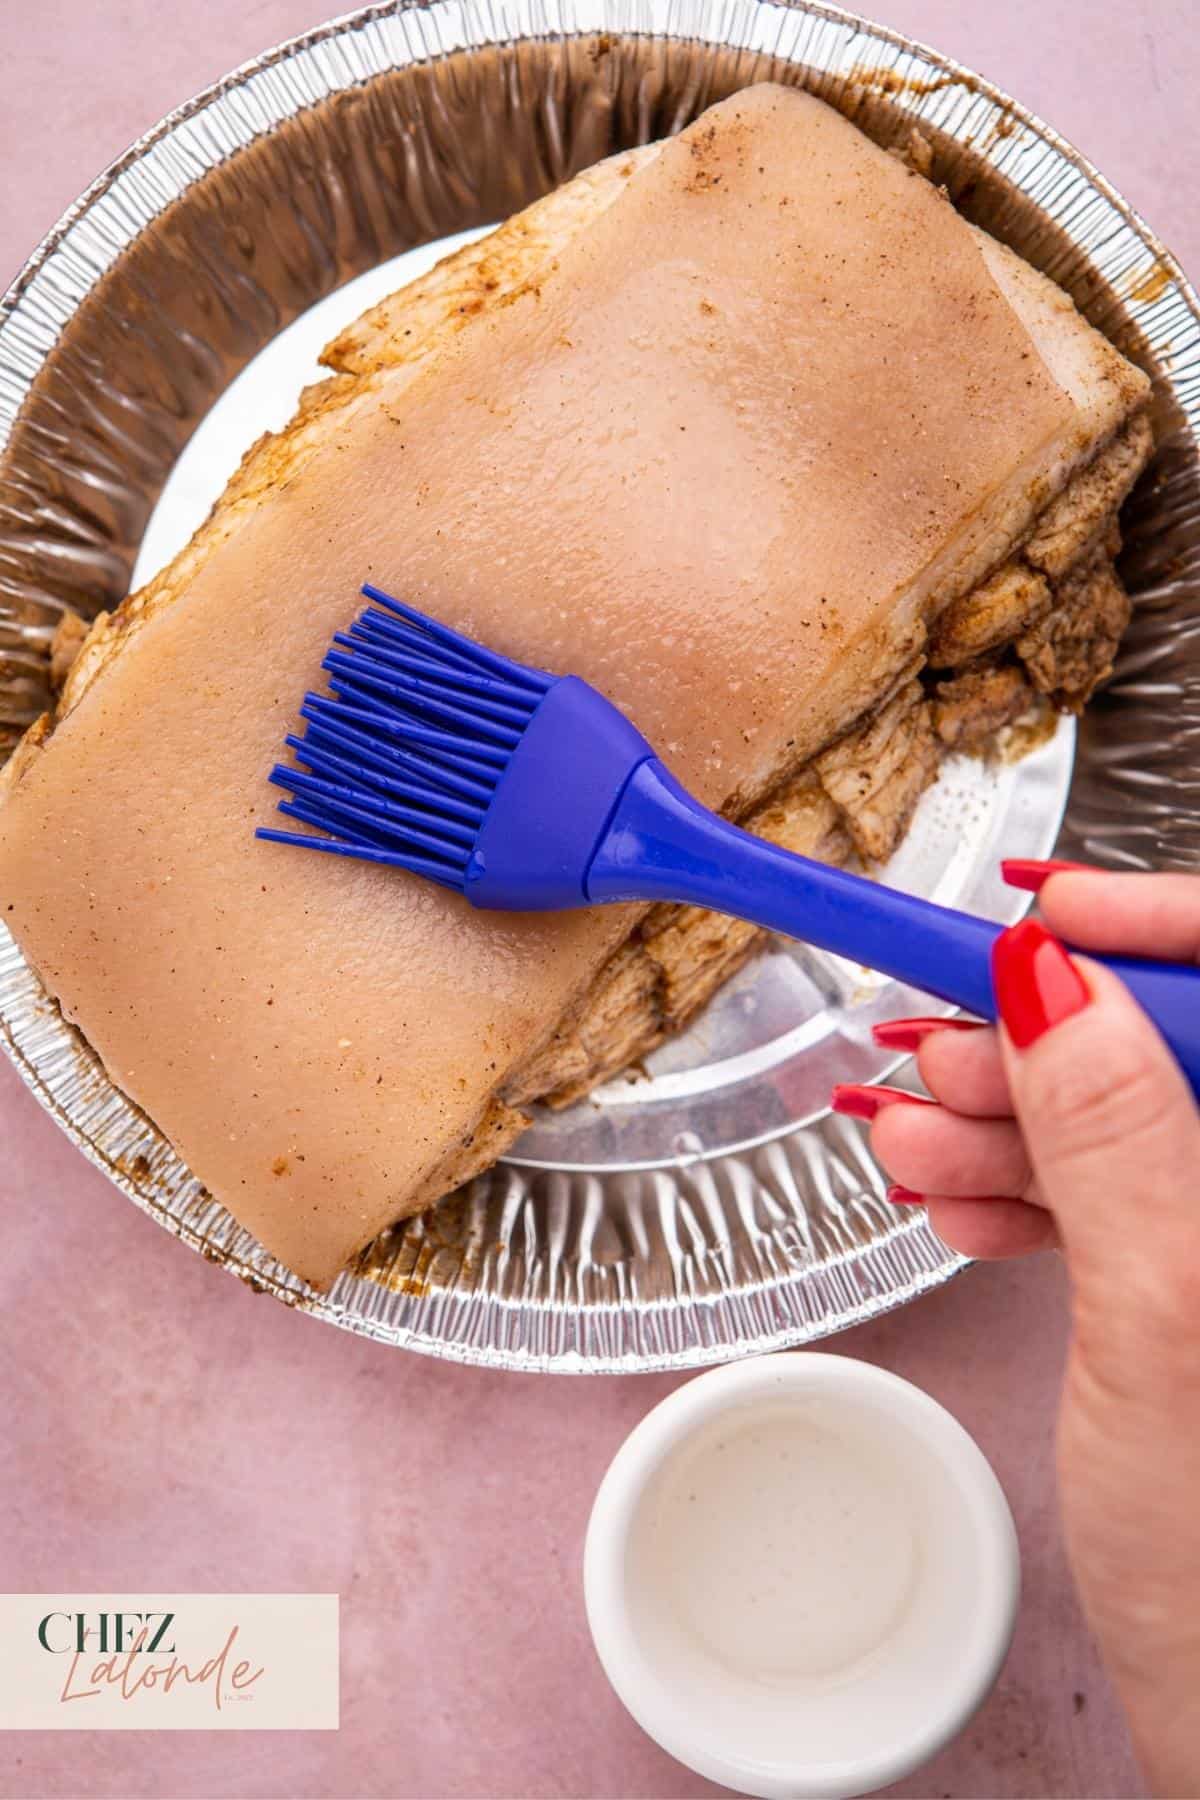
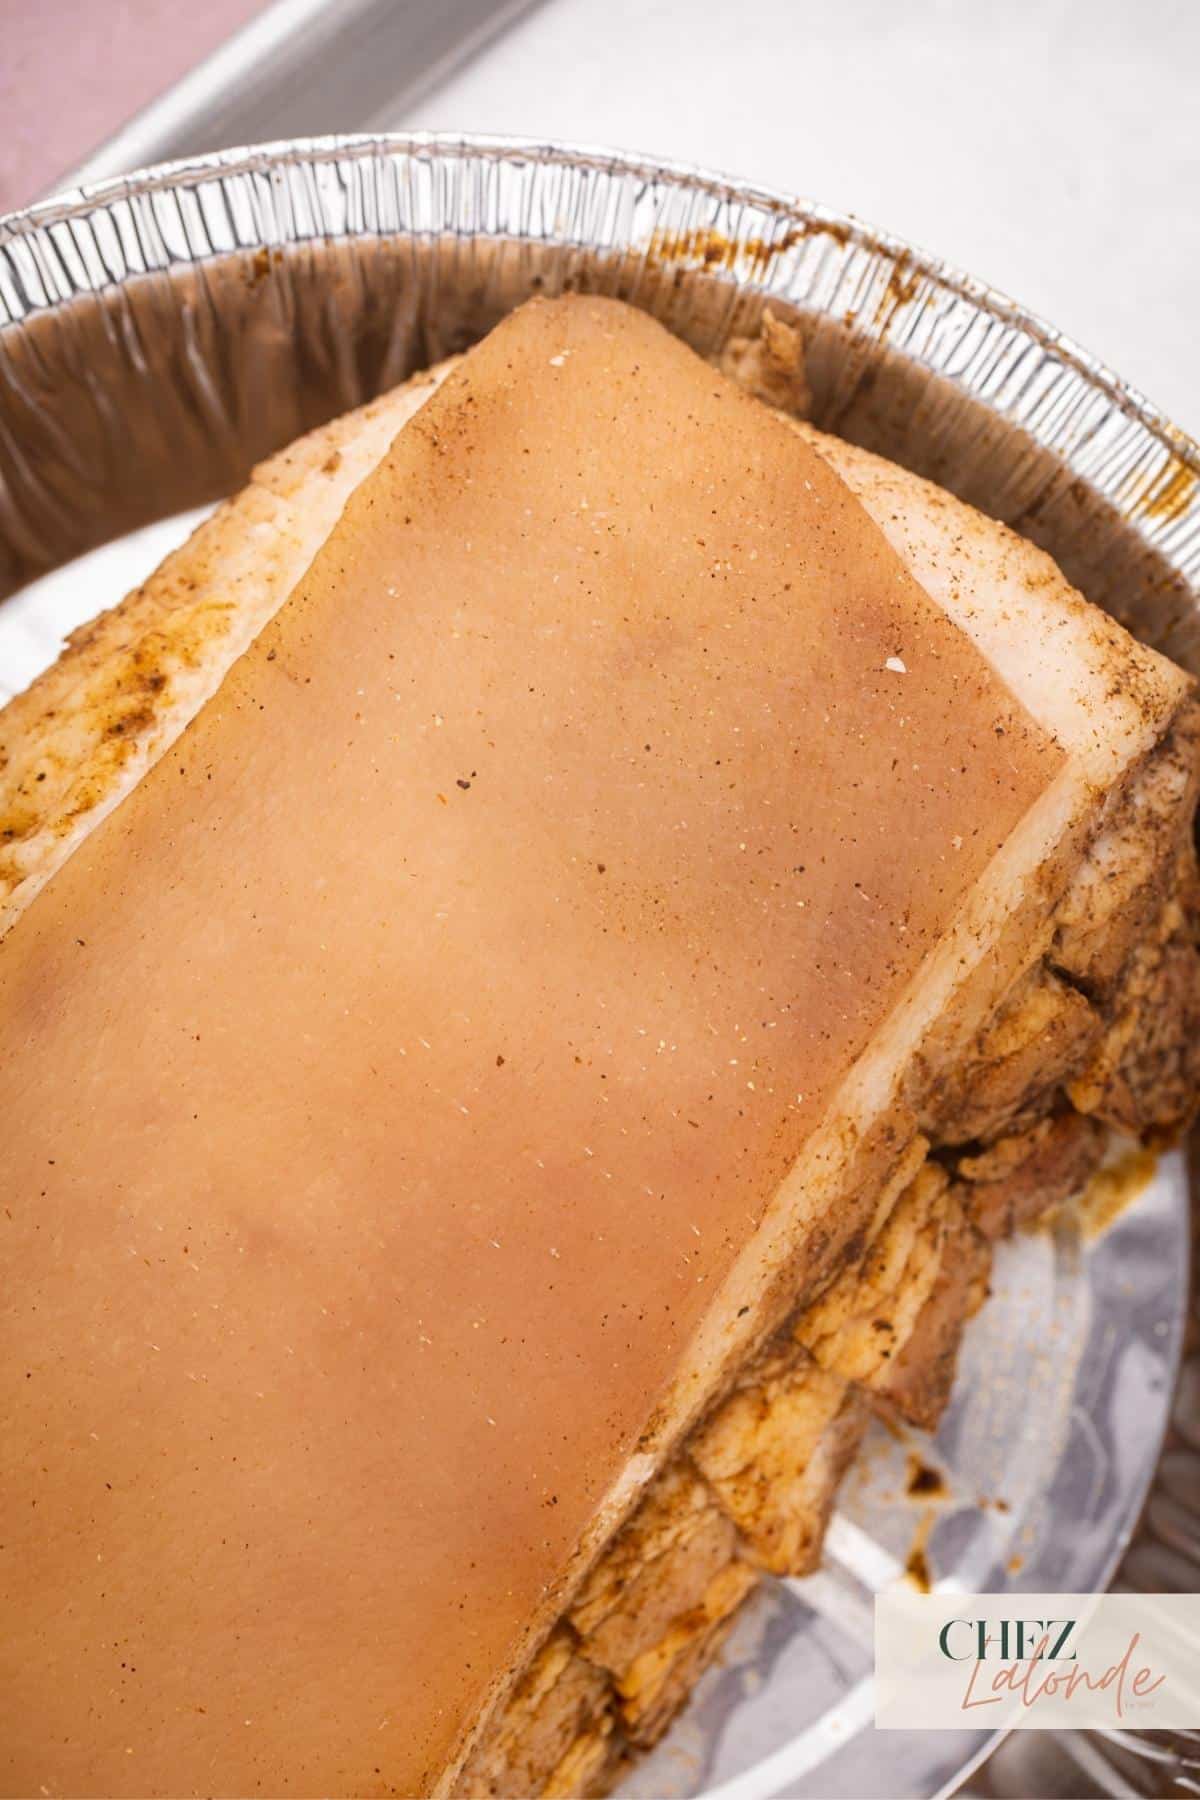
Step 8: Add vinegar to the skin:
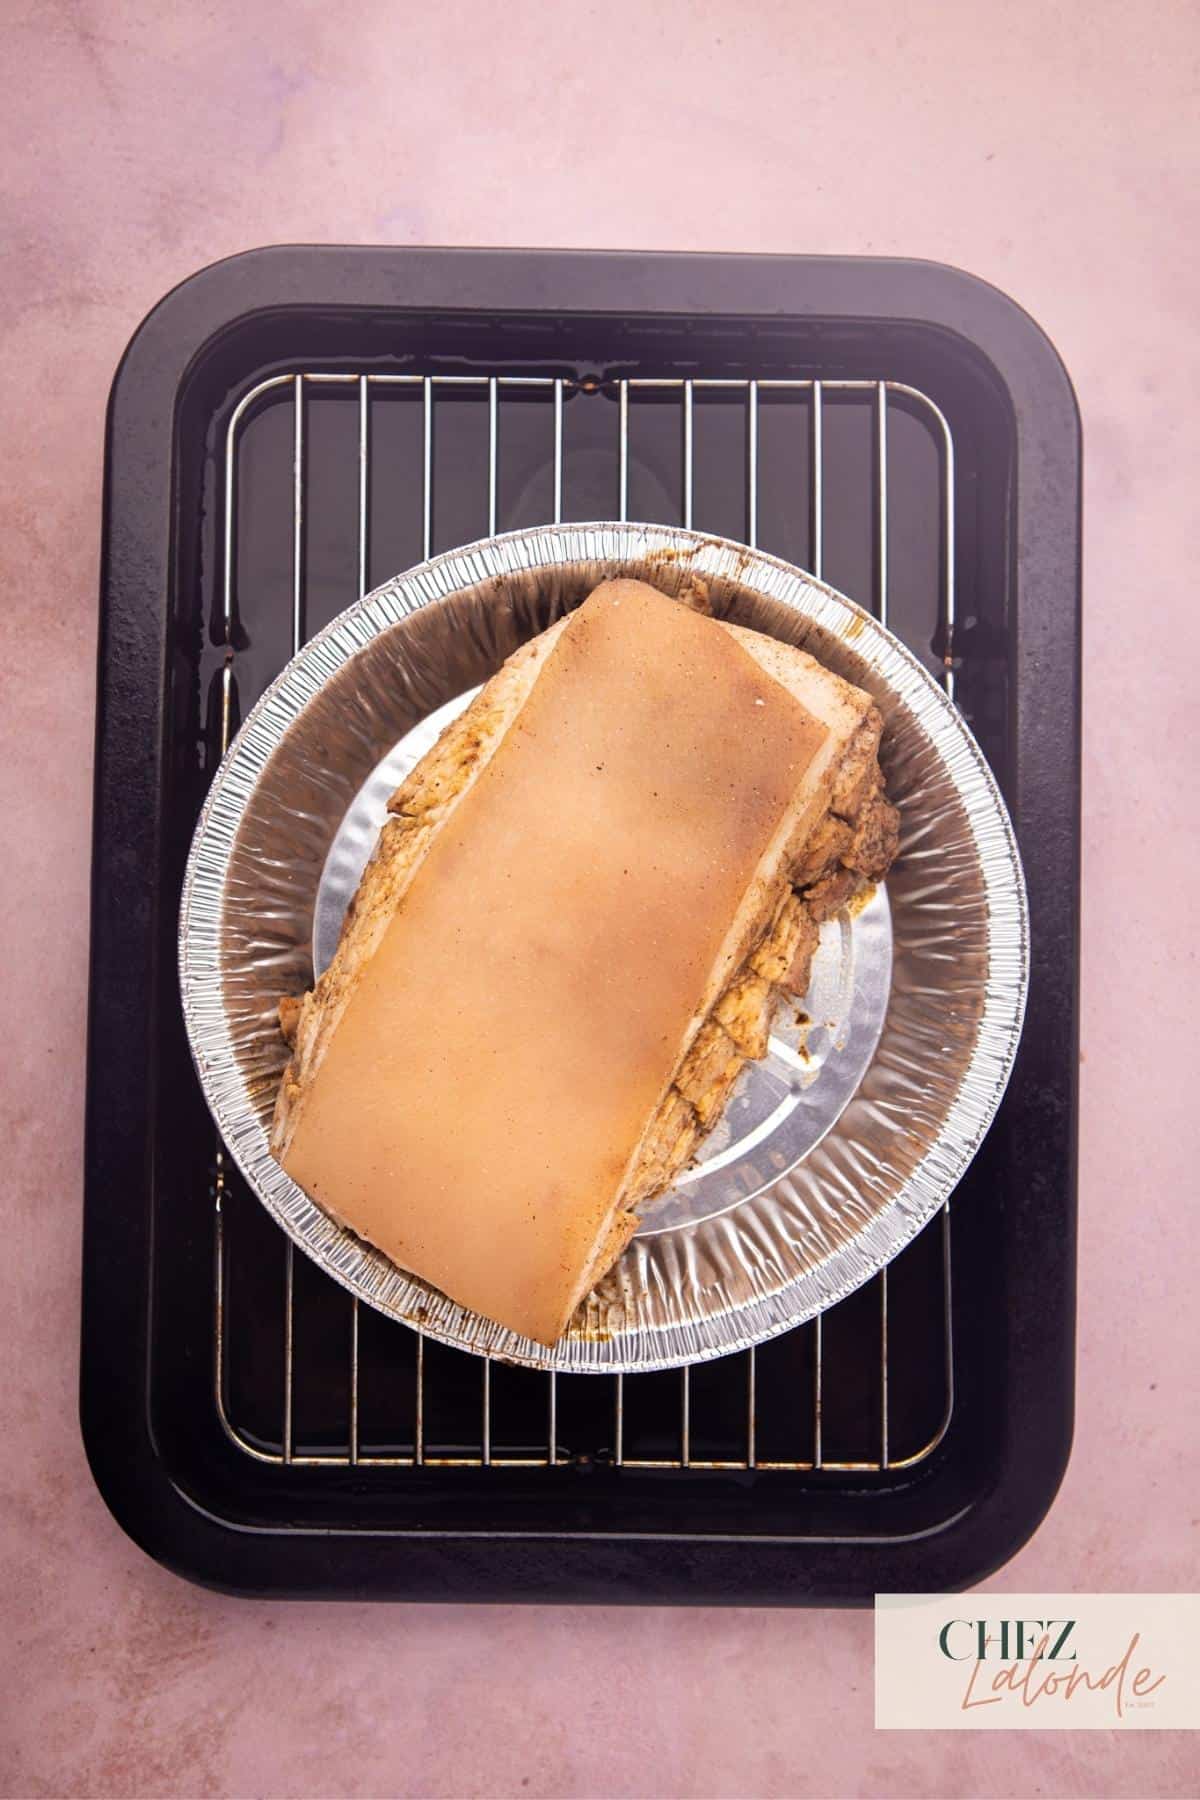
To conclude Day One, transfer the seasoned pork belly to an aluminum baking tray. Apply a teaspoon of Chinese white vinegar onto the skin using a silicone brush or your fingers. Place the pork belly and the baking tray in the refrigerator overnight, leaving it uncovered. This allows the cool air to draw out moisture from the skin further.
Day 2
Step 9: Cook the pork belly:
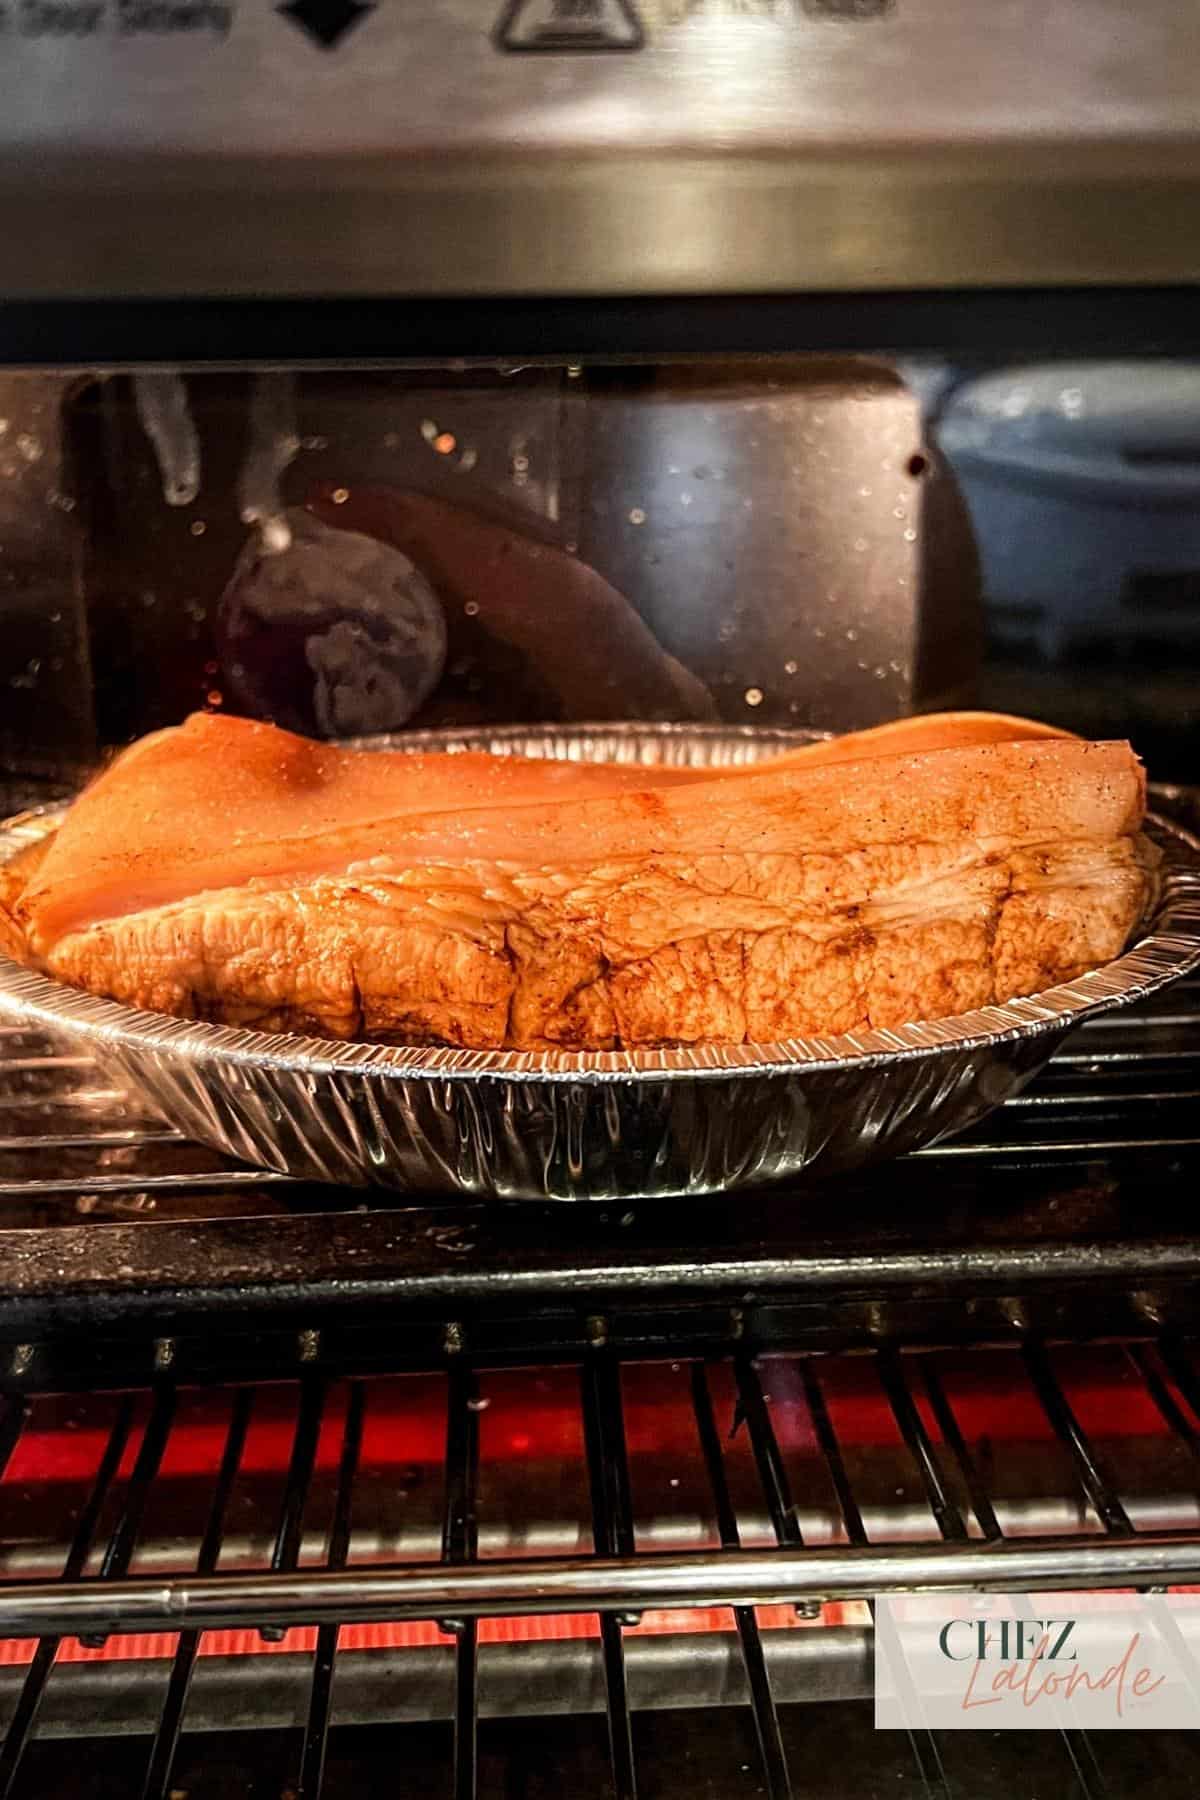
Take out the pork belly from the refrigerator and place it on the kitchen counter to bring it to a slight room temperature. At the same time, Preheat the oven to 400F/200C in the roast setting. Place a wire rack with one cup of water in the baking tray, then position the aluminum tray with pork belly skin-side up on the wire rack. Roast the belly in the water bath for 30 minutes at 400F/200C before transferring it to the air fryer to finish.
Step 10: Finish the pork belly in the air fryer:
Once the belly has cooked in the toaster oven for 30 minutes, transfer it and the aluminum tray to the air fryer. Set the air fryer to 400F/200C and cook the pork belly for 10 minutes. Then remove the aluminum tray and cook it for 10 more minutes or until the rind becomes crispy and crackles.
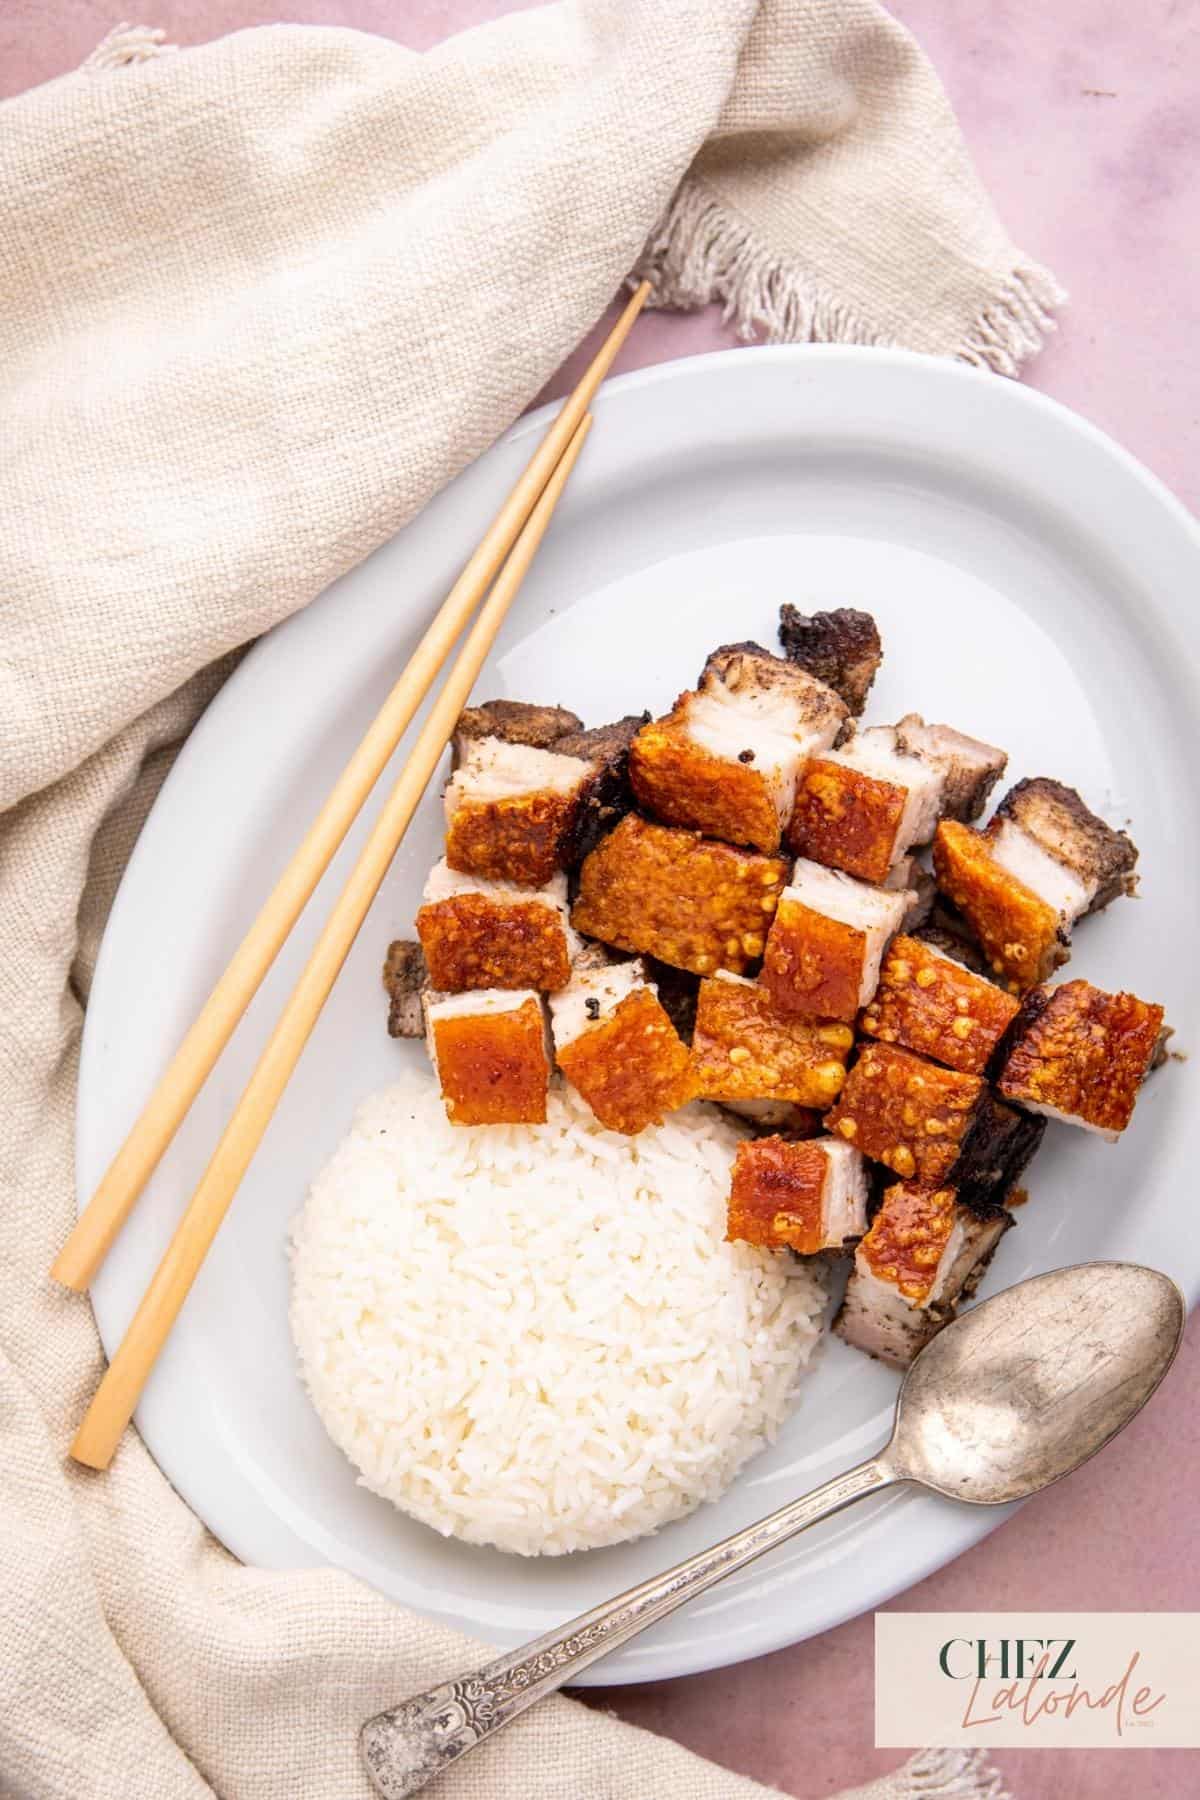
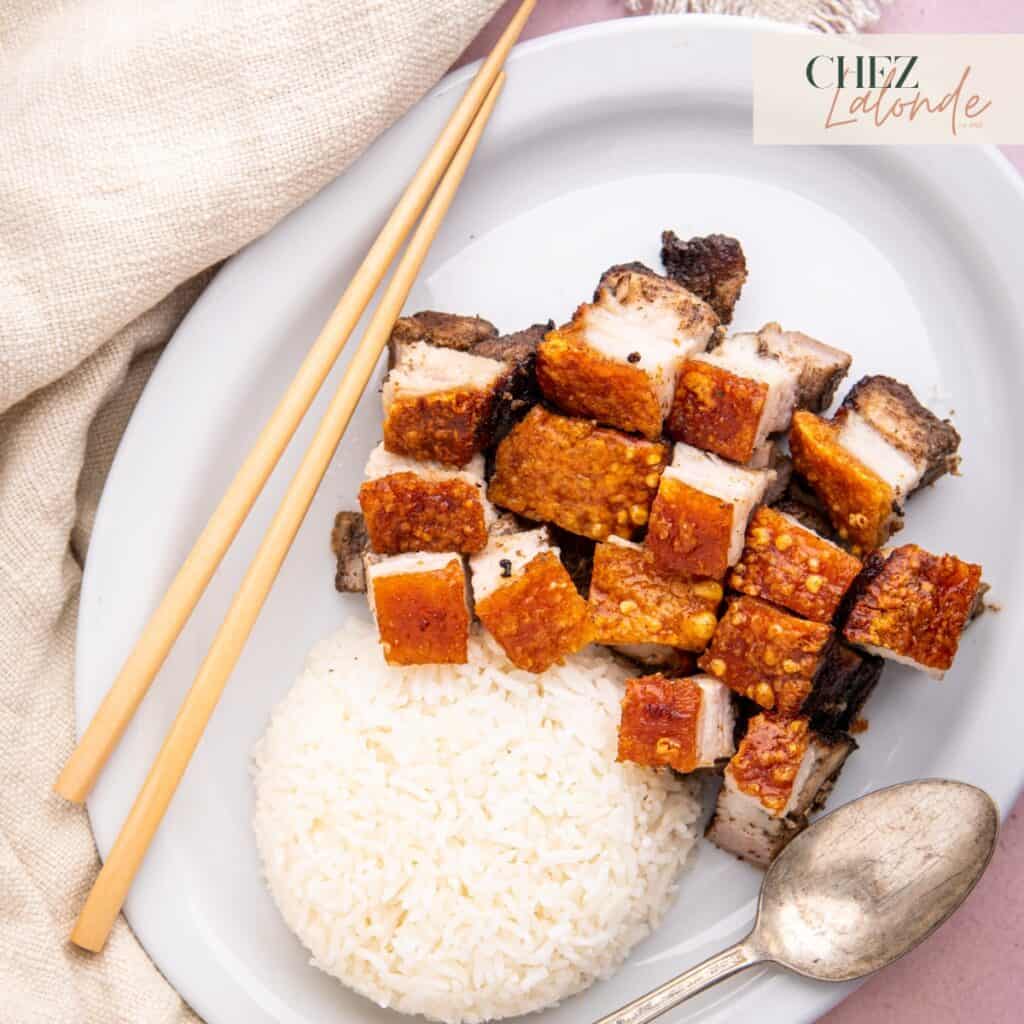
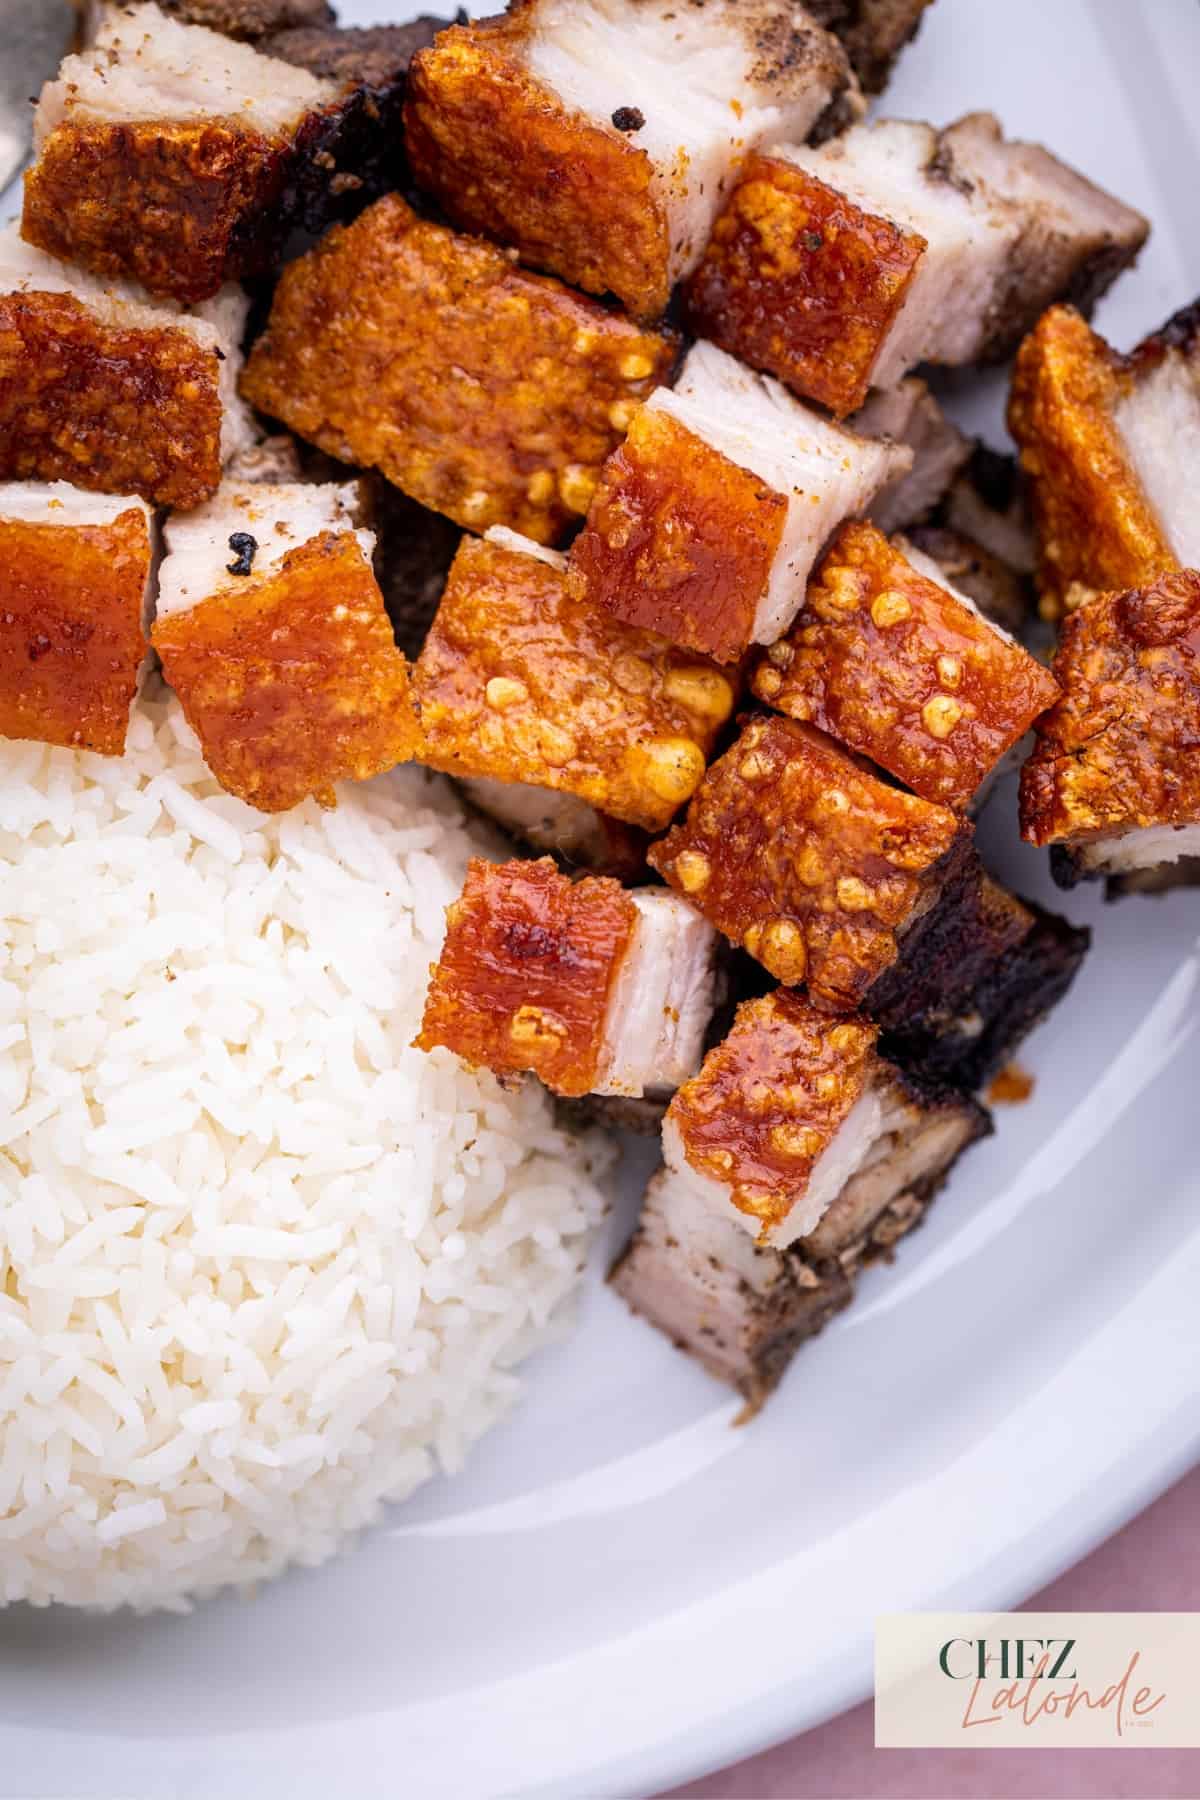
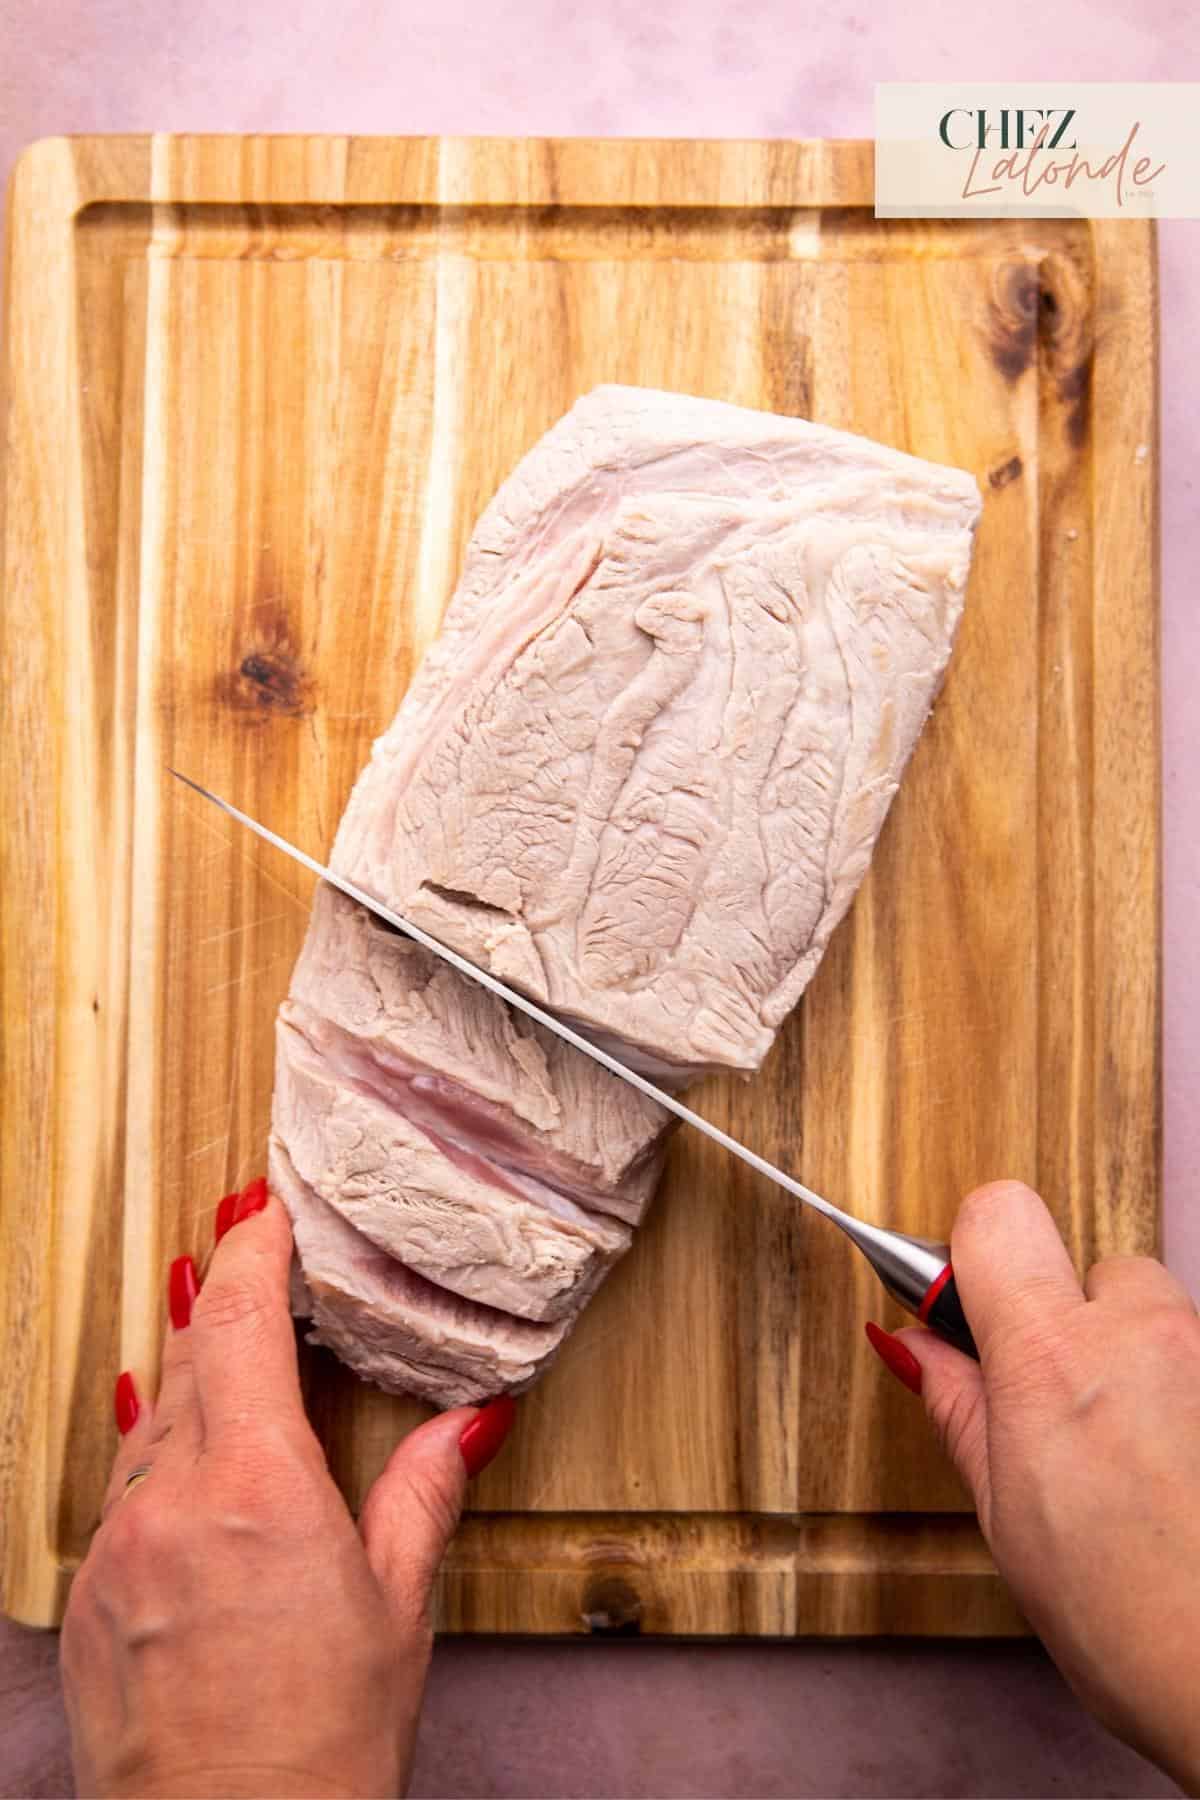
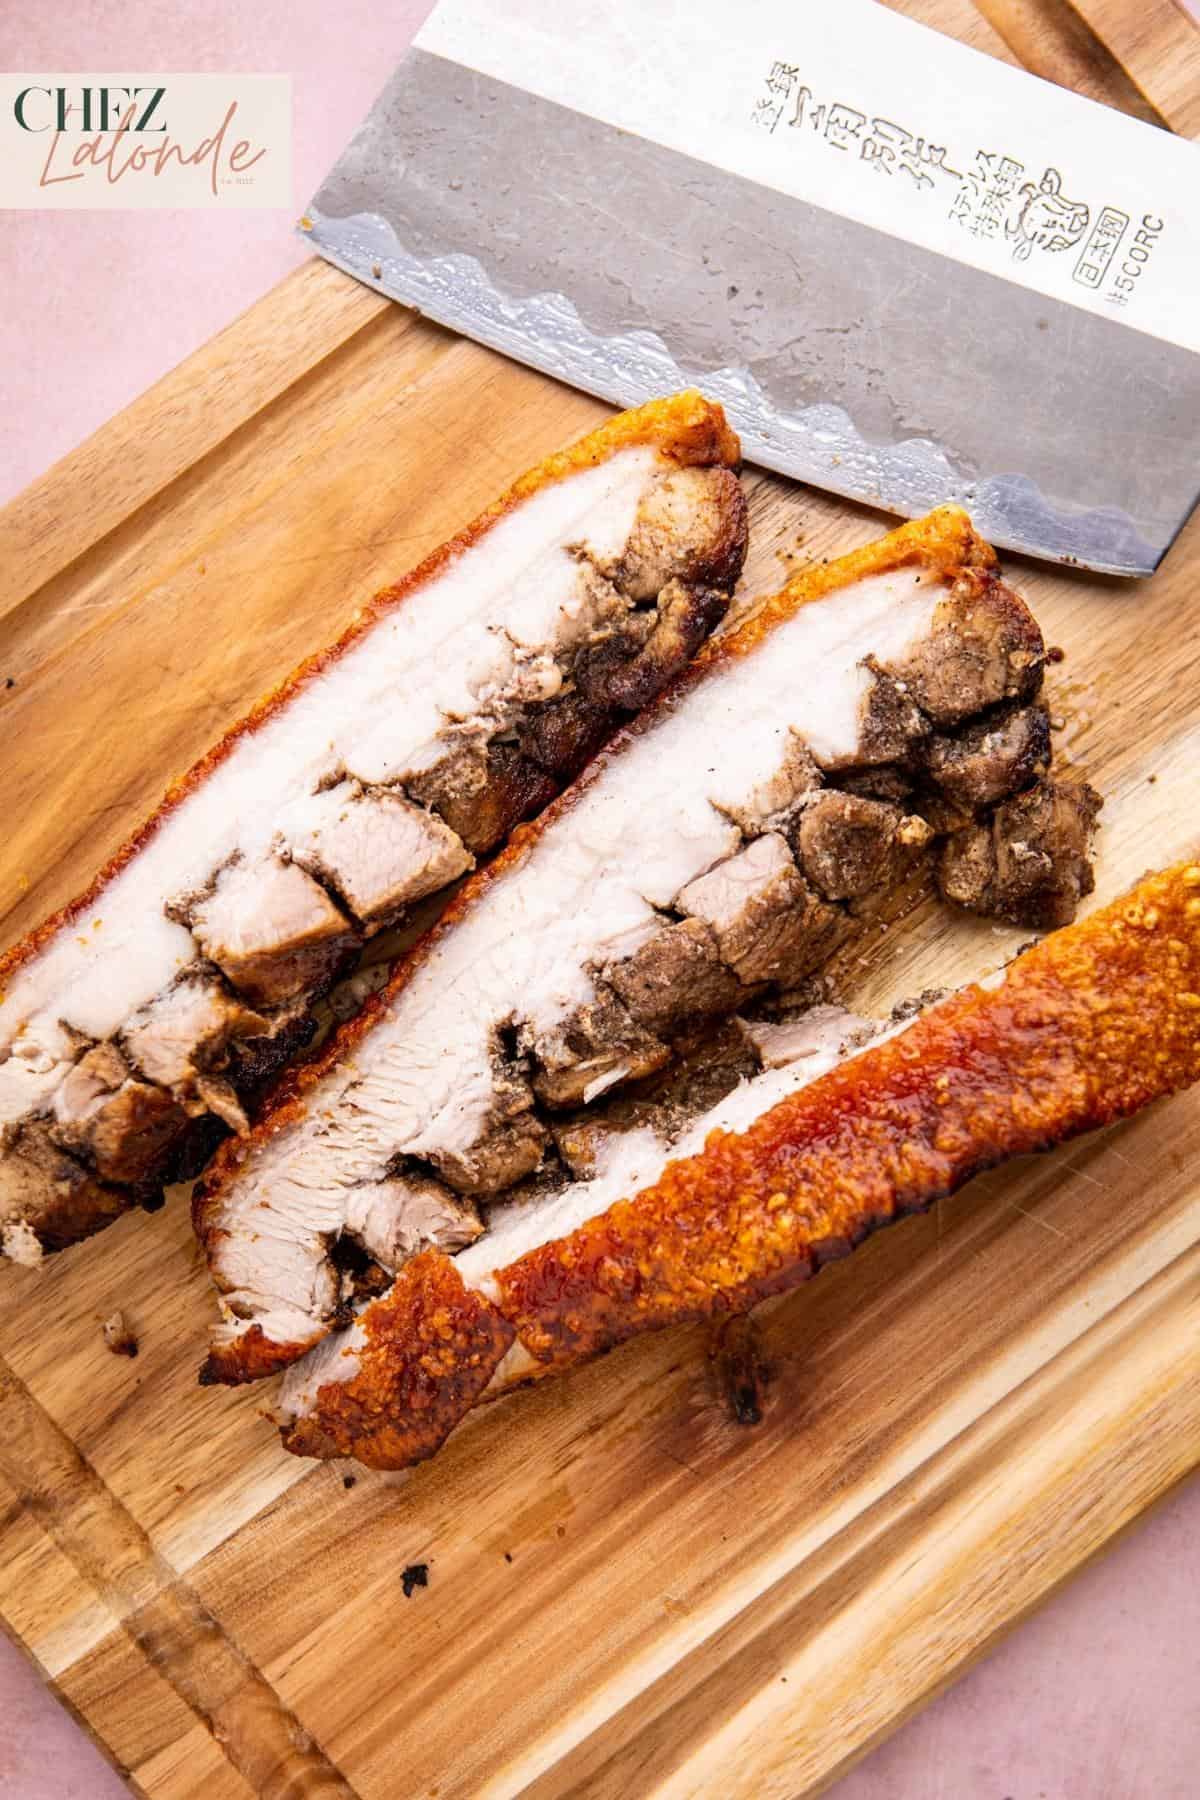
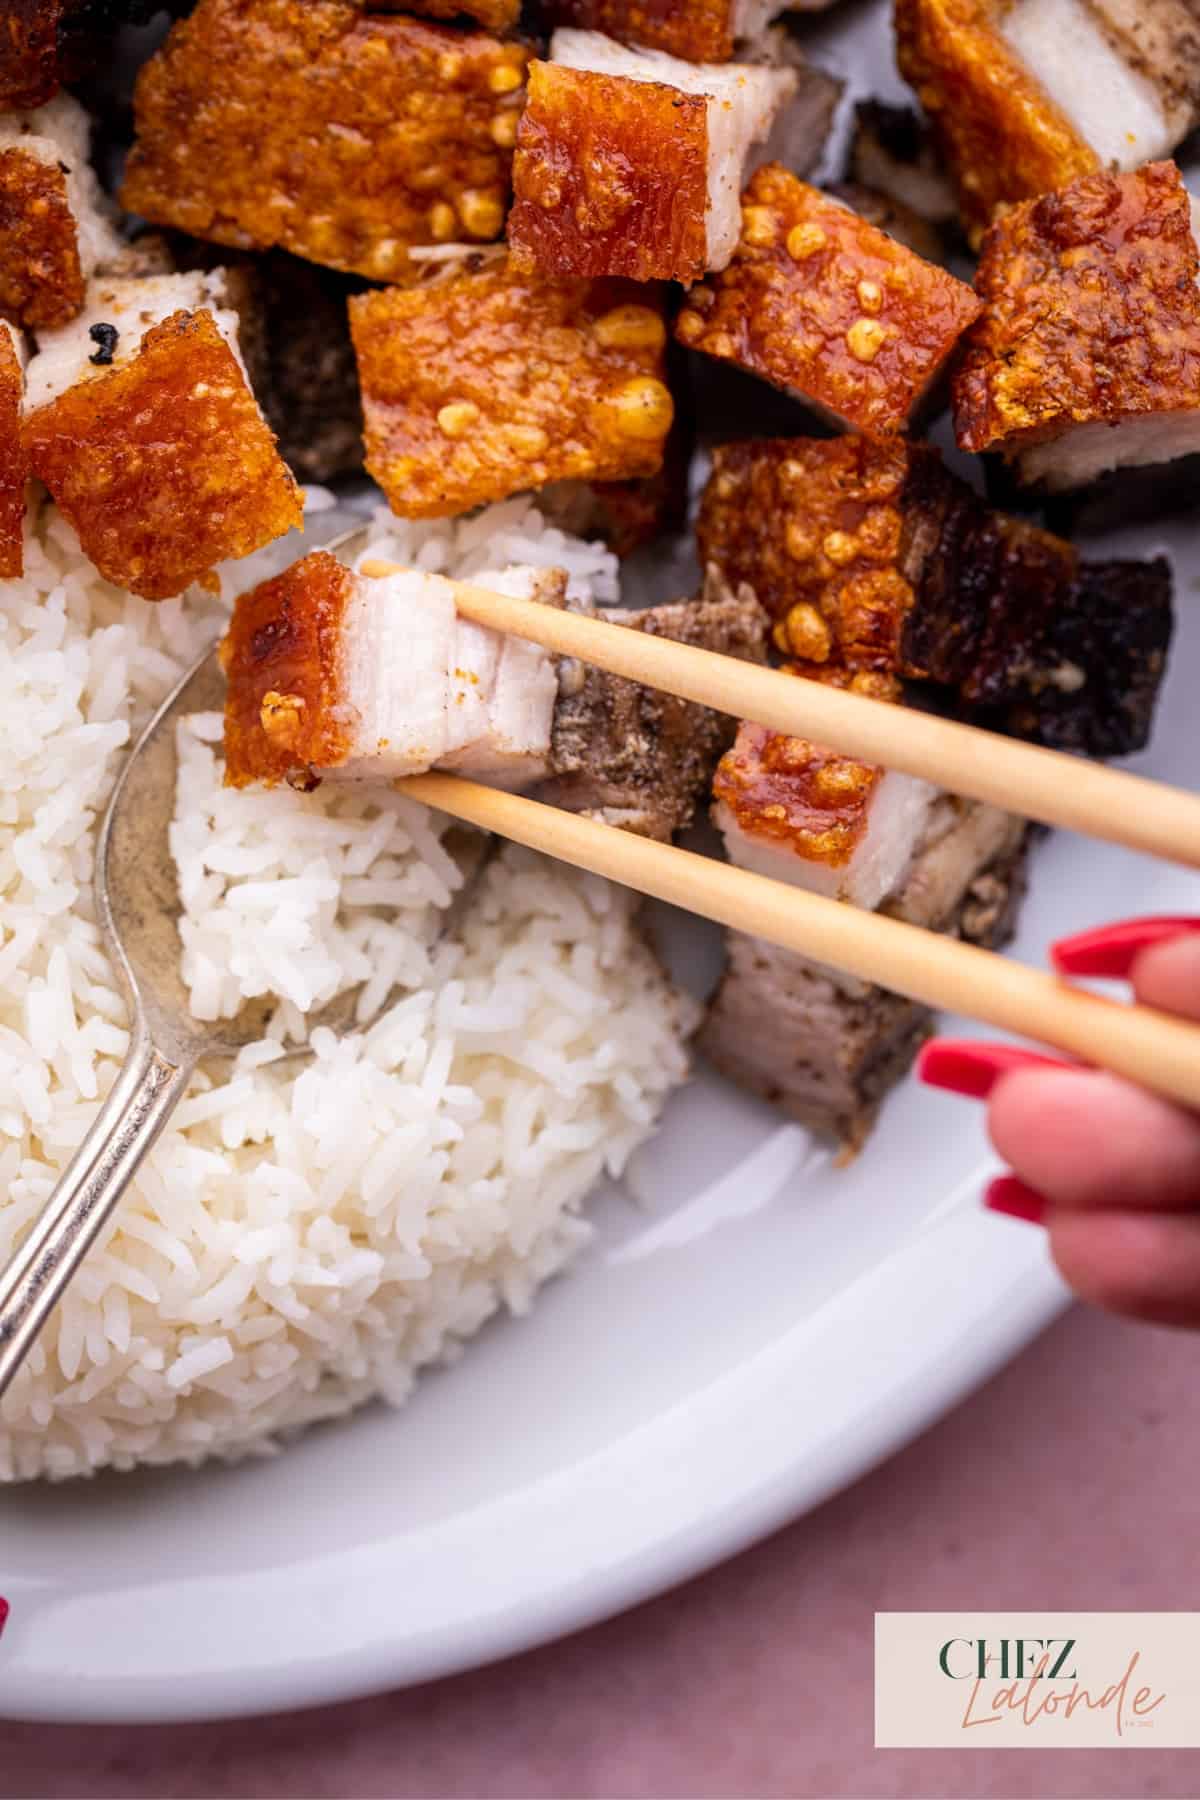
Step 11: Let it rest, cut, and serve:
After cooking the pork belly in the air fryer, allow it to cool and rest on a wire rack for 15 to 20 minutes. This resting period helps to crisp up the skin further and retains its juiciness. Then, using a cleaver, follow the scored lines and cut the belly into evenly sized pieces. The Cantonese-style air-fried pork belly is best served with steamed rice for a delicious and satisfying meal.


Tips and tricks for this recipe:

1. Get a meat tenderizer with steel needles for this recipe:
Using a meat tenderizer with steel needles is highly recommended for this recipe. It allows you to punch numerous holes into the pork skin, ensuring they are closely spaced together. This step is crucial in preparing the skin for optimal crispiness, resulting in the iconic bubbled and crackling texture that makes the Chinese roasted pork belly so enticing. Make sure to thoroughly poke the skin with as many holes as possible for the best results. Remember to focus on the skin and avoid piercing through the meat.
2. Cook your pork belly in both a Toaster oven and an air fryer:
I recommend using the toaster oven and air fryer to cook your pork belly for the perfect outcome. Through multiple recipe tests, I’ve discovered that solely roasting the pork belly in the toaster oven yields moist meat but lacks the desired crispy skin. On the other hand, cooking it entirely in the air fryer without the water bath leads to slightly dry meat and overly hardened skin. The solution is to cook the “Meat” part in the toaster oven using the roast setting and then transfer it to the air fryer. This technique yields fantastic results, providing juicy meat and a satisfyingly crackling rind.
3. Use a foil tray when cooking pork belly:
When cooking pork belly, some people prefer using aluminum foil to create and fold out a tray, while others, like myself, opt for an aluminum tray for convenience. (I will be honest, I am just not good at doing Origami!) Both methods are suitable. Whether you choose to create your tray or use an aluminum one, the fundamental purpose of using a tray is to protect the meat side from drying out and burning while preserving its juiciness.
Leftover Storage Tips:
1. Refrigeration:
Place the leftover pork belly in an airtight container or wrap it tightly with plastic. Store it in the refrigerator for up to 2-3 days. It must be sealed adequately to maintain freshness and prevent odors from permeating.
2. Reheating:
When reheating the pork belly, it’s best to use methods that help retain its moisture and crispiness. One recommended method is to reheat it in the air fryer for a few minutes until it becomes hot and crispy again. Alternatively, you can reheat it in a preheated oven at a moderate temperature, around 325°F (165°C), for about 8-10 minutes or until warm.
3. Freezing:
I haven’t tried freezing cooked pork belly before, so I can’t give you specific instructions. However, based on my experience, the portion size mentioned in this recipe is usually perfect for enjoying in one sitting. Freezing it might not give you the same delicious taste and texture as when it’s freshly cooked. I recommend savoring it immediately or within a few days for the best-tasting experience.
FAQs About Cantonese-style Pork Belly
Here are more Asian-style recipes you may like:


In Conclusion:
This crispy air fryer Cantonese-style pork belly, known as Siu Yuk, is a culinary masterpiece of Cantonese cuisine. With its perfectly crackling golden skin and juicy, tender meat, this dish is a true delight for the senses. From the careful scoring of the skin to the flavorful seasoning and the precise cooking techniques, each step plays a crucial role in achieving that irresistible combination of textures and flavors. Following this recipe post’s detailed instructions and expert tips, you can confidently create your mouthwatering Siu Yuk home.
I hope you enjoy this dish and Bon Appétit!
Don’t miss out on more delicious recipes and cooking tips!
Follow this blog and social media channels for exciting updates, mouthwatering recipes, and culinary inspiration. Stay connected and join our food-loving community for a delightful journey through the world of flavors!

Crispy Air Fryer Cantonese Style pork belly (Siu Yuk)
- Total Time: 24 hours 50 minutes
- Yield: 3 servings
Description
Experience the ultimate crispy Cantonese pork belly with our air fryer recipe. Unlock the secrets to perfect crackling skin and tender meat by blending traditional Chinese seasoning methods with innovative air frying technology. Elevate your Chinese cooking skills with my secret tips and expert techniques, and discover the magic of the air fryer for irresistible, crispy pork belly creations.
Ingredients
2 lbs – Pork Belly with skin intact
1/2 Teaspoon of Five spice
1/2 Teaspoon of Black Pepper
1/2 Teaspoon of white pepper
1/2 Teaspoon of garlic powder
1/2 Teaspoon of sea salt
2 Teaspoons of Chinese ground bean sauce
2 Teaspoons of Chinese Shaoxing Wine
1 Teaspoon of sugar
1/2 Tablespoon of Sea Salt
1 Teaspoon of Chinese white vinegar
Instructions
Step 1: Wash and Pre-boil the belly:
To prepare the pork belly, boil 4 to 5 cups of water in a shallow wok or saucepan. Rinse the pork belly and place it skin-side down in boiling water, submerging it fully. Cover and cook for 5 minutes. This step tenderizes the meat and removes impurities before proceeding with the recipe.
Step 2: Clean the skin:
Once the pork belly has boiled for 5 minutes, carefully remove it from the hot water and transfer it to a plate to cool down. Once it is safe to handle, take a butter knife and gently scrape off any hair or impurities from the skin. Rinse the pork belly once again and use clean paper towels to pat it dry. This step ensures a clean and prepared surface for the next stage of the recipe.
Step 3: Poke holes with tenderizer:
Take the meat tenderizer with steel needles and use it to punch as many holes as possible into the pork skin, ensuring they are closely spaced together. Focus solely on the skin and avoid piercing through the meat.
Step 4: Salt Skin:
After puncturing the skin side, gently rub half a tablespoon of sea salt onto the skin, ensuring even distribution. The sea salt aids in extracting moisture from the skin, resulting in a dry and crispy texture. Avoid rubbing salt on the meat side. Let the salt sit on the skin for 15 minutes, and the surface becomes moist. After 15 minutes, use a butter knife to scrape off the salt and a paper towel to absorb any excess moisture from the skin.
Step 5: Score the meat:
Once you have removed the salt from the skin side, flip the pork belly upside down and place it on the cutting board. Score the meat lengthwise, followed by perpendicular scoring to create a checkerboard pattern with approximately 1-inch by 1-inch squares.
Step 6: Season the meat with dry seasonings:
In a small bowl, combine all the dry ingredients. Sprinkle the mixture onto the meat side of the pork belly, ensuring that it covers all areas, including the nooks and gaps. Use your hands to rub the seasonings to ensure even distribution.
Step 7: Brush wet seasoning on the meat:
Mix the sugar, Shaoxing wine, and ground bean paste in a separate small bowl until the paste forms. Using a silicone brush, apply the seasoning paste onto the meat side of the pork belly, ensuring it covers all areas, including the nooks and gaps in the meat. Be thorough in coating the meat with the seasoning paste for optimal flavor.
Step 8: Add vinegar to the skin:
To conclude Day One, transfer the seasoned pork belly to an aluminum baking tray. Apply a teaspoon of Chinese white vinegar onto the skin using a silicone brush or your fingers. Place the pork belly and the baking tray in the refrigerator overnight, leaving it uncovered. This allows the cool air to draw out moisture from the skin further.
Step 9: Cook the pork belly:
Take out the pork belly from the refrigerator and place it on the kitchen counter to bring it to a slight room temperature. At the same time, Preheat the oven to 400F/200C in the roast setting. Place a wire rack with one cup of water in the baking tray, then position the aluminum tray with pork belly skin-side up on the wire rack. Roast the belly in the water bath for 30 minutes at 400F/200C before transferring it to the air fryer to finish.
Step 10: Finish the pork belly in the air fryer:
Once the belly has cooked in the toaster oven for 30 minutes, transfer it and the aluminum tray to the air fryer. Set the air fryer to 400F/200C and cook the pork belly for 10 minutes. Then remove the aluminum tray and cook it for 10 more minutes or until the rind becomes crispy and crackles.
Step 11: Let it rest, cut, and serve:
After cooking the pork belly in the air fryer, allow it to cool and rest on a wire rack for 15 to 20 minutes. This resting period helps to crisp up the skin further and retains its juiciness. Then, using a cleaver, follow the scored lines and cut the belly into evenly-sized pieces. The Chinese roasted pork belly is best served with steamed rice for a delicious and satisfying meal.
Notes
This recipe requires two days to process for the best flavor and results. The pork belly must be prepared and seasoned, cured, and dry overnight before cooking. While it may require some patience, the wait will be well worth it for the incredible taste that awaits.
When choosing pork belly, pay attention to freshness, fat-to-meat ratio, skin quality, and selecting the proper cut to ensure the best results when preparing this recipe.
For the best outcome, use both the toaster oven and air fryer. Roasting in the toaster oven alone results in moist meat but soft skin. Air frying alone can lead to dry meat and overly hard skin. The solution is to roast the meat in the toaster oven, then finish in the air fryer for juicy meat and a crispy, crackling skin.
Using a meat tenderizer with steel needles is essential. It creates closely spaced holes in the pork skin, ensuring optimal crispiness and the iconic bubbled and crackling texture. Thoroughly poke the skin with as many holes as possible, focusing on the skin and avoiding piercing through the meat.
An aluminum tray protects the meat side from drying out and burning. At the same time, preserving its juiciness for a tender result.
Tools needed: Toaster oven with Roast setting, Air Fryer, and a meat tenderizer with steel needles
- Prep Time: 24 hours
- Cook Time: 50 minutes
- Category: Asian Cuisine
- Method: Air-Frying
- Cuisine: Chinese