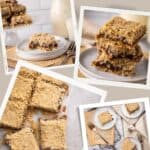
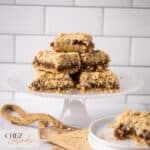
A Classic Canadian Dessert: Old-fashioned Date Squares
You might have seen and tried making my Japanese milk bread recipe already. Let’s switch things up today and add some Canadian flair to your dessert collection. Join me in exploring my mother-in-law’s old-fashioned date squares recipe that her family passed down for generations. These tasty squares are rich and gooey, with a chewy date filling and a crumbly, buttery roll oat crust. These little treats will satisfy your sweet tooth with every bite.

Disclaimer Notice: This website contains affiliate links. If you make a purchase through these links, I may earn a commission at no extra cost to you. I only endorse products or services I believe will be valuable to my readers. I appreciate your support.
It was love at first bite when my mother-in-law introduced me to this traditional Canadian dessert nine years ago. Now, whenever she visits, she makes us a big tray of date squares to freeze. My husband swears them as the best post-workout snack because they’re not too sweet and are packed with dietary fiber and nutrients. It’s clear that this is more than just a dessert – it’s a family legacy. It is my mother-in-law’s grandmother’s recipe passed down from generation to generation. And with every bite, we can’t help but feel a sense of nostalgia for this beloved treat that’s been a part of my husband’s family for decades.
Recipe Snapshot
EASE: Super easy even a new baker can do.
PROS: It’s Delicious and Healthy
CONS: You must try not to overindulge in this heavenly dessert.
WOULD I MAKE THIS AGAIN? Absolutely, especially when my Canadian family is visiting.
What are Date Squares?
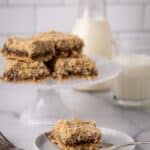
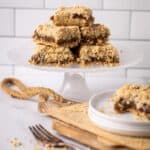
These mouthwatering goodies originated in the prairie provinces of Saskatchewan and Manitoba, Canada. The original story was unclear, but some said these date squares were inspired by Scottish oatcakes and Middle Eastern desserts made with dates. Date squares’ ingredients consist of sweet and chewy date filling sandwiched between two layers of buttery and crumbly crust made from rolled oats, butter, brown sugar, and flour. Traditionally it is baked in a deep baking dish and then cut into small squares to serve. People can enjoy these yummy squares with black tea, coffee, or milk.
Are date squares good for you?
Date squares are healthy, but you must not overindulge (I know it is hard because they are so yummy). Dates are packed with natural sugars, just like other dried fruits, yet, they are rich in dietary fiber, iron, and antioxidants. Additionally, oatmeal is a good source of fiber, helps lower cholesterol levels, and reduces the risk of heart disease. Like any dessert, you can enjoy these tasty squares in moderation without feeling guilty. It is a great post-workout treat, especially after leg day.
Why do some people refer to date squares as matrimonial cakes?

Some parts of Canada referred to these sweet squares as “Matrimonial Cake” or “Matrimonial squares.” In some Canadian traditions, these sweet, dense squares are a popular dessert at weddings. Some said that the sweetness of the dates and the buttery crust symbolized the perfect union of a married couple. This two-layered structure has been likened to the layers of a marriage, with the sweet filling representing the love and happiness shared between two people. Therefore, such a name had created.
This is an interesting fun fact right?
What is the difference between Medjool Dates and Noor Deglet Dates?

Do you know…
- Noor Deglet Dates have a drier, firmer texture and taste milder. The slightly nutty taste works well in both savory dishes and desserts. It is reasonably priced, and you can easily find a 2.5 lbs tub at Costco, which my Mother-in-law uses in her recipe.
- Medjool dates are often called the “king of dates” and are usually more expensive and larger; and are known for their caramel-like flavor, soft texture, and high sweetness level. Therefore it makes them a popular choice for desserts and sweet snacks. I saw many people use this in their date square recipe.
What kind of dates should I use in this recipe?
Ultimately, the choice between Medjool and Noor Deglet dates comes down to your personal preference. Medjool dates can provide a more luscious and flavorful filling, while Noor Deglet dates offer a less sweet and nuttier flavor. Both varieties can be used to make delicious date squares.
Nine simple ingredients are needed for this recipe
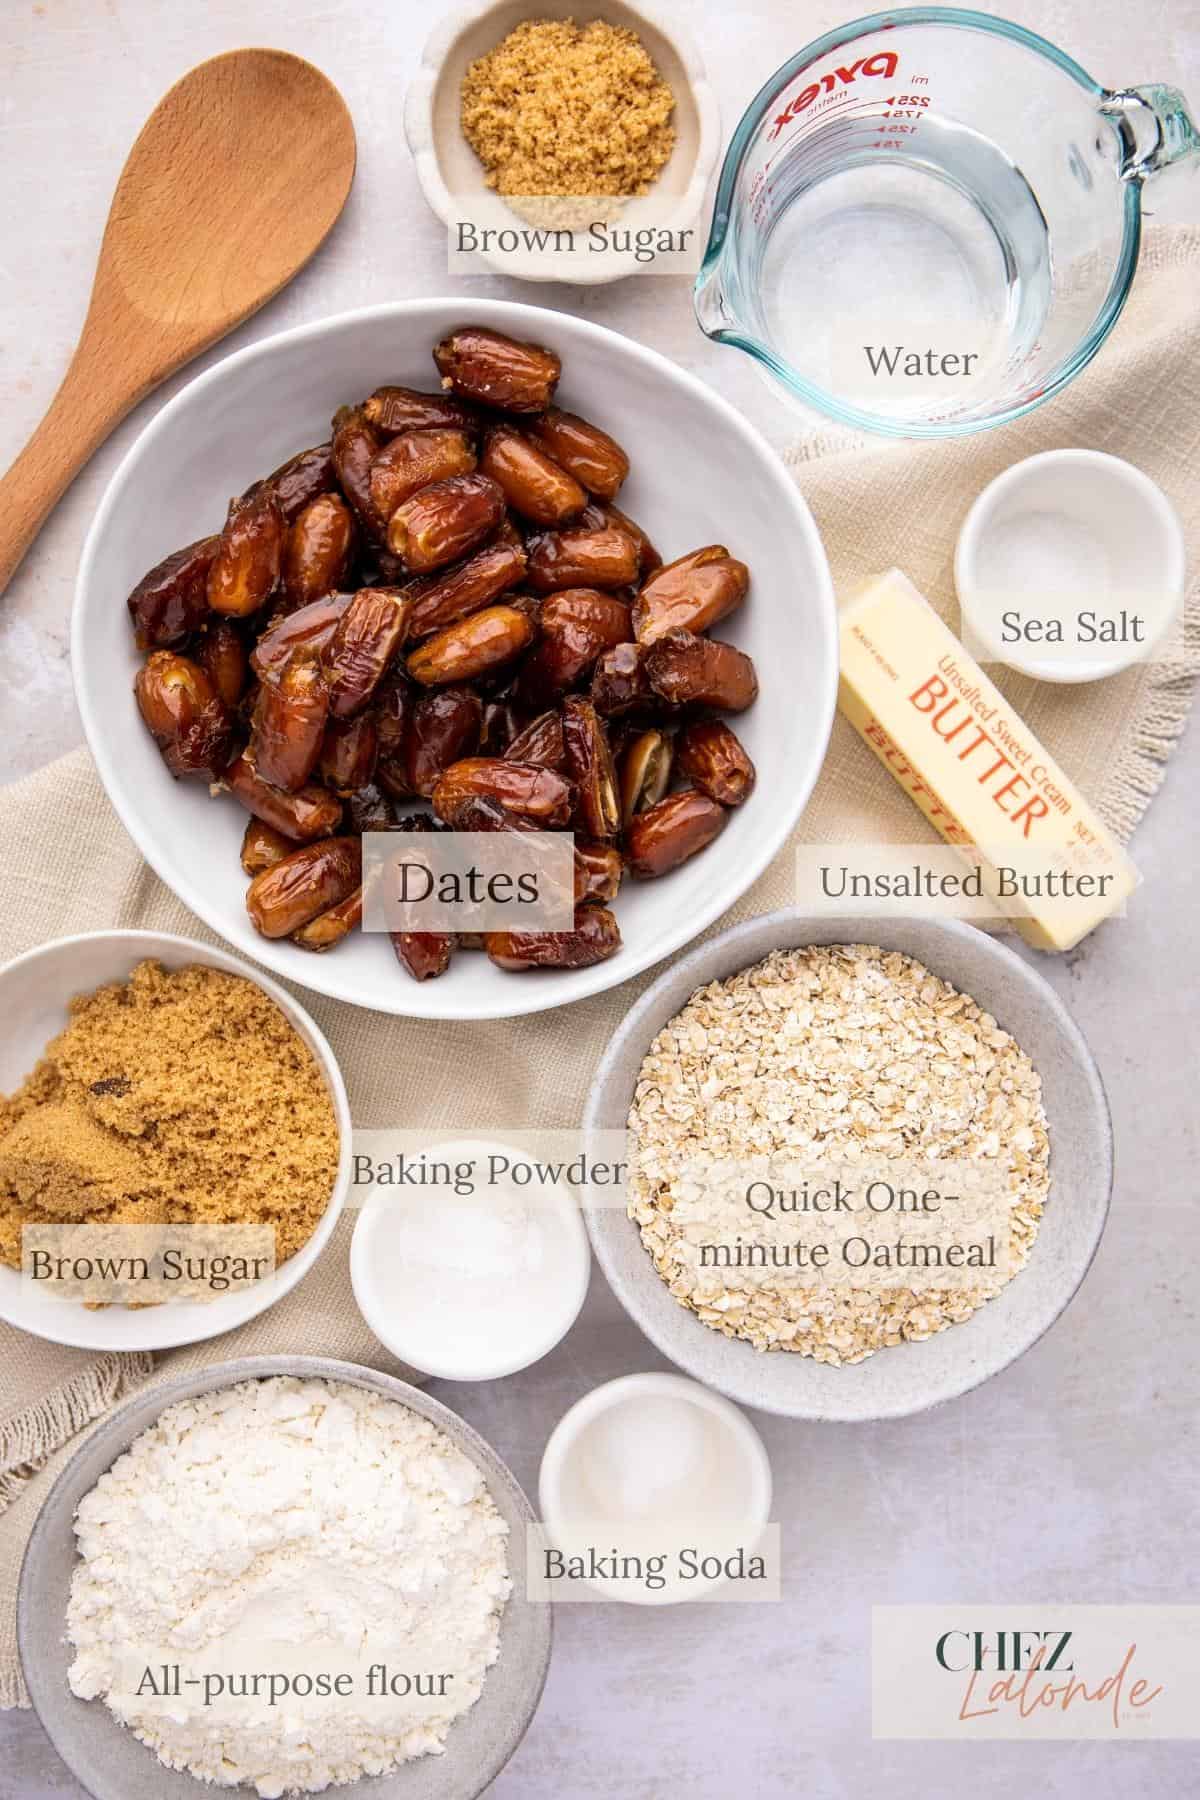
- Pitted Dates -The main ingredient in date squares. They are heated, mashed, and combined with other ingredients to create a delicious, sweet, chewy dessert filling.
- Light brown Sugar – To add sweetness and moisture to the filling. It also contributes to the dark color of the filling and enhances the caramel flavor.
- Water – Adding water when cooking date square fillings helps to soften the dates and make them more plump and juicy.
- Quick one-minute oatmeal – It is added to create a crumbly texture. It has a nutty flavor that can balance the date fillings’ sweetness.
- All-purpose flour- It is a binding agent, holding the oatmeal mixture together, providing a crummy texture to the cruts, and adding flavor.
- Baking powder – It is a leavening agent that helps date squares rise and become fluffy.
- Baking Soda – It helps to result in a softer and fluffier texture for the crust and toppings.
- Room Temperature unsalted butter – The softened butter helps create a crumbly and tender texture in the crust, which complements the chewy and gooey texture of the date filling.
- Pinch of sea salt – This ingredient can enhance the overall flavor, balance the sweetness, and bring out the dates’ natural flavor.
Tips
Substitutions and variation tips:
- Gluten-free variation: Instead of all-purpose flour, make the oatmeal crust with a gluten-free blend. I love King Arthur brand the most.
- Extra flavor: Add ½ tablespoon of vanilla extract into the date filling or sprinkle some cinnamon powder on the oat crust for additional flavor.
- Nutty variation: Add chopped nuts such as pecans or walnuts to the oatmeal crust mixture for extra texture and flavor.
How to make these delicious Canadian desserts?
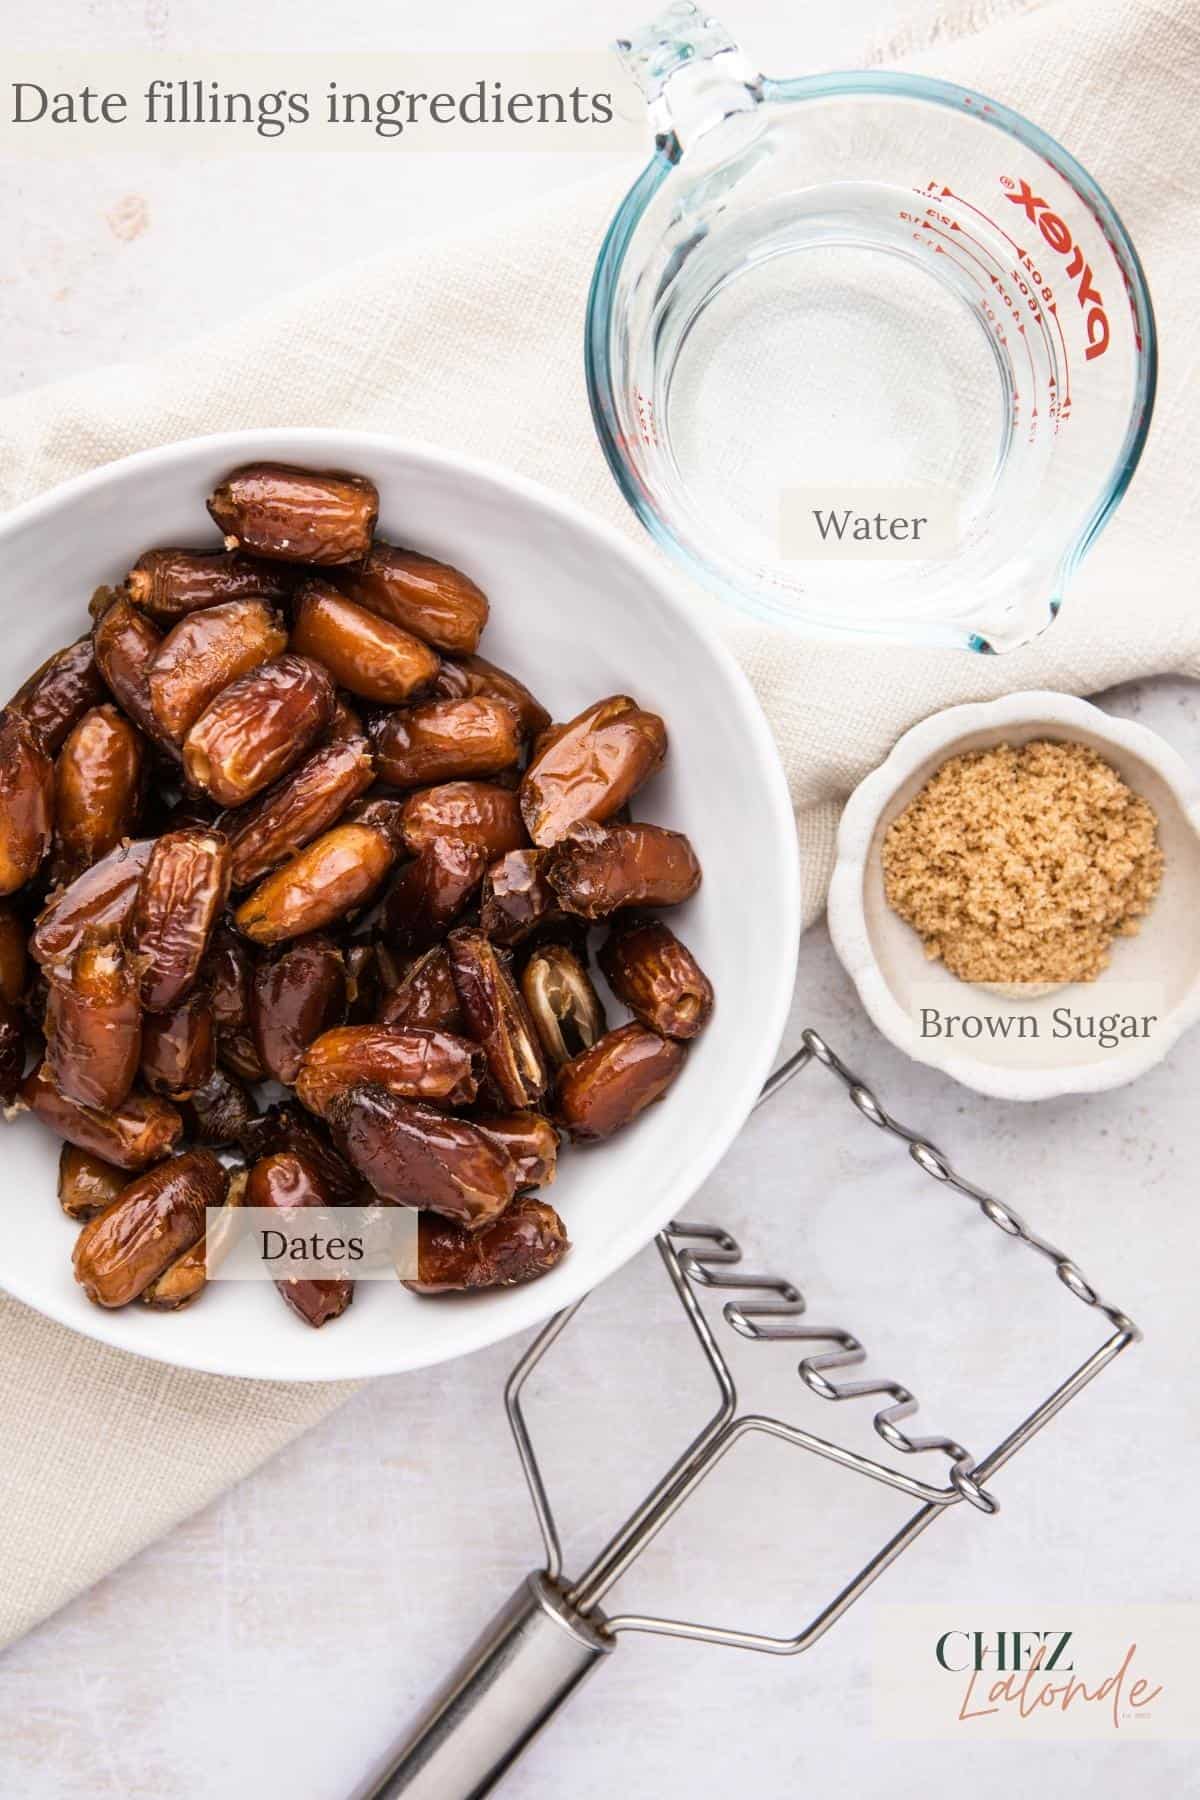
Making the date filling
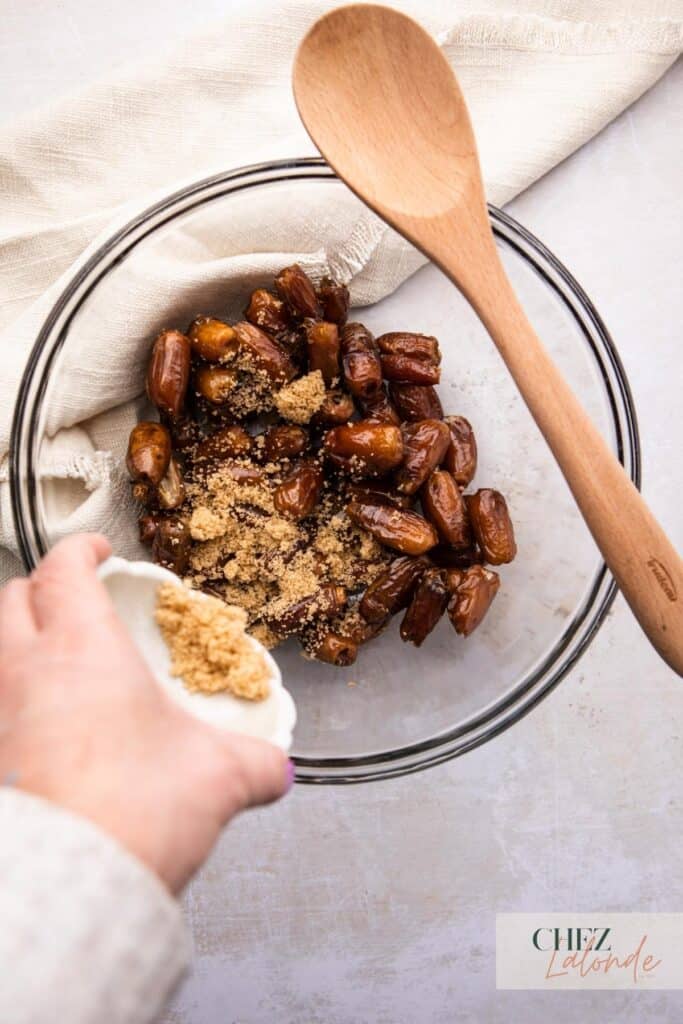
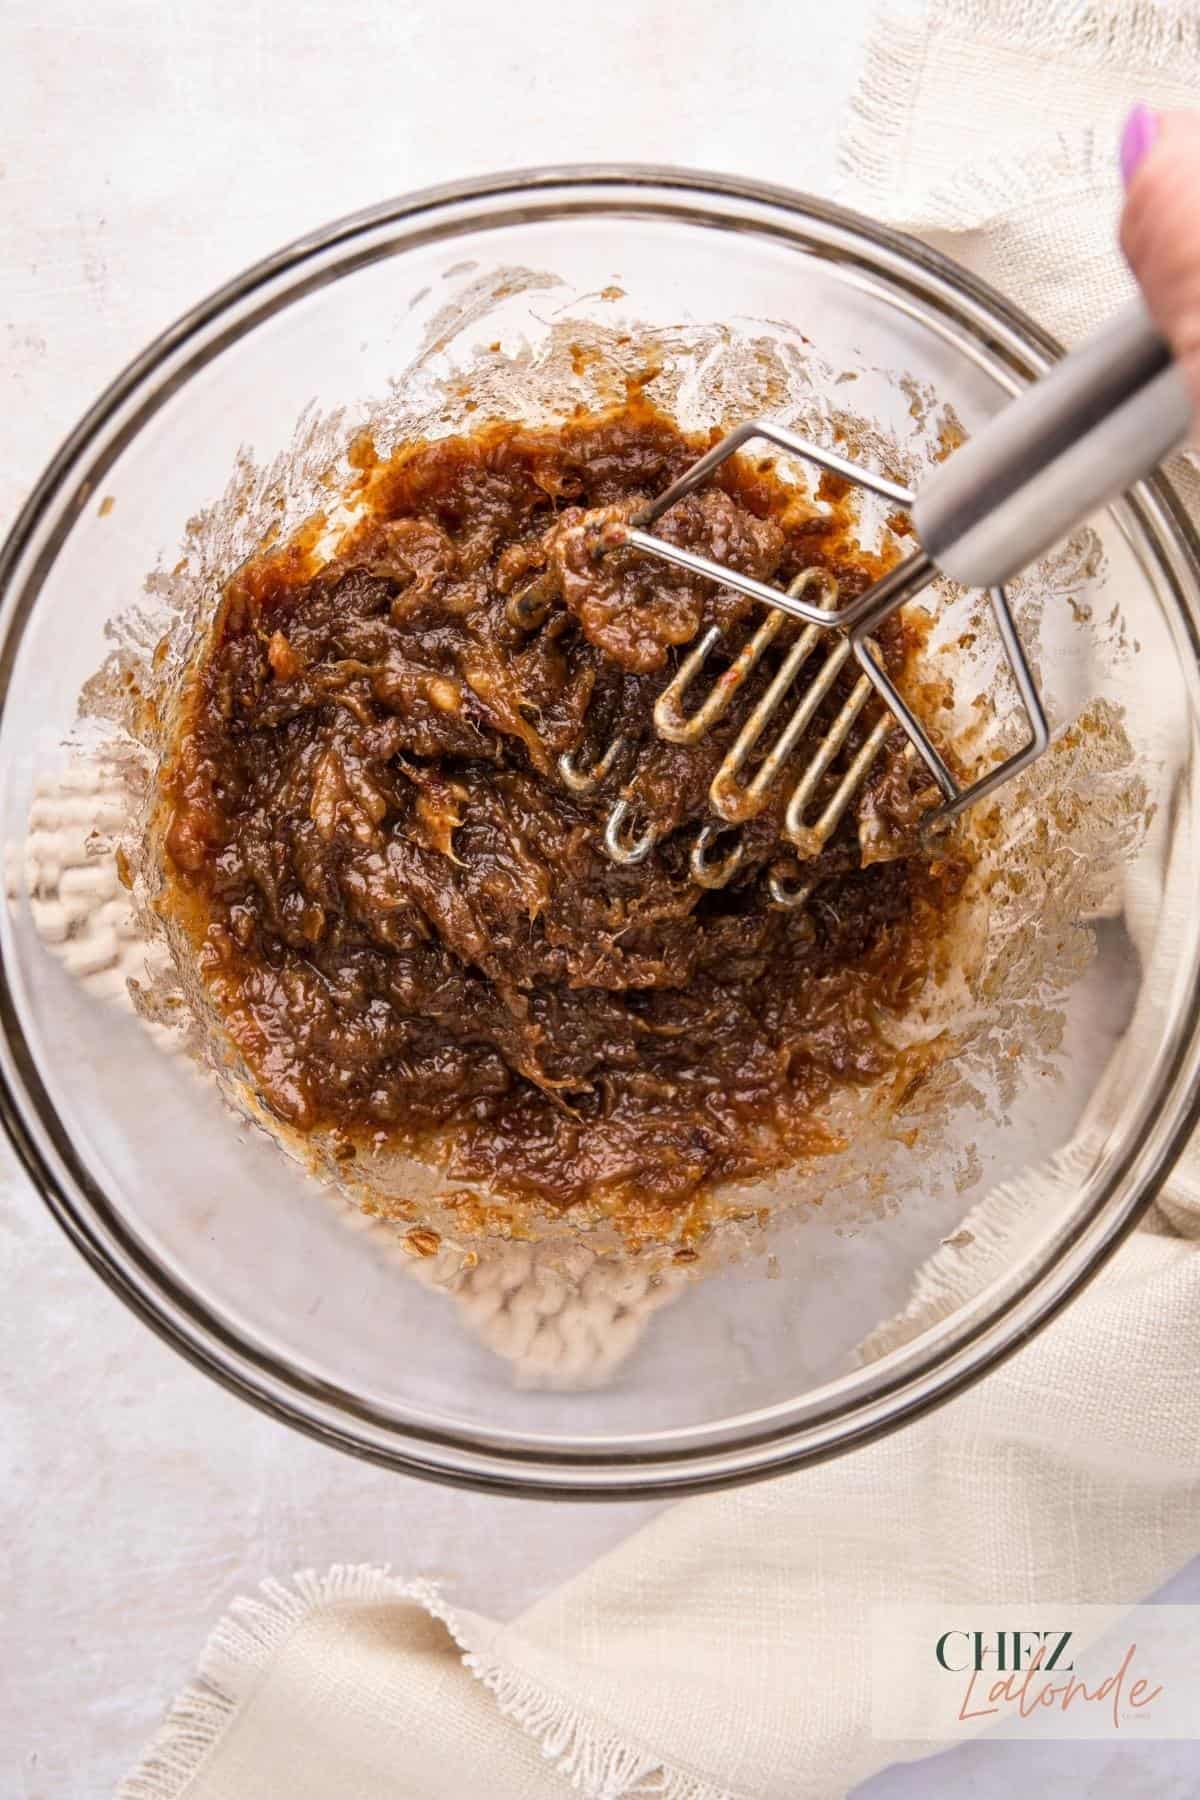
Step 1 – Place pitted dates in a clean microwave-safe glass bowl to make the filling. Mix well with ½ cup of water, two tablespoons of brown sugar, and a pinch of sea salt. Microwave the mixture for 3 minutes, then remove the bowl and use a potato masher to mash the date mixture into a paste-like texture.

Microwave the mixture three separate times.


Step 2 – Add 1/4 cup of water to the date mixture for the second round, mix well, and microwave for three more minutes. Mash the mixture again to achieve a paste-like consistency.
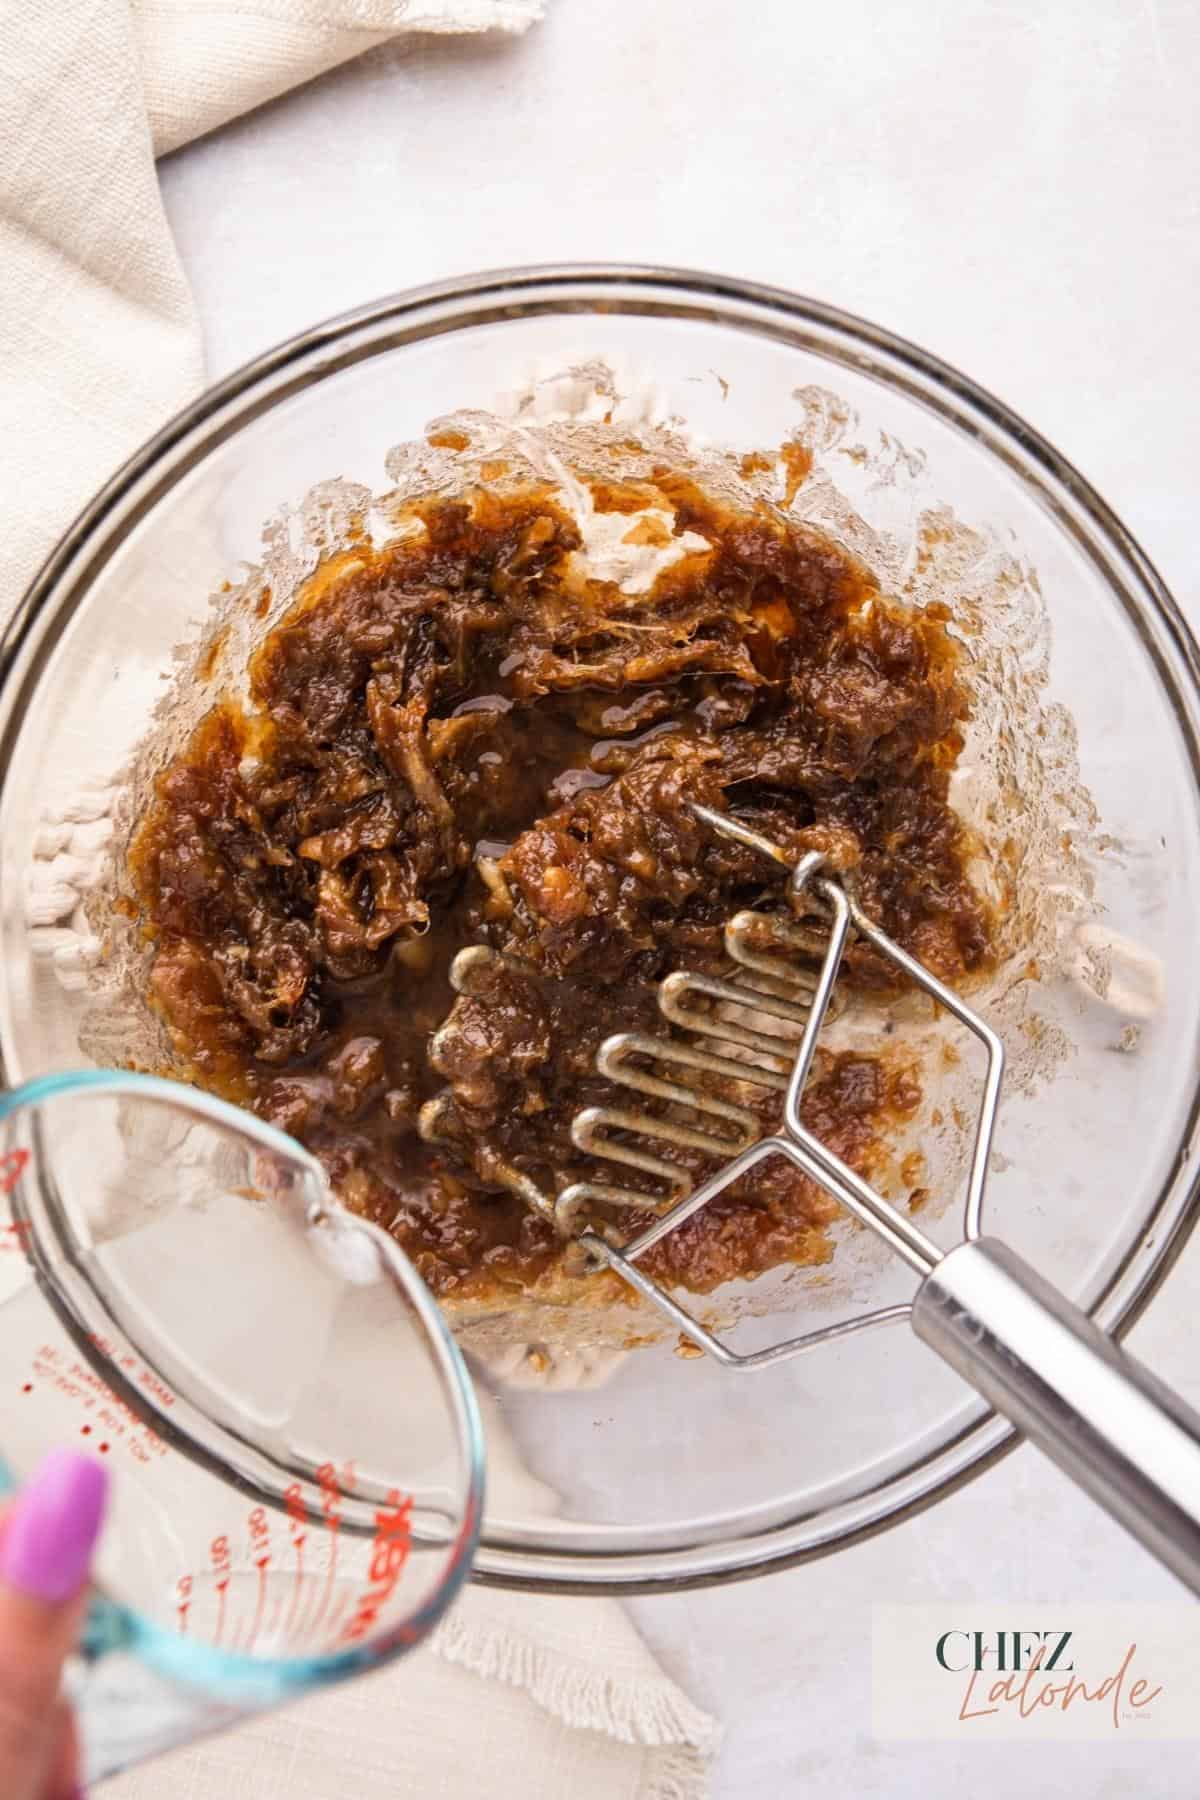
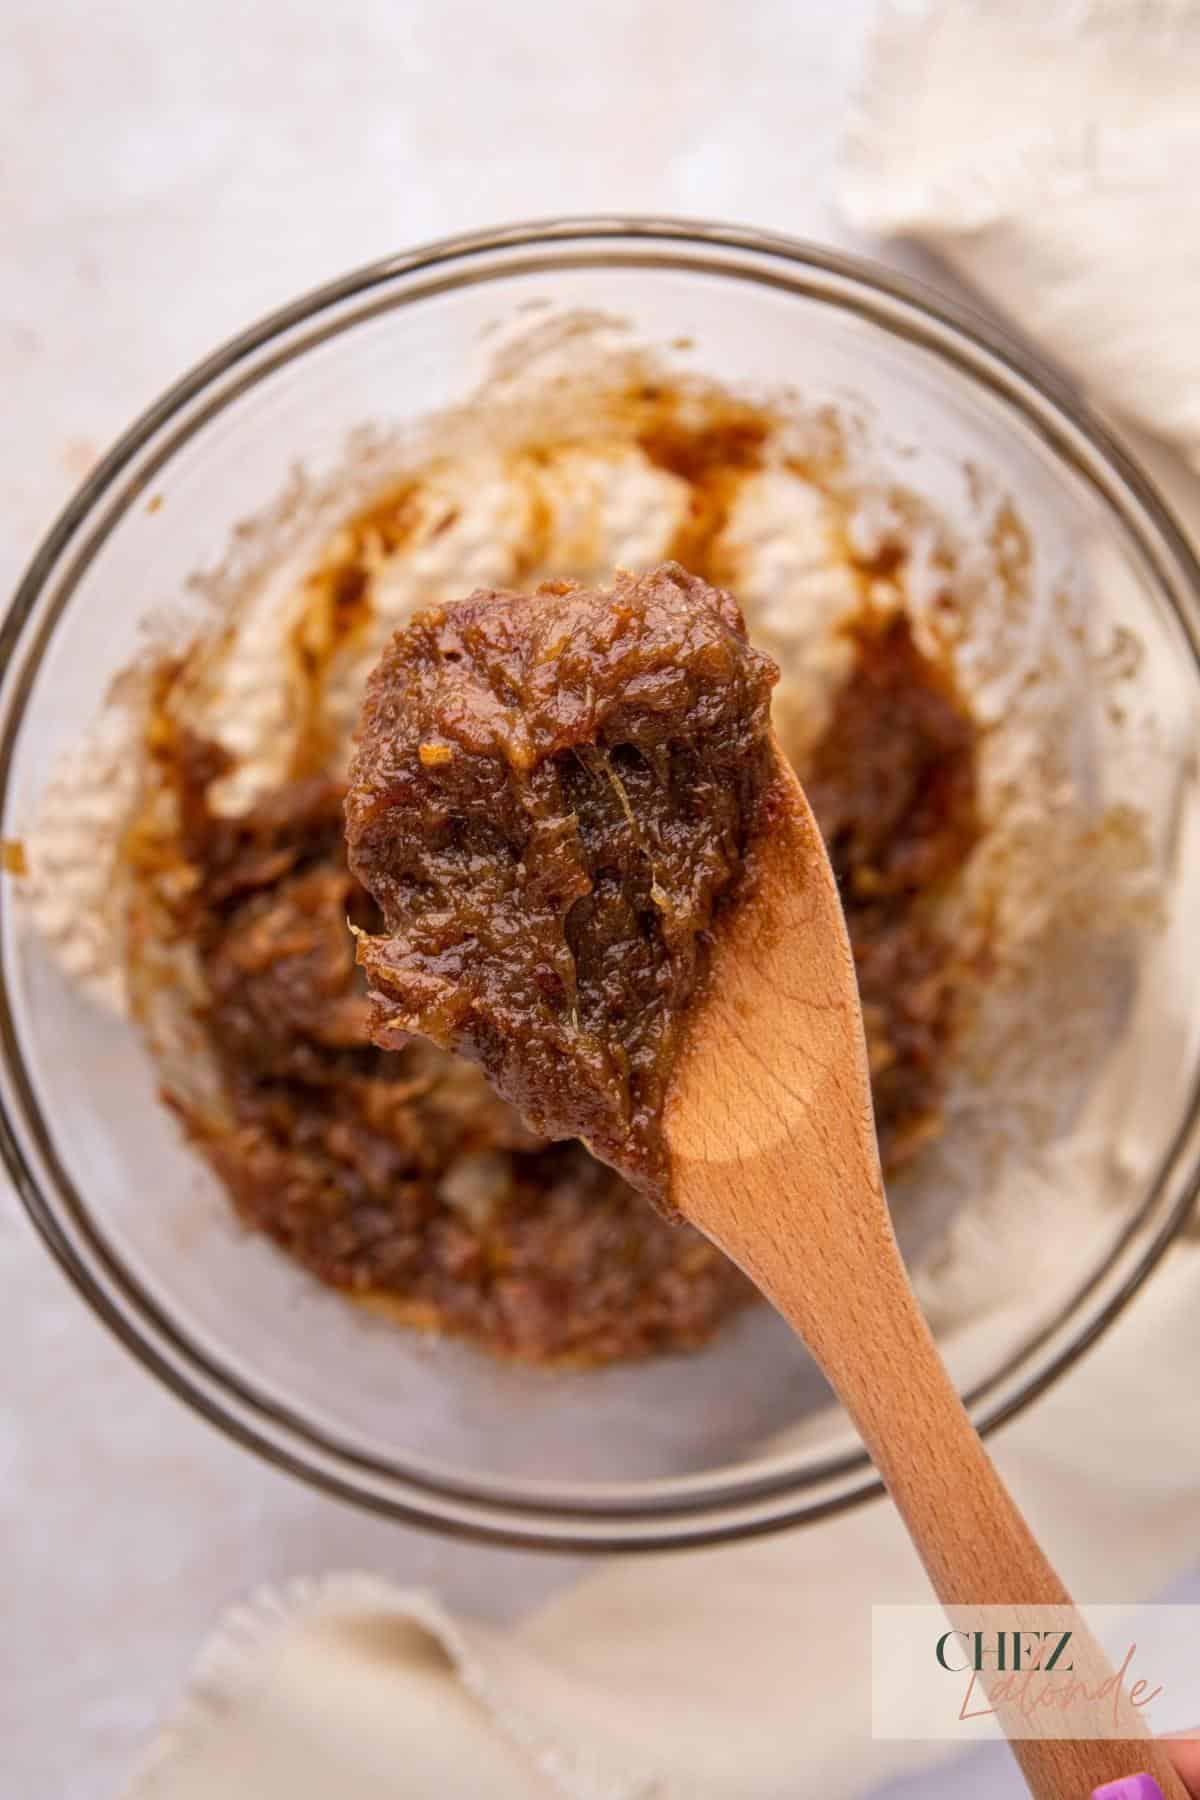
Step 3 – For the final step, microwave the date mixture and add 1/4 cup of water. Mix well and microwave for another 3 minutes. Once done, use a potato masher to mash the mixture until it forms a smooth and complete paste. Set the filling aside and let it cool.
Making the Oatmeal toppings

Step 4 – In a separate bowl, combine the dry ingredients, including oatmeal, flour, brown sugar, baking powder, and baking soda. Mix thoroughly using a spatula.
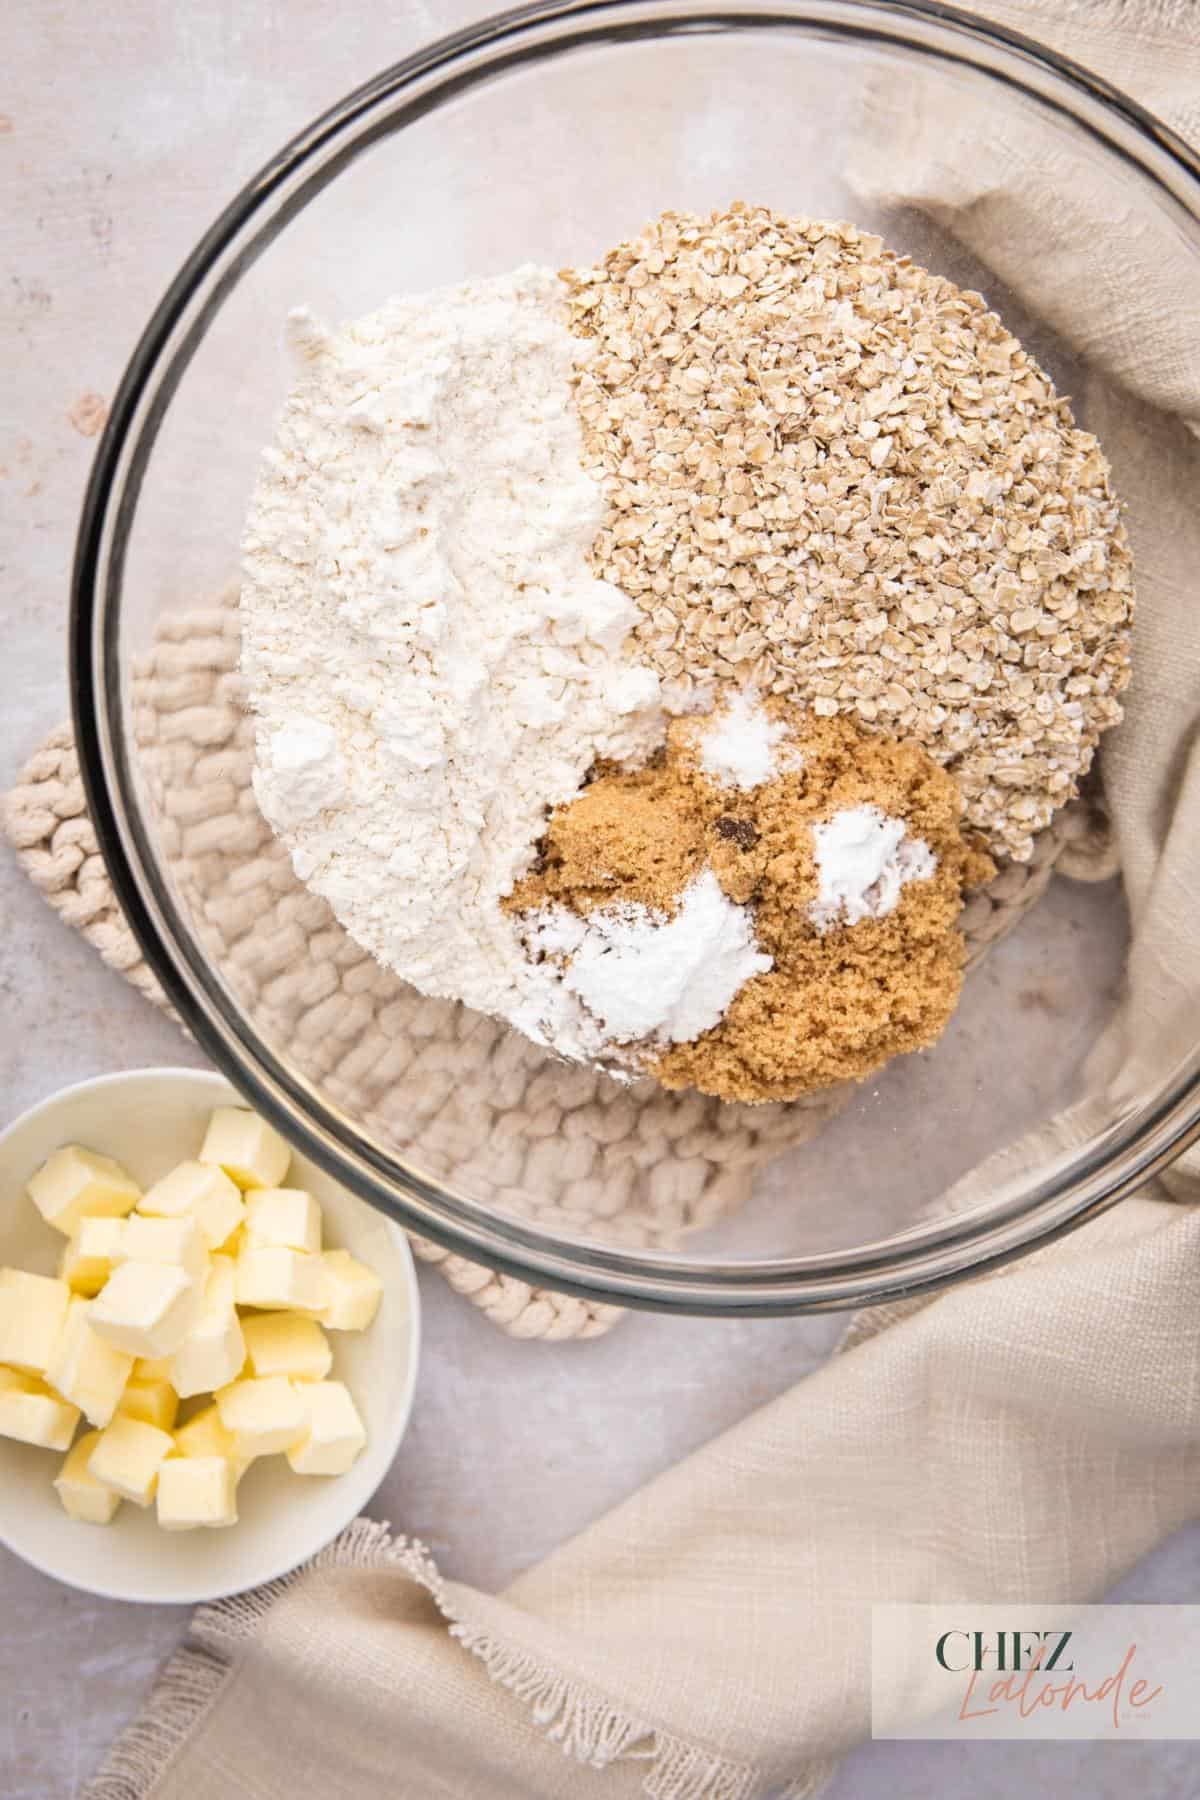

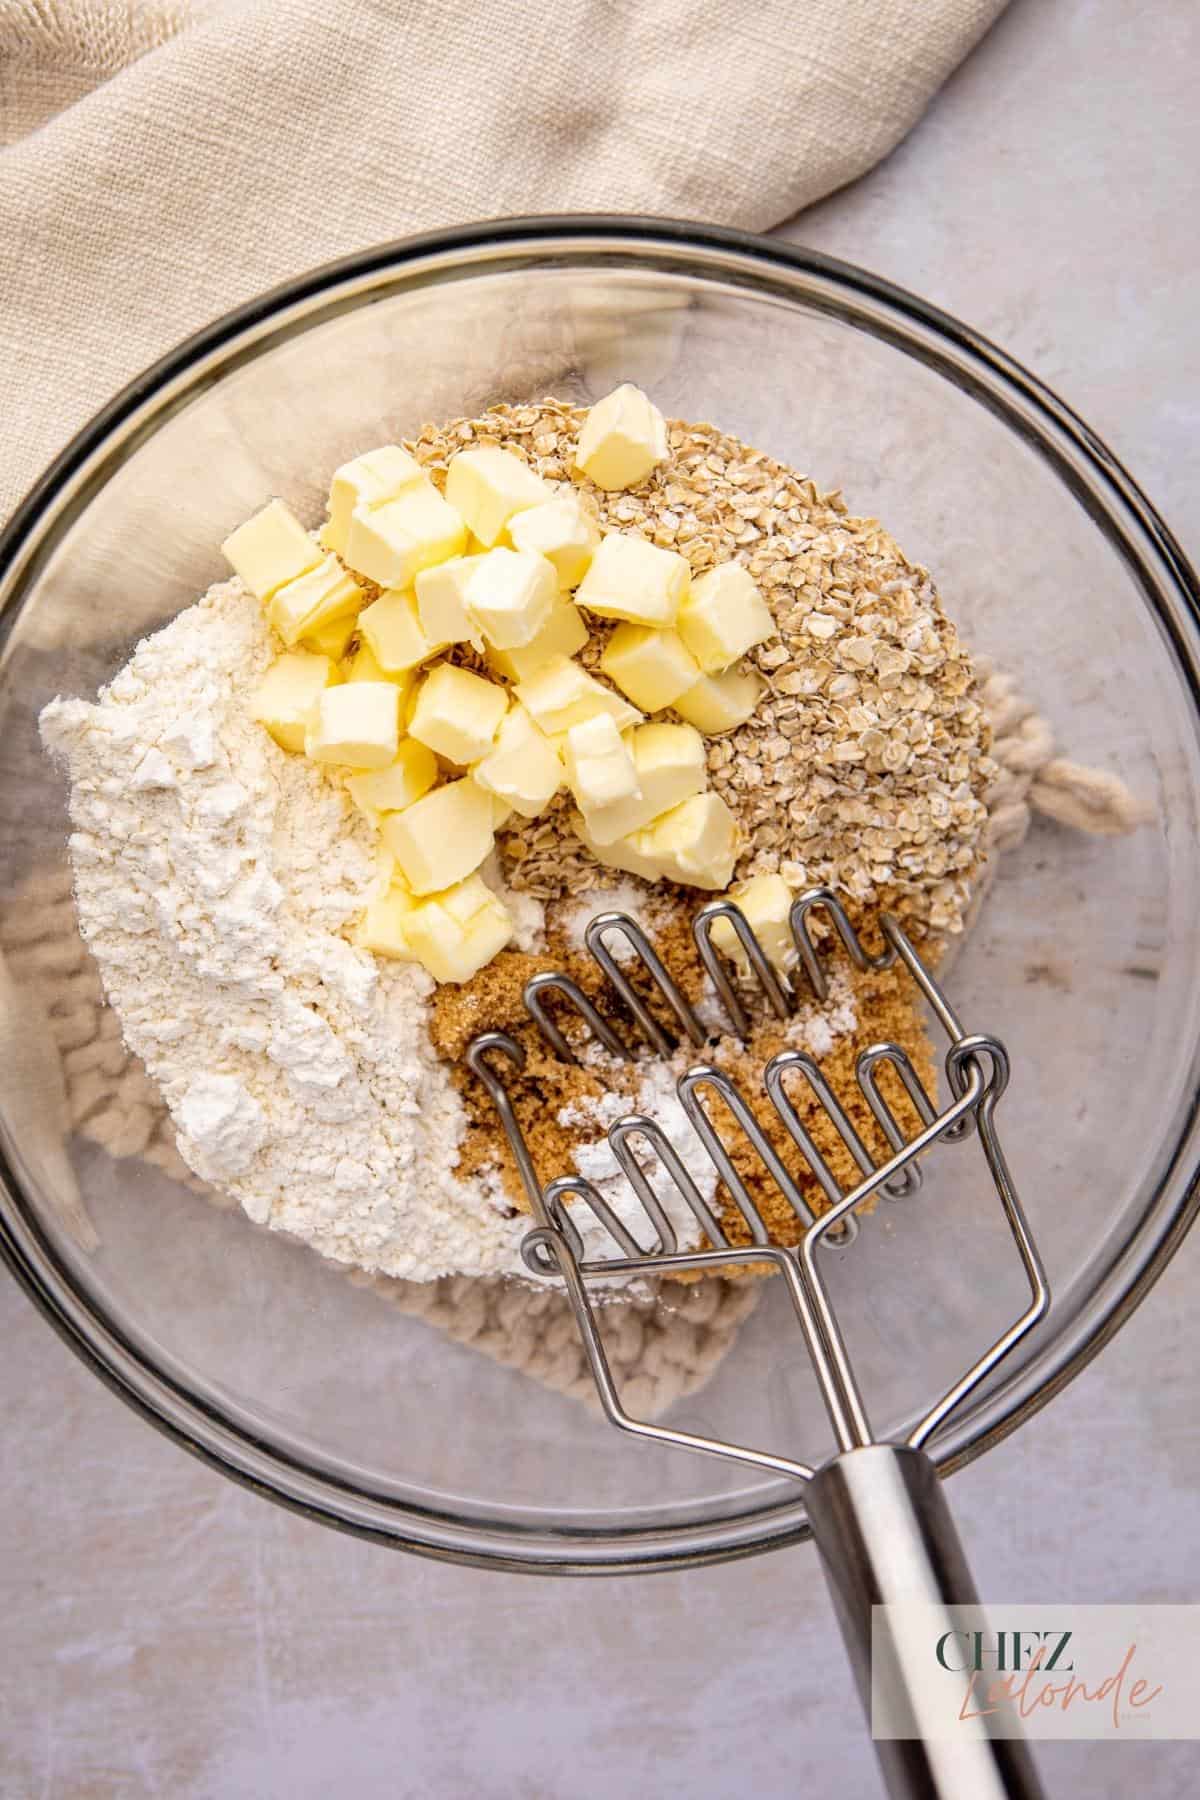
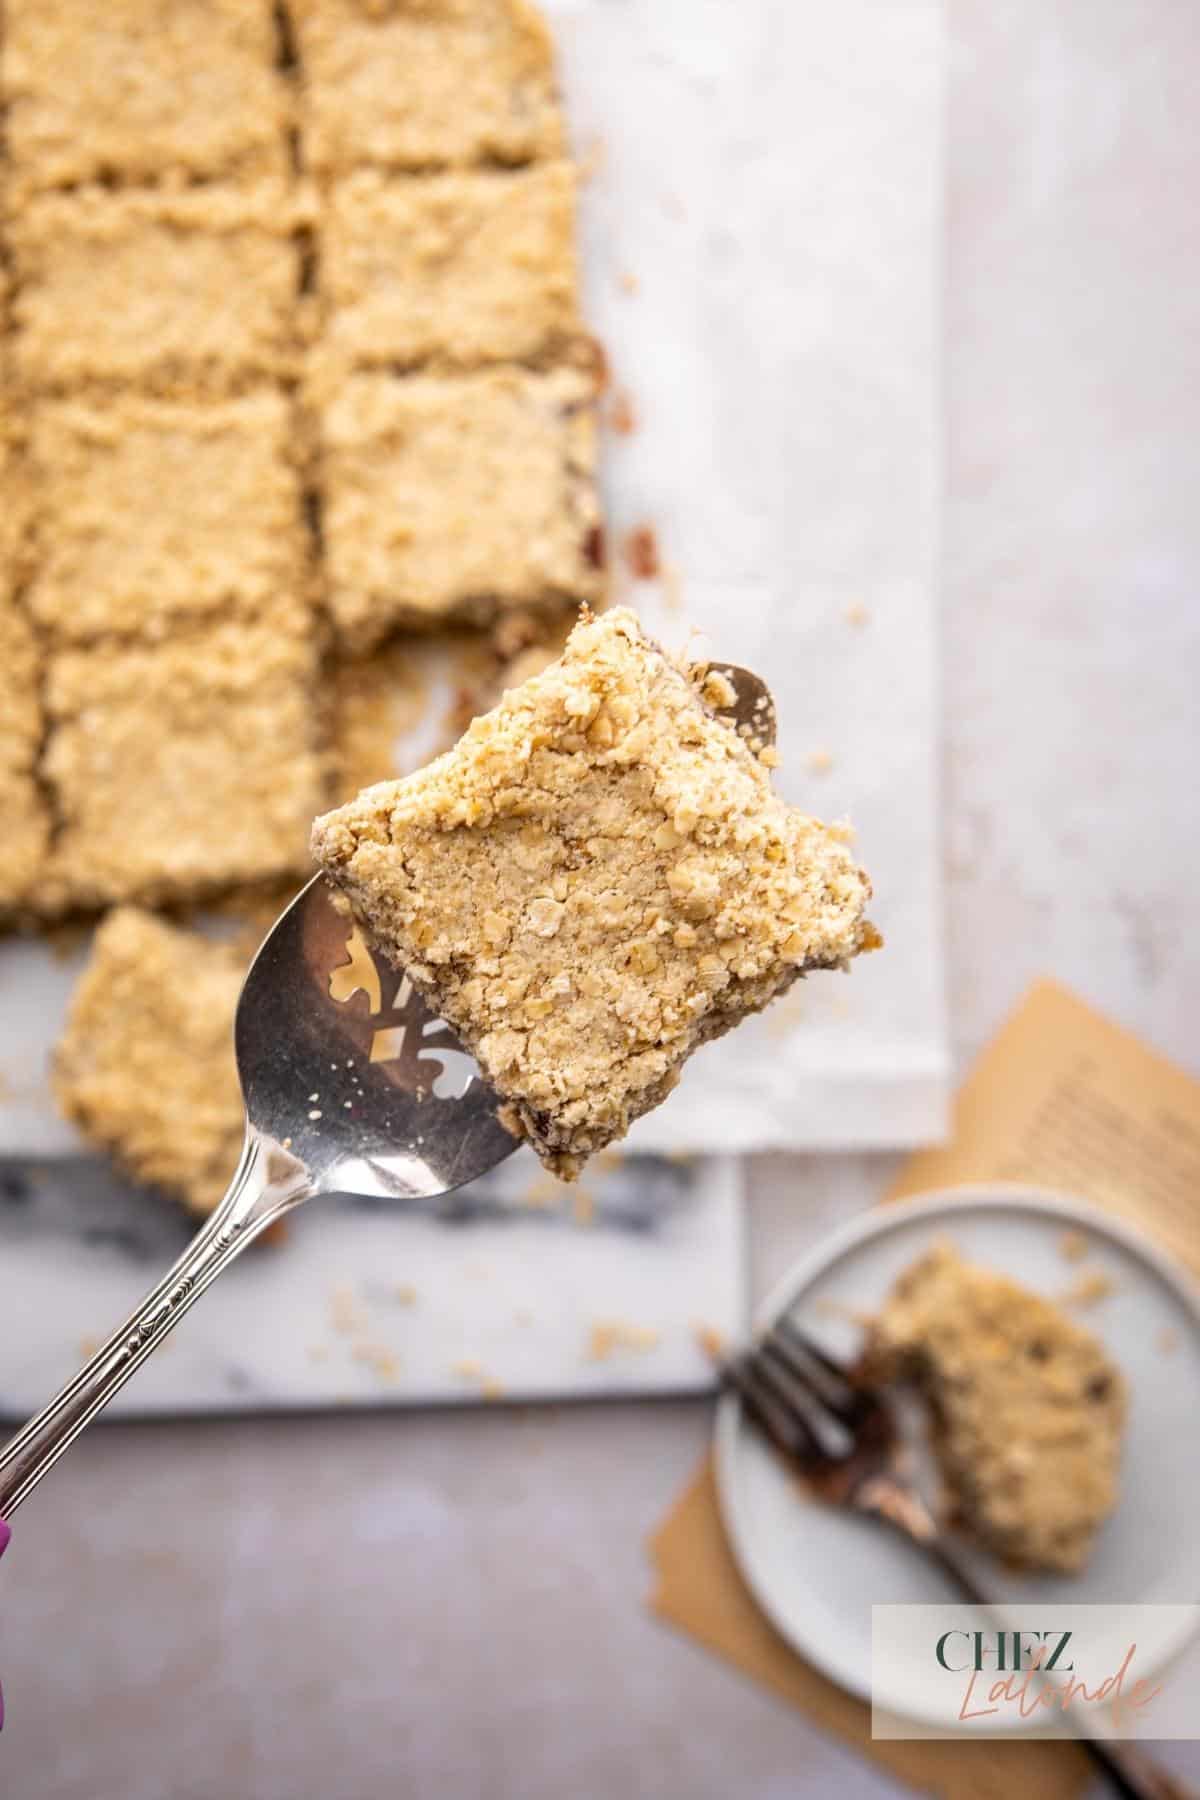
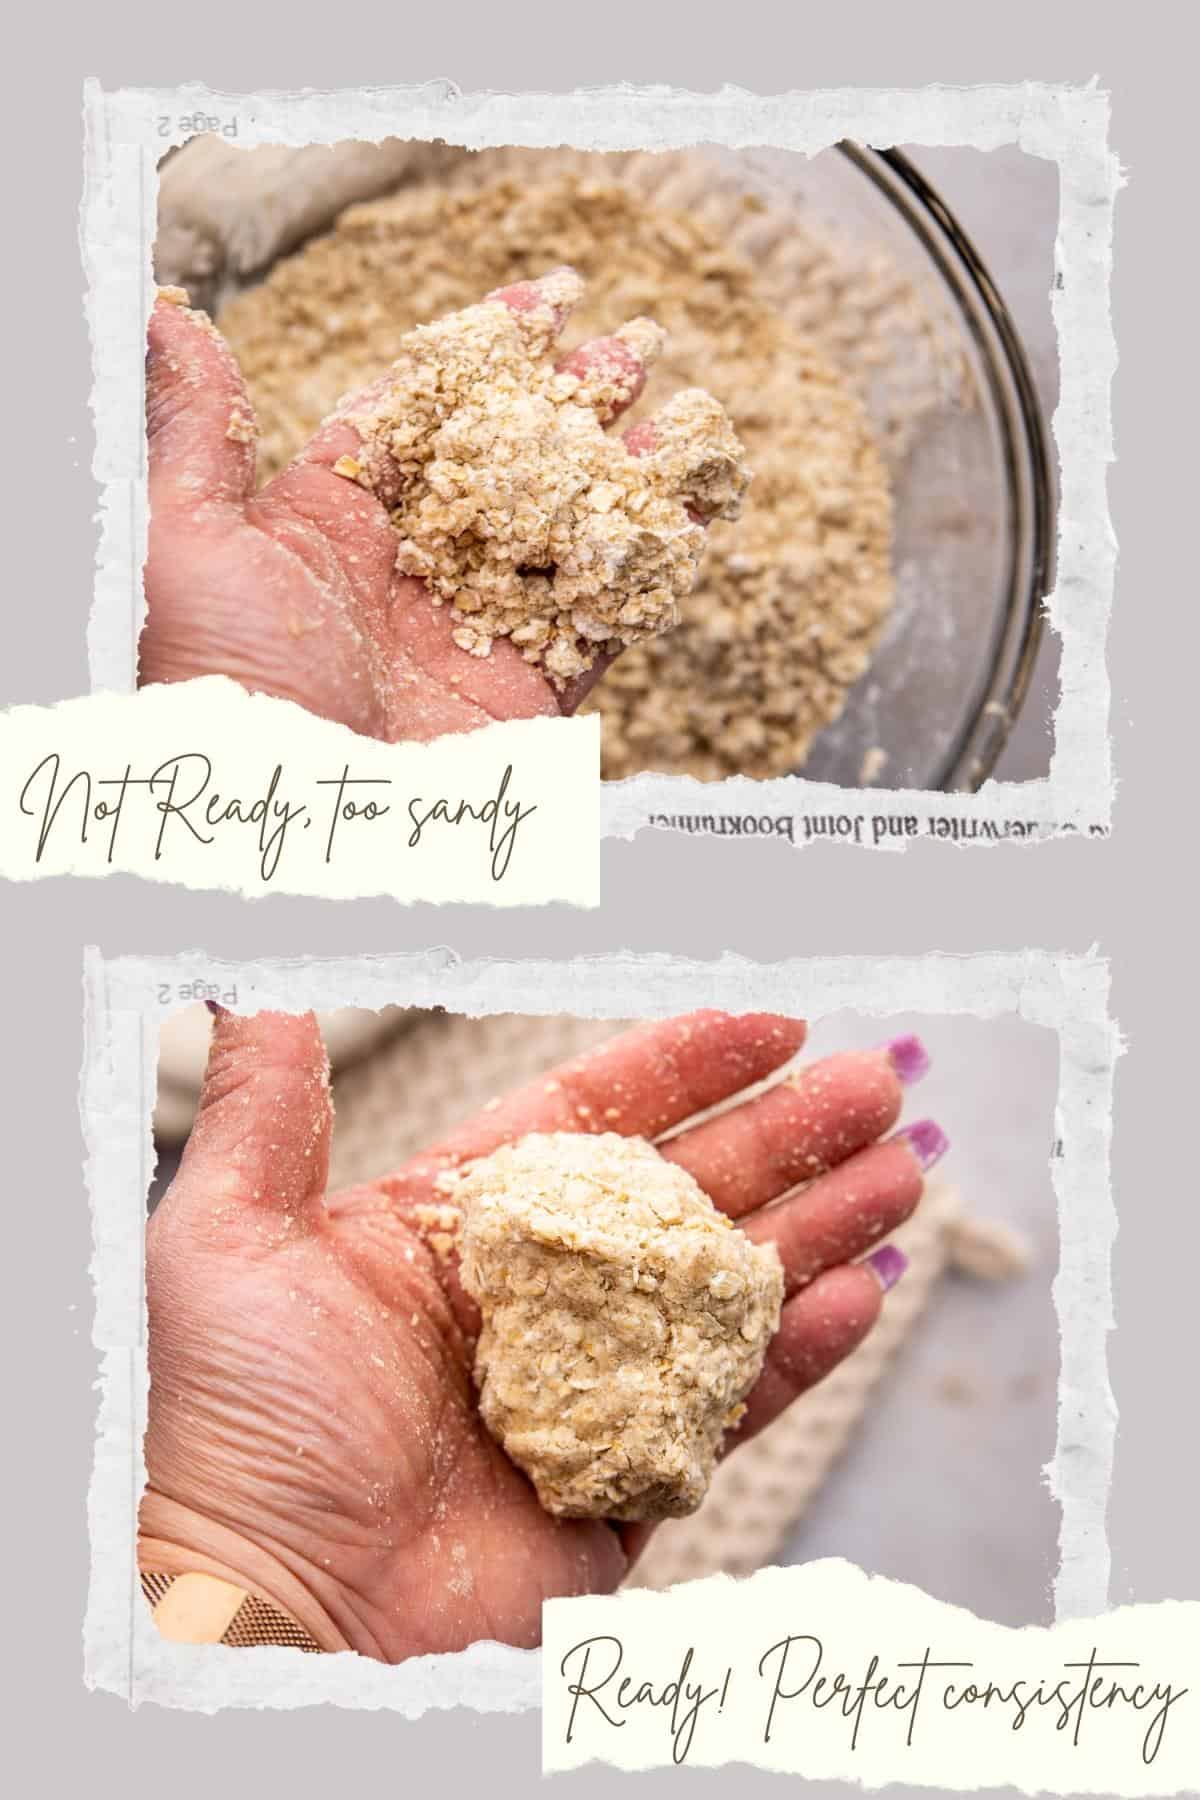
Step 5 – Incorporate room-temperature unsalted butter into the dry mixture using a fork or pastry cutter to create a crumbly texture. Test the mixture by picking up a small amount with your hand. If it is still sandy, add one tablespoon of butter until the mixture forms a dough-like consistency.
Assembling and baking the squares
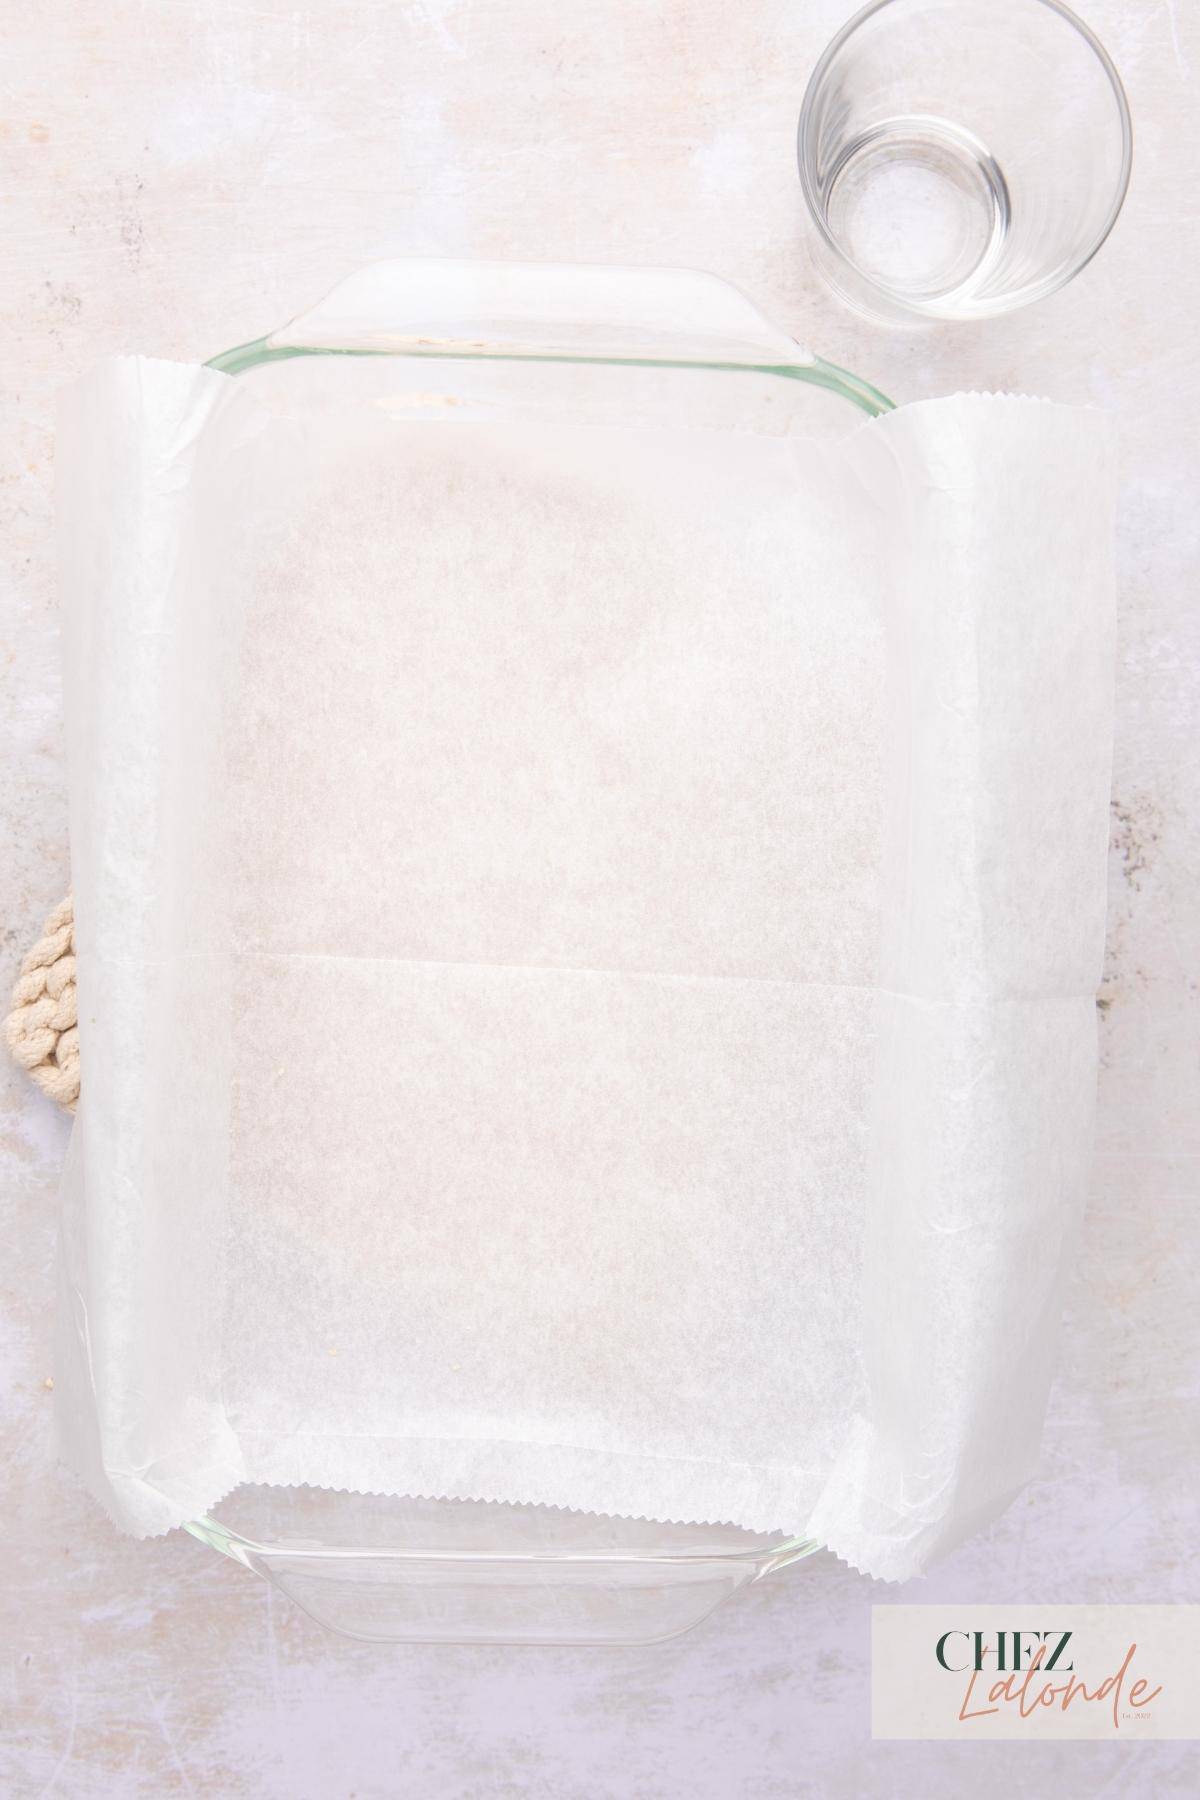
Step 6 – First, preheat the oven to 350F. Prepare an 8×12 baking dish by lining it with parchment paper or coating it with non-stick baking spray.
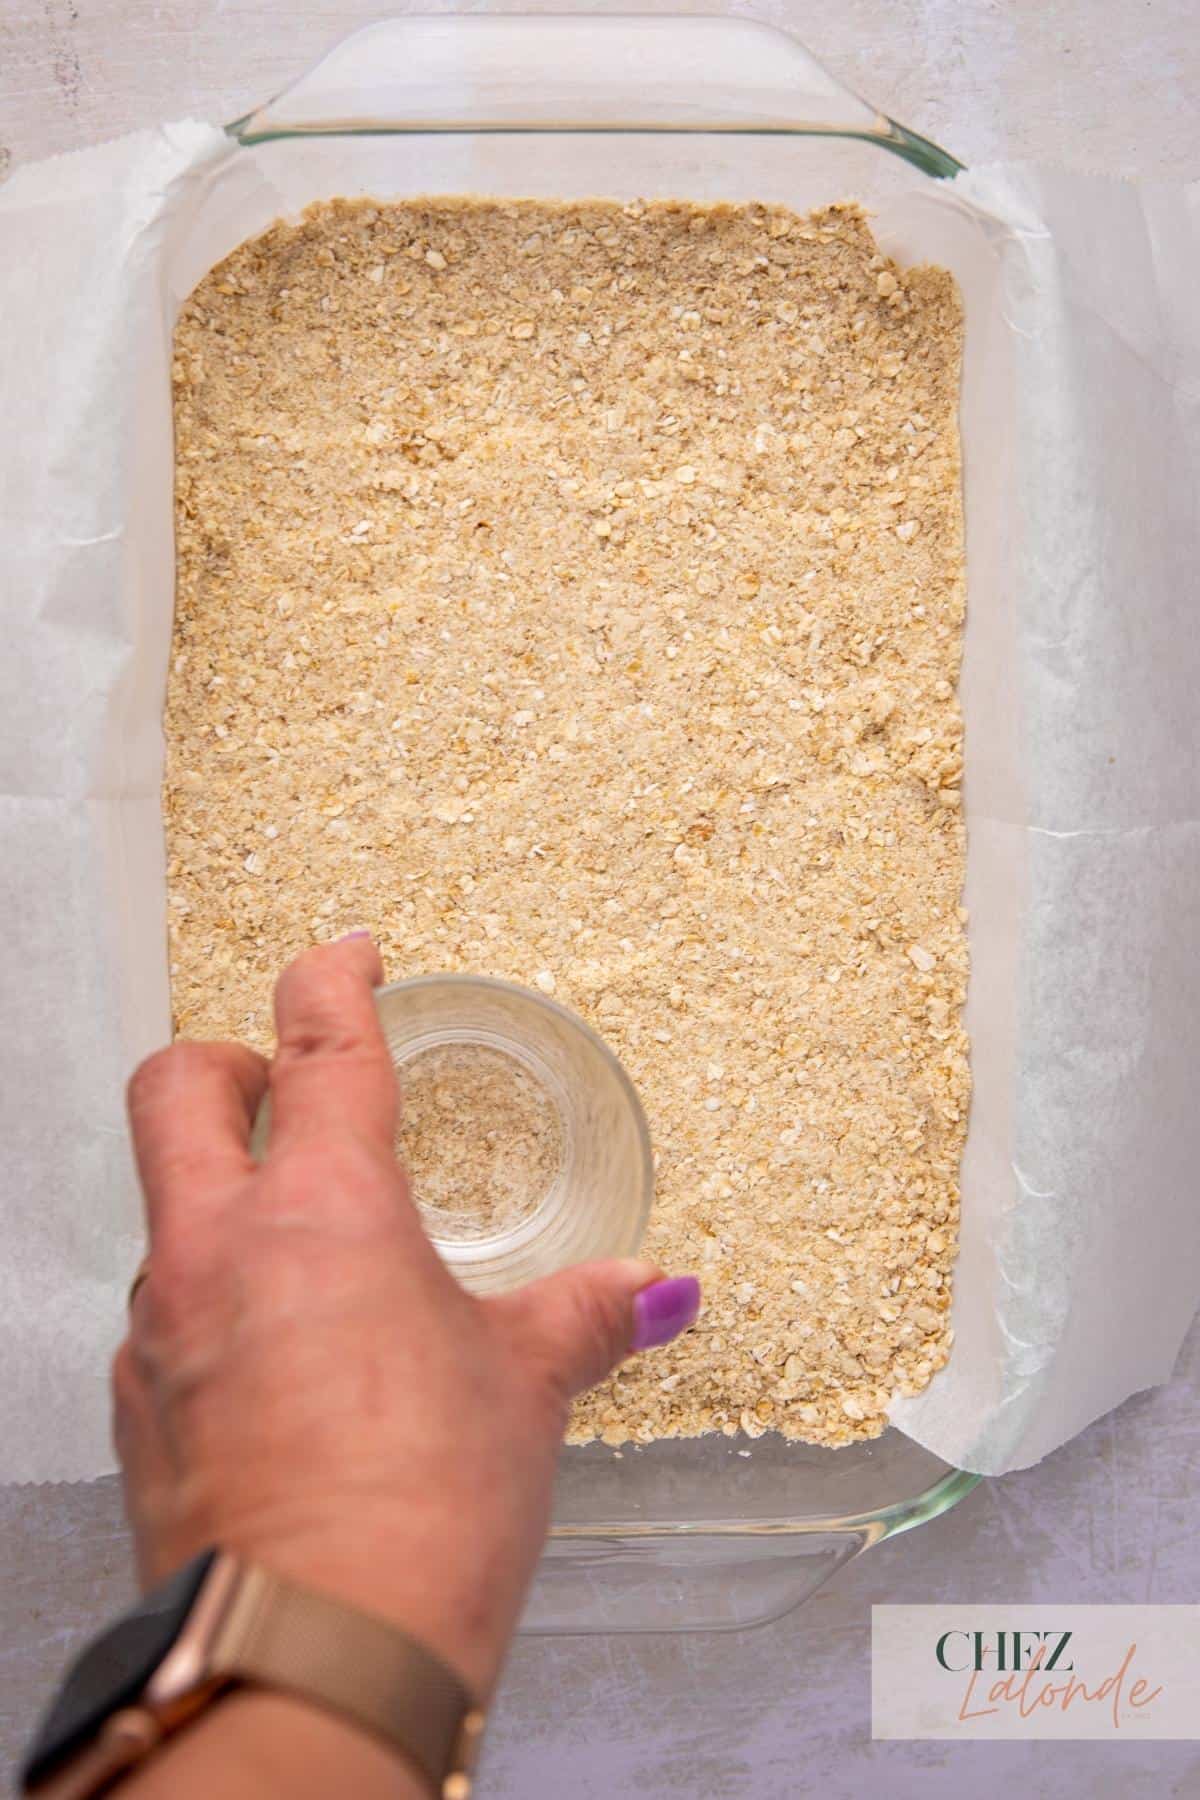
Step 7 – Add half of the oatmeal mixture into the tray, spreading it evenly. Then, pack the layer tightly with your palm or the bottom of a glass, ensuring the oatmeal mixture is compacted.
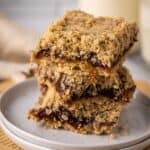
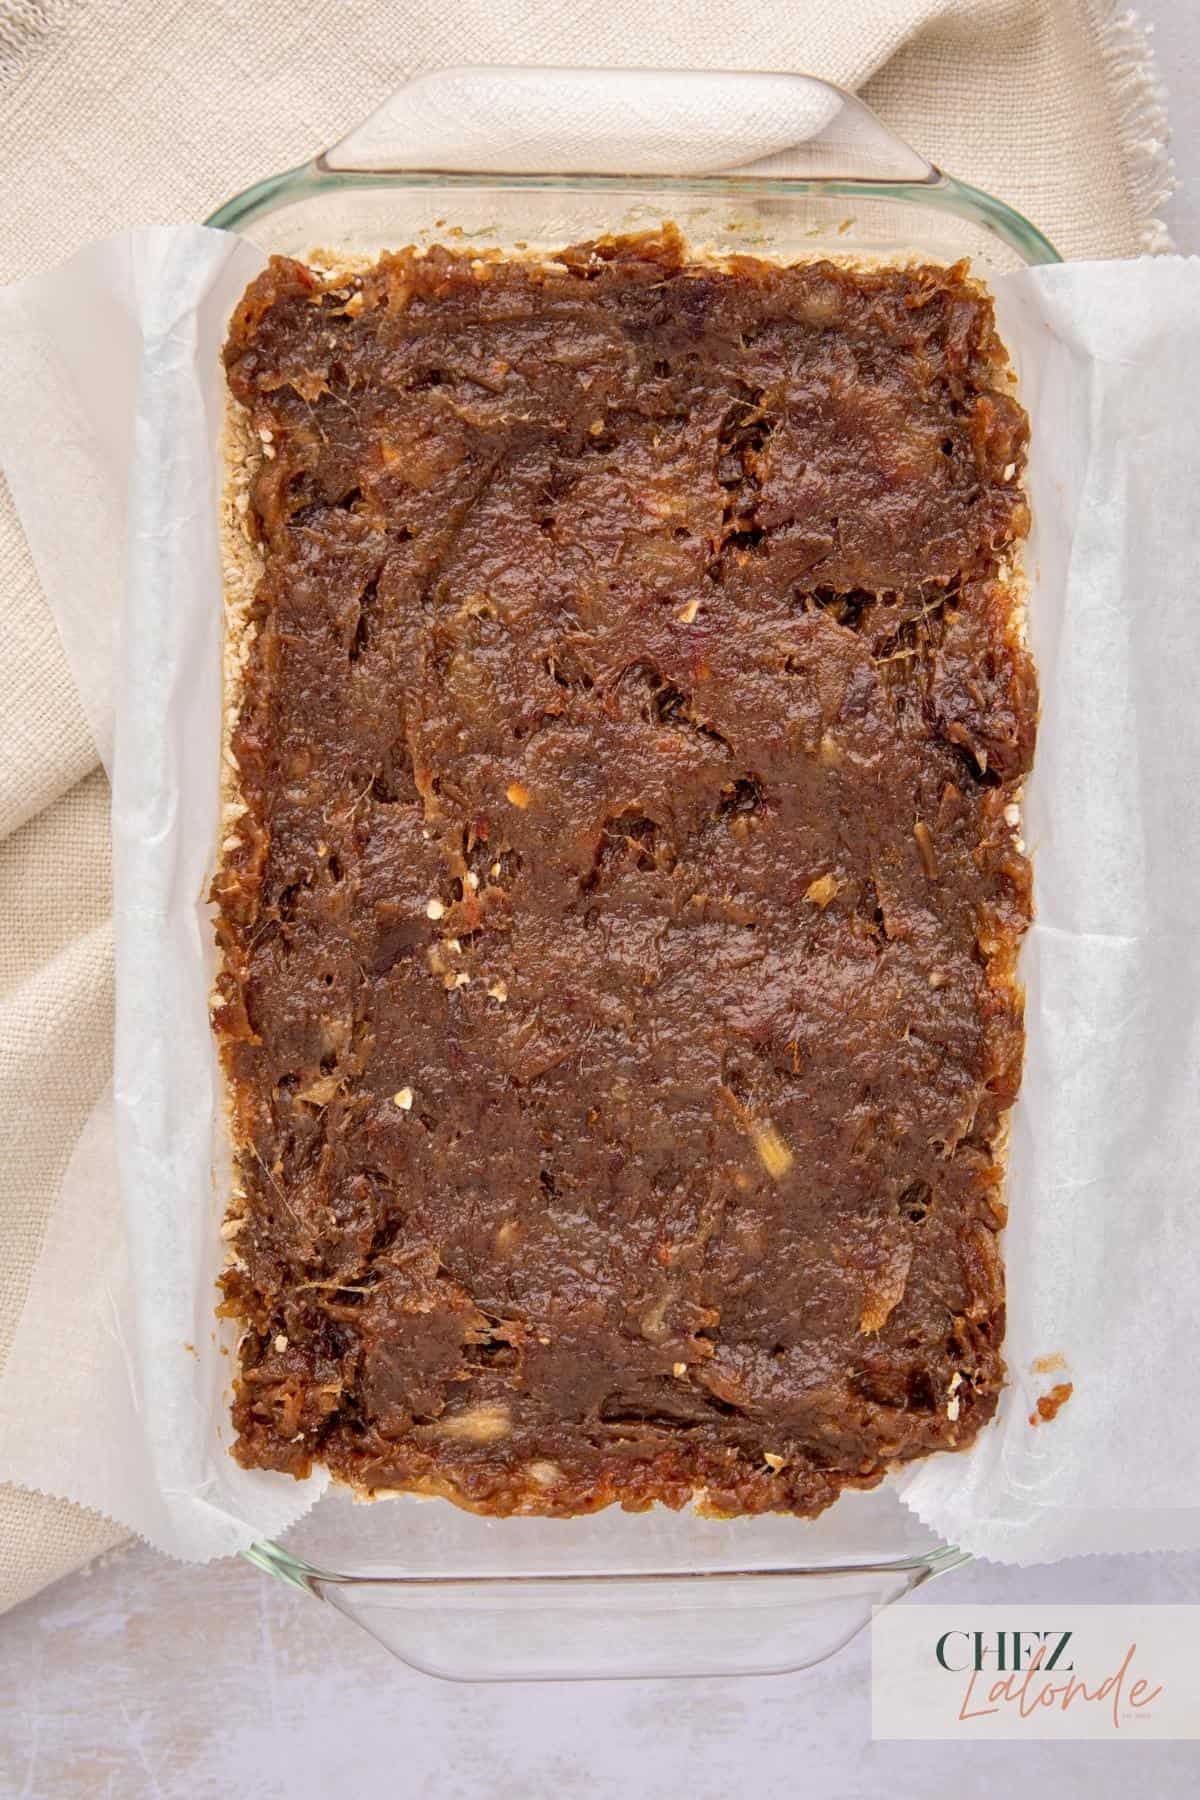
Step 8 – Spread the date filling evenly on top of the oatmeal mixture layer using a spatula.

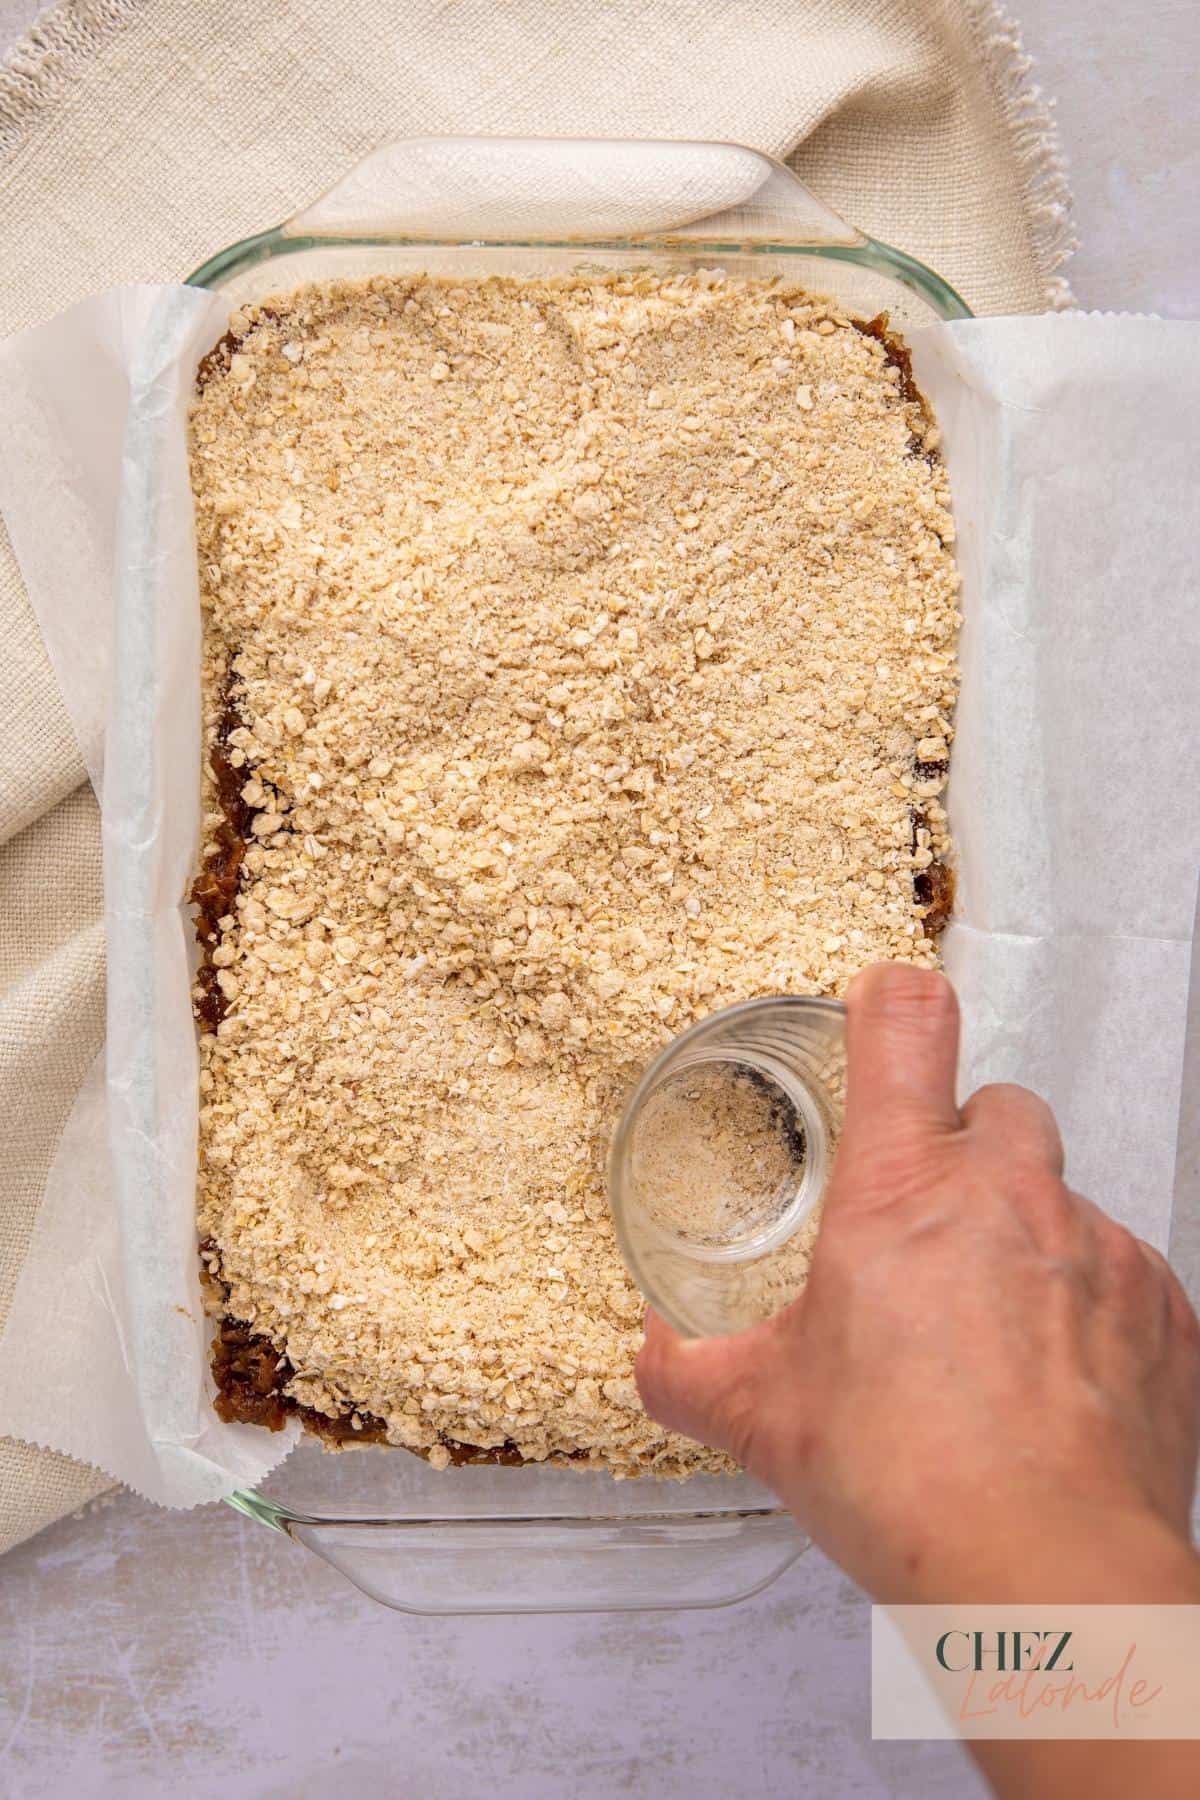
Step 9 – Using a spatula, spread the remaining oatmeal mixture on top of the date-filling layer, making sure it is evenly distributed. Press firmly with your palm or the bottom of a glass to pack the oatmeal tightly.
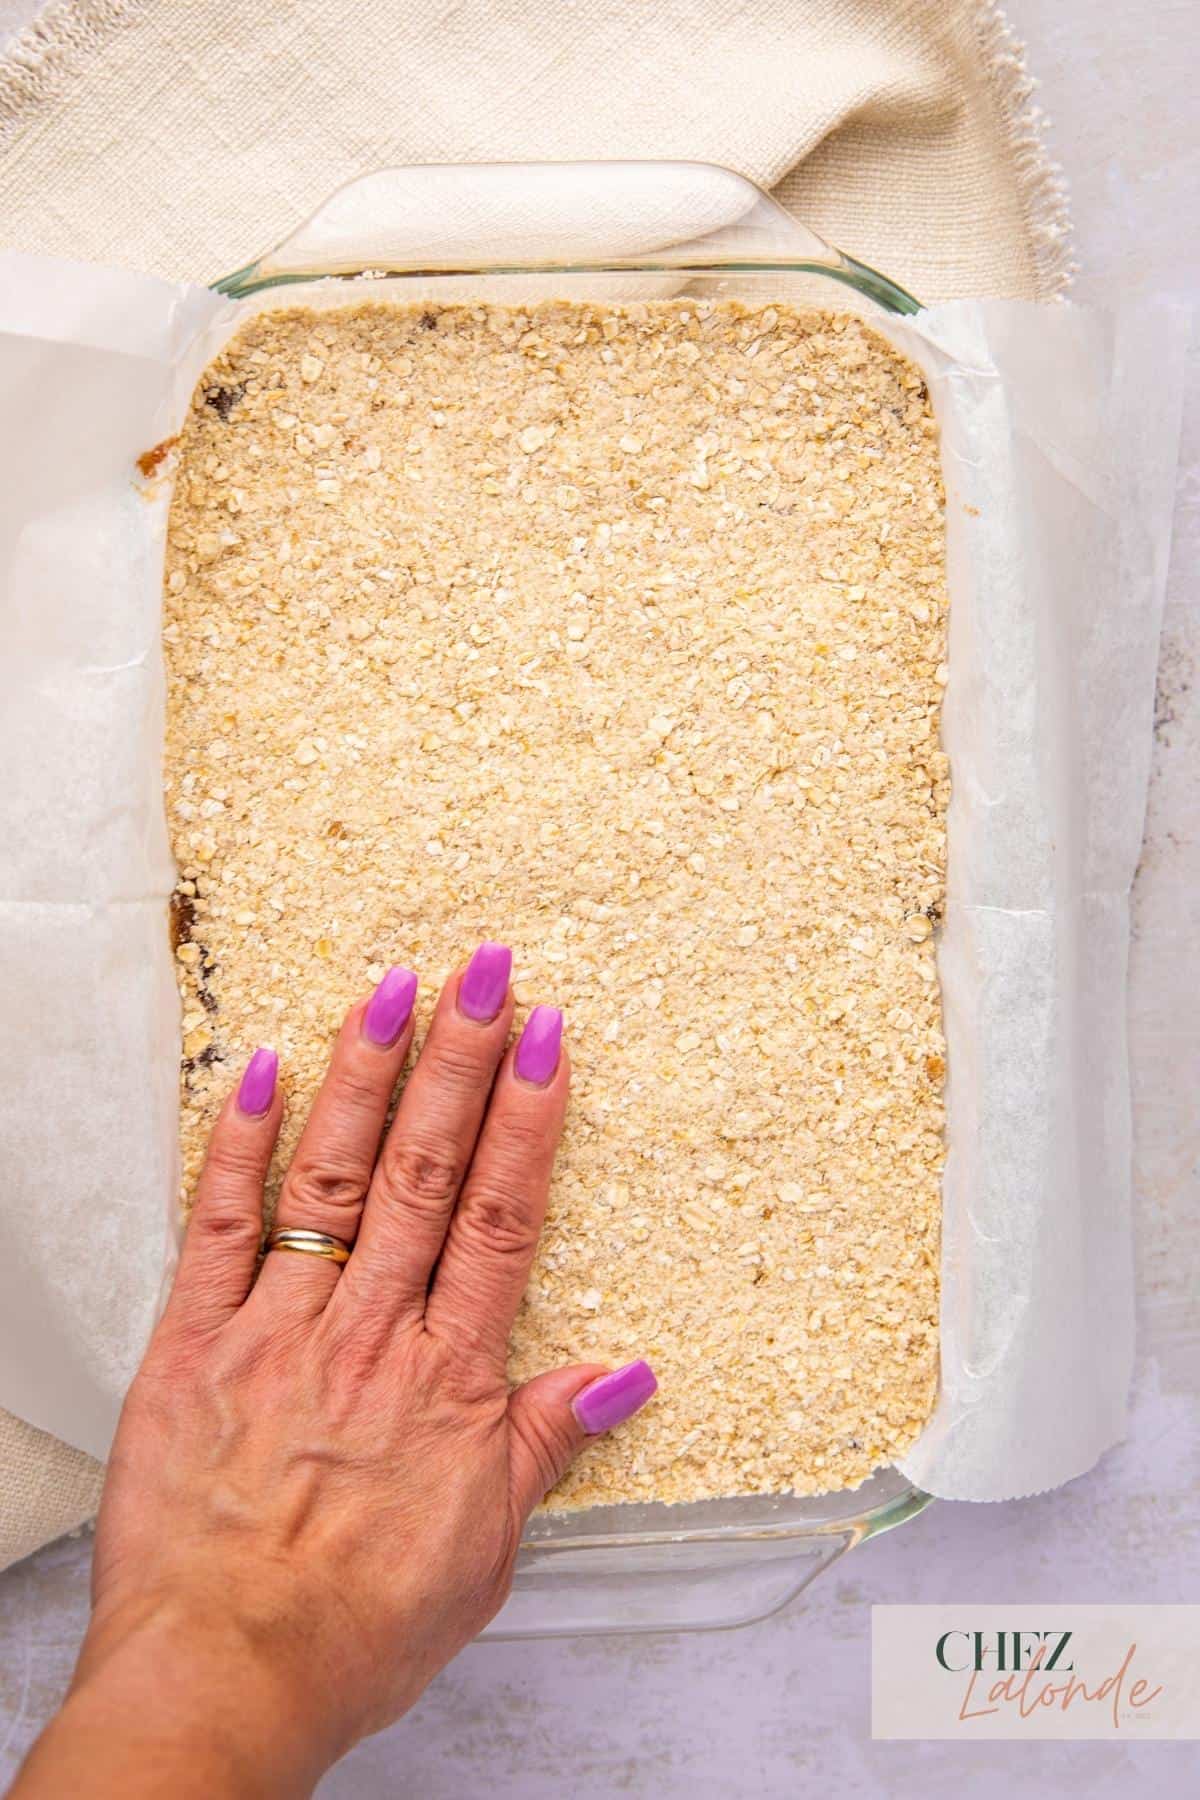
Step 10 – Once the oatmeal mixture and date filling are evenly layered in the baking dish, place it in a preheated oven and bake for 20 to 25 minutes at 350F or until the top turns golden brown.
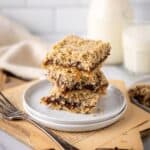
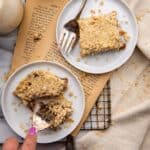
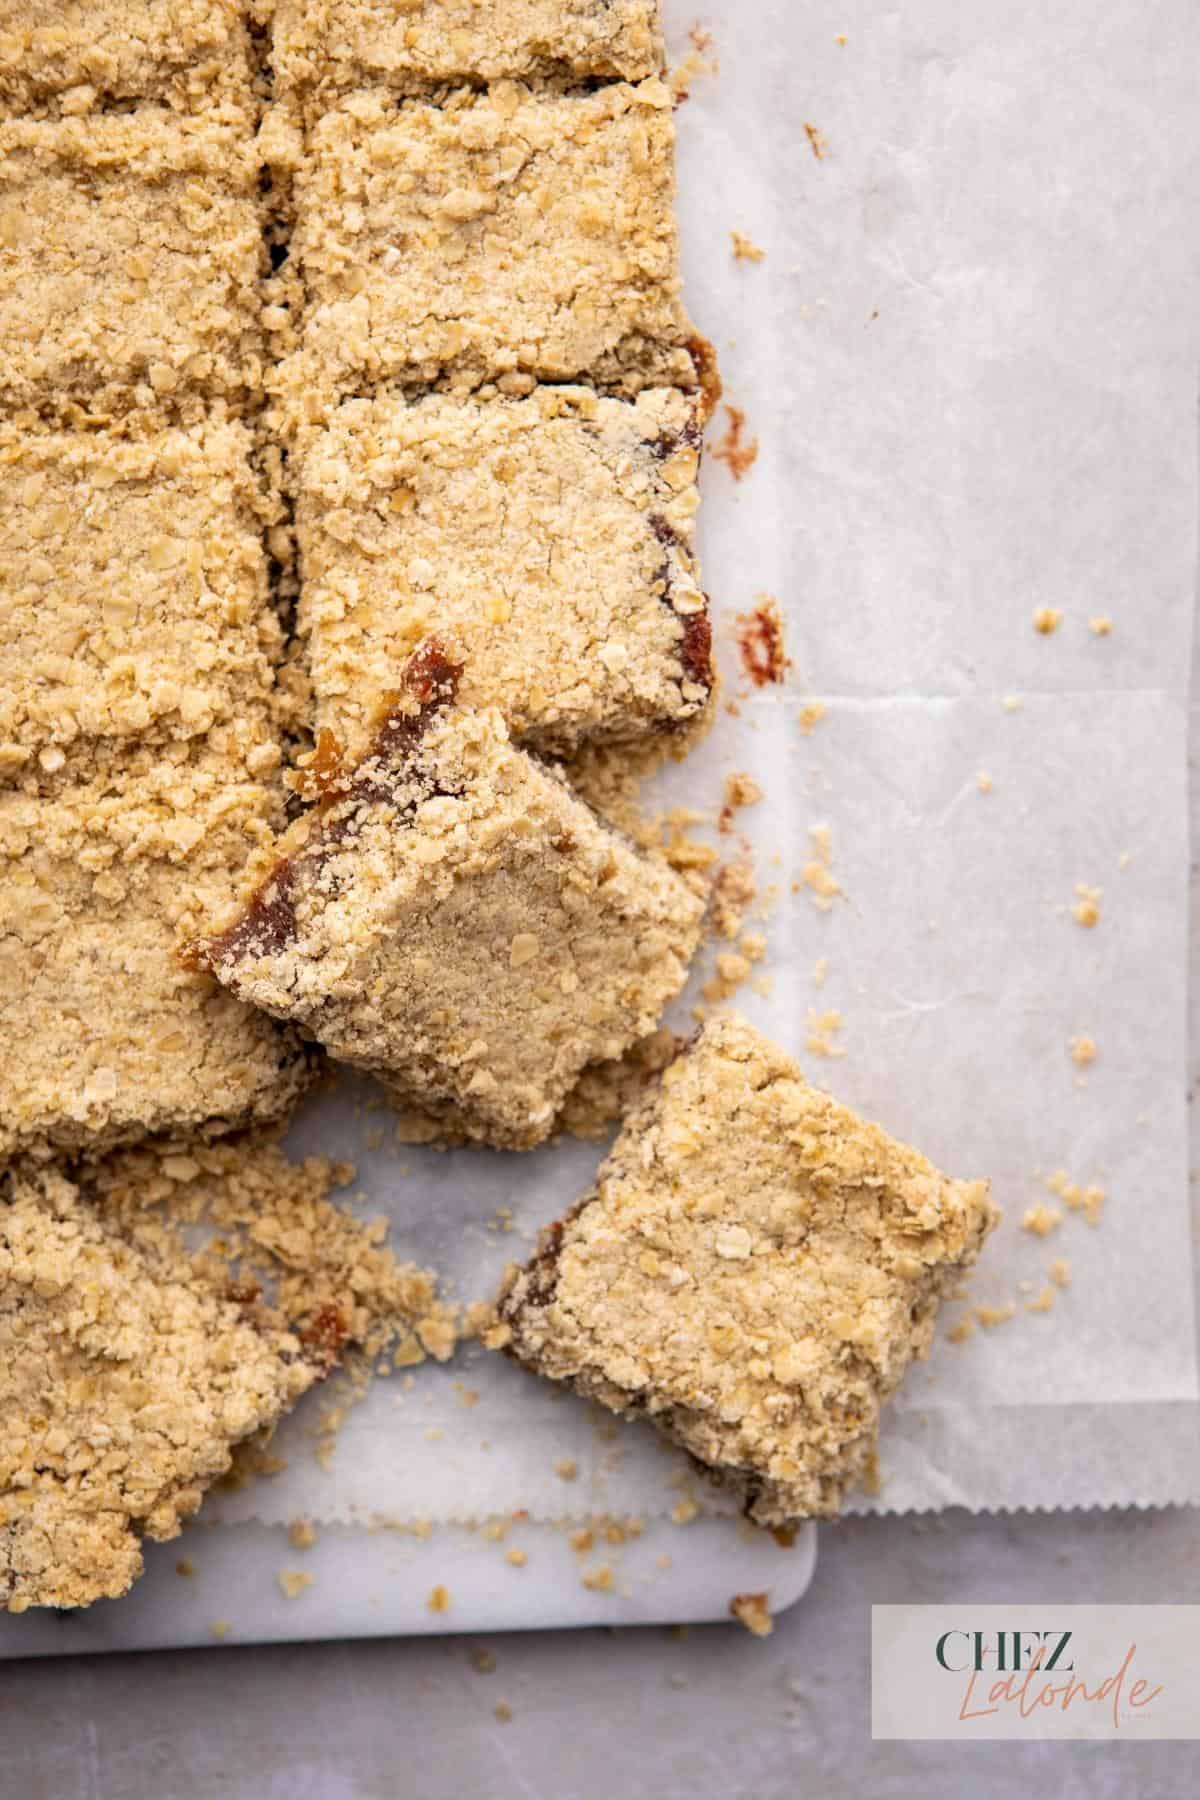
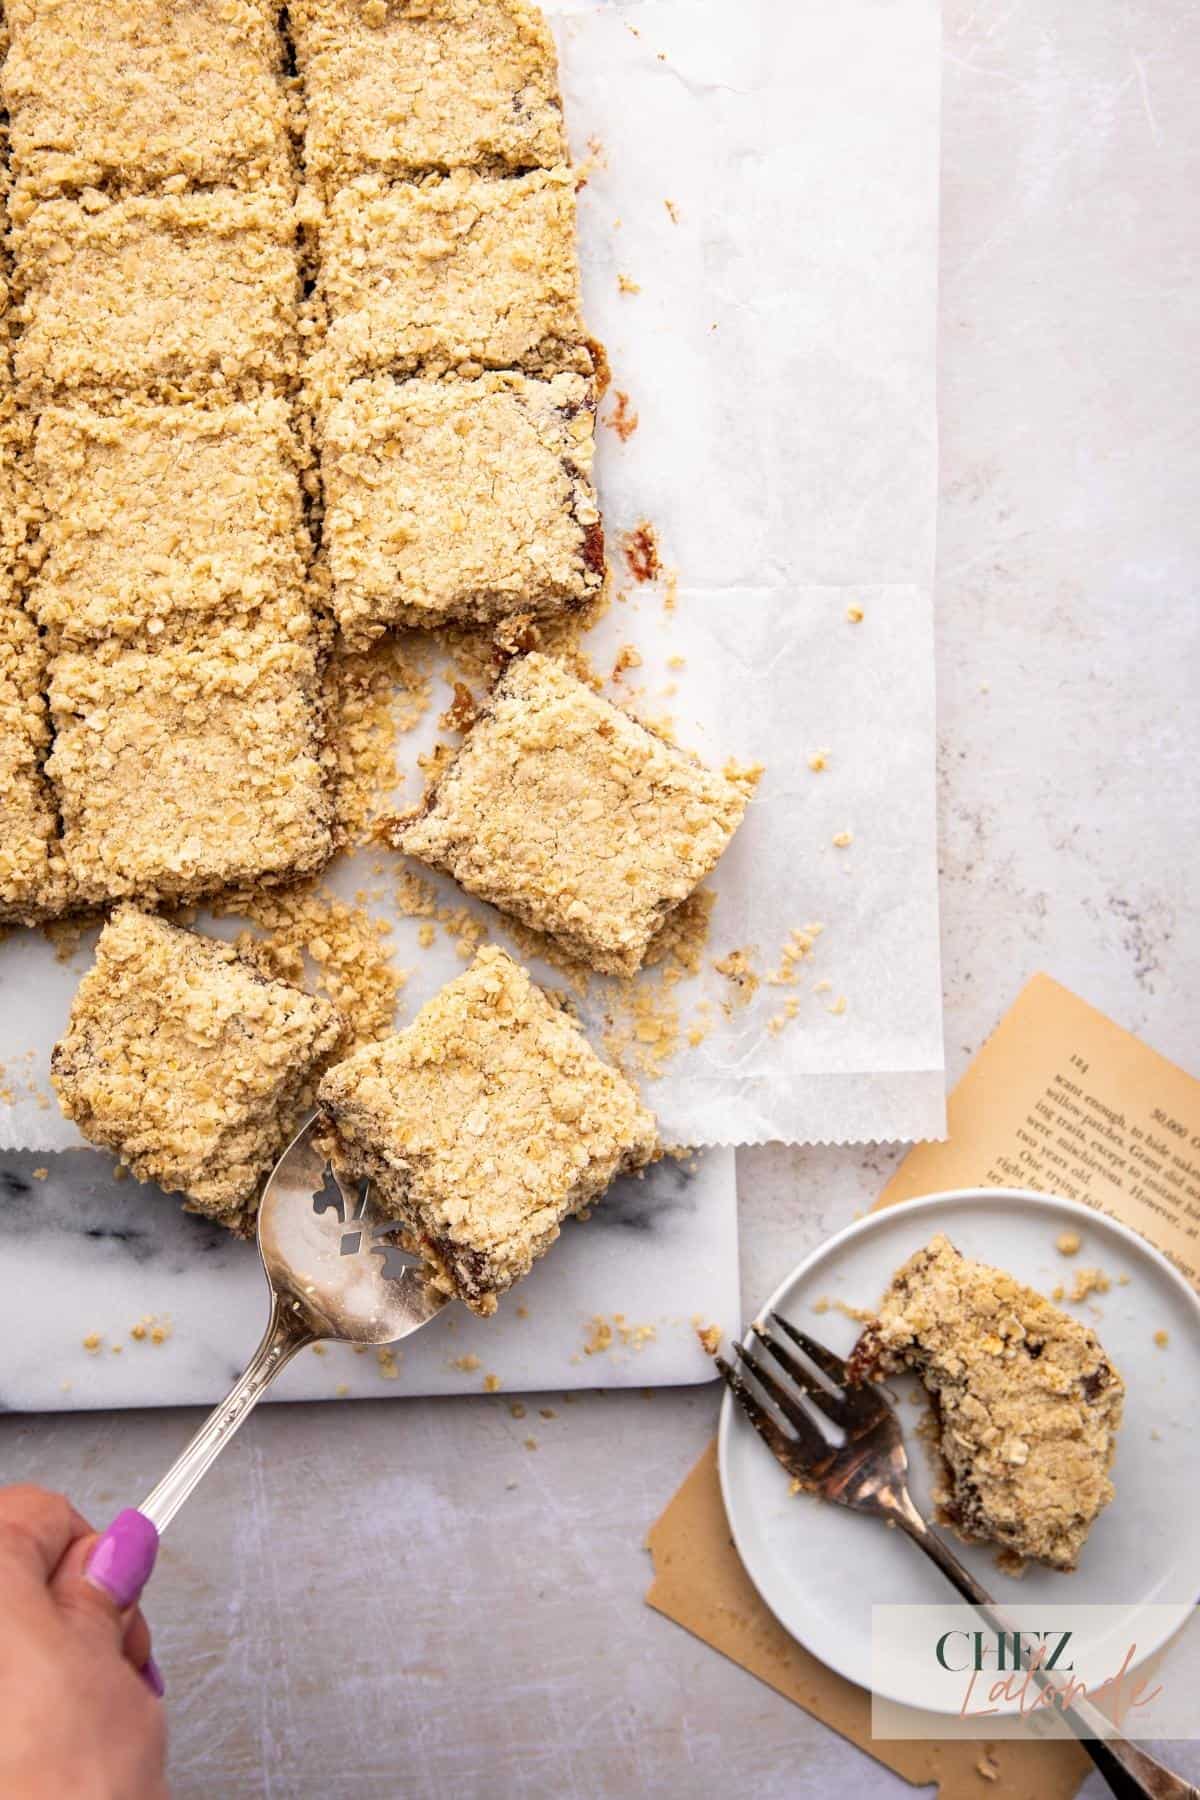
Step 11 – After baking, allow the date squares to rest for at least 15 minutes to let the crust and filling settle before cutting them into small squares. Serve and enjoy with a hot cup of tea, coffee, or milk.
Recipe Notes & Tips:
- Since dates are naturally sweet, only a small amount of extra sugar is needed in this recipe. The listed quantity has been tried and tested to achieve the perfect level of sweetness.
- To check if your oatmeal mixture is thoroughly combined, squeeze a small amount in your hand. If it still feels sandy, gradually add more softened butter, one tablespoon at a time, until it reaches a firm dough consistency, like the one in the picture below.
- If you want a thicker date filling, add extra dates according to your preference. This will require more water when cooking it in the microwave. I recommended adding a quarter cup of water to prevent the filling from becoming too watery.
- My mother-in-law suggests using a potato masher instead of a food processor for the perfect old-fashioned date-filling consistency. While it may take more time and effort, using a potato masher will result in the old-fashioned, chunky consistency that is traditional for date squares. A food processor may overprocess the filling, resulting in a mushy texture.
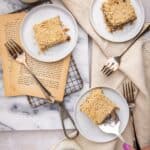
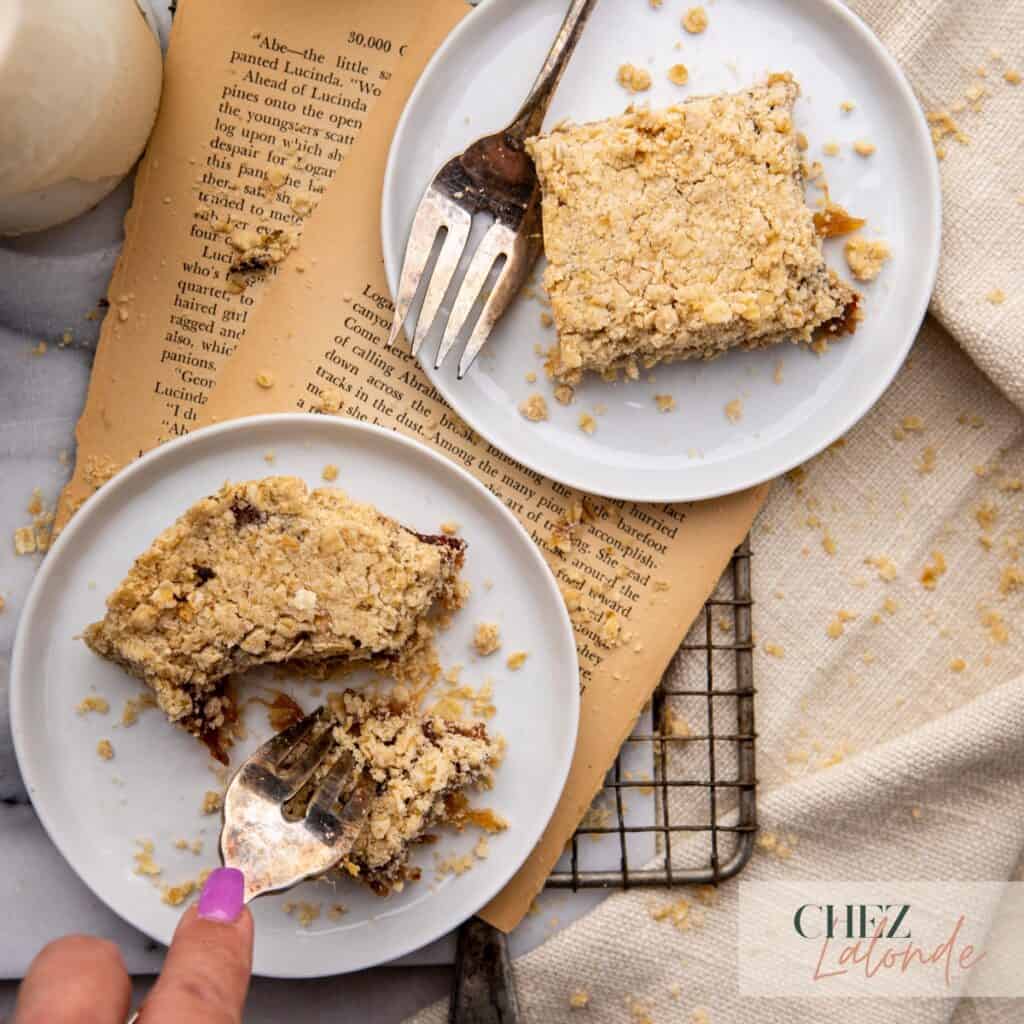
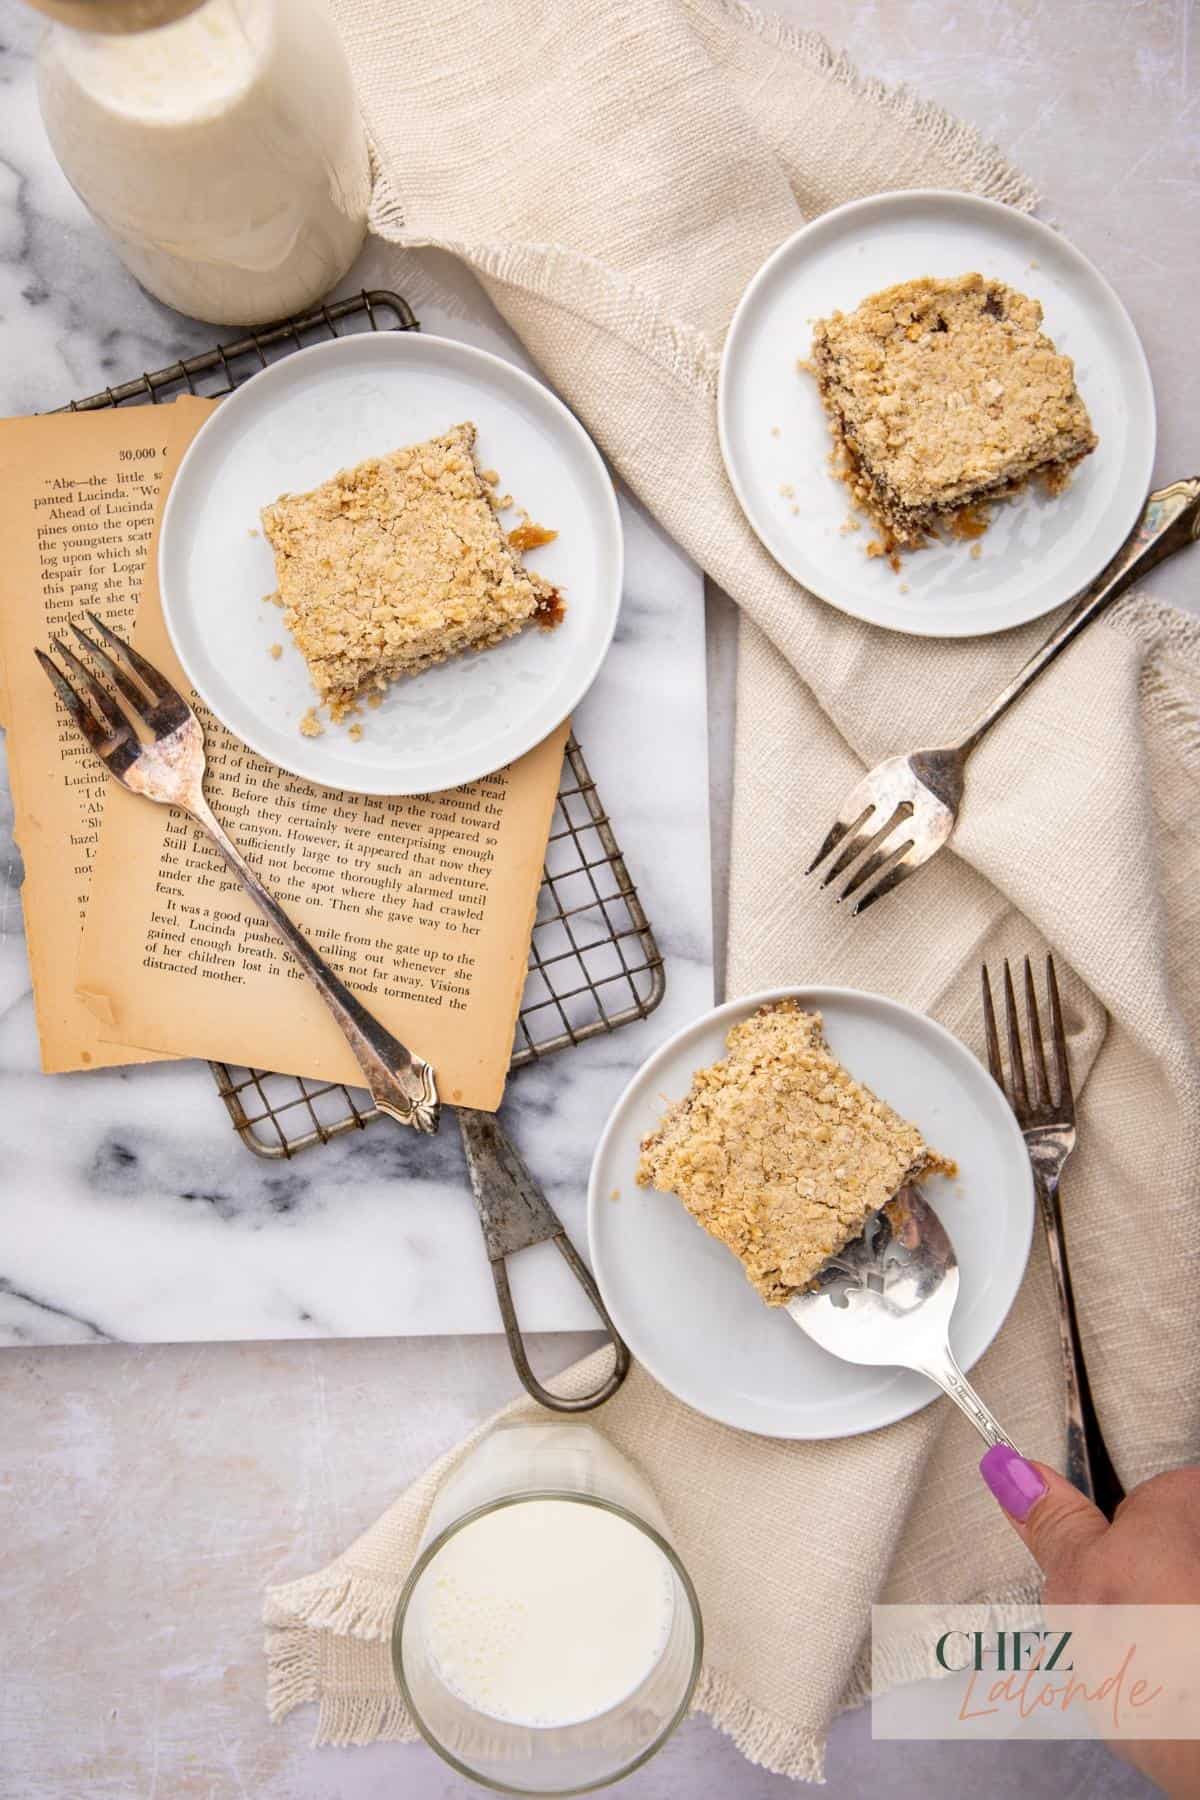
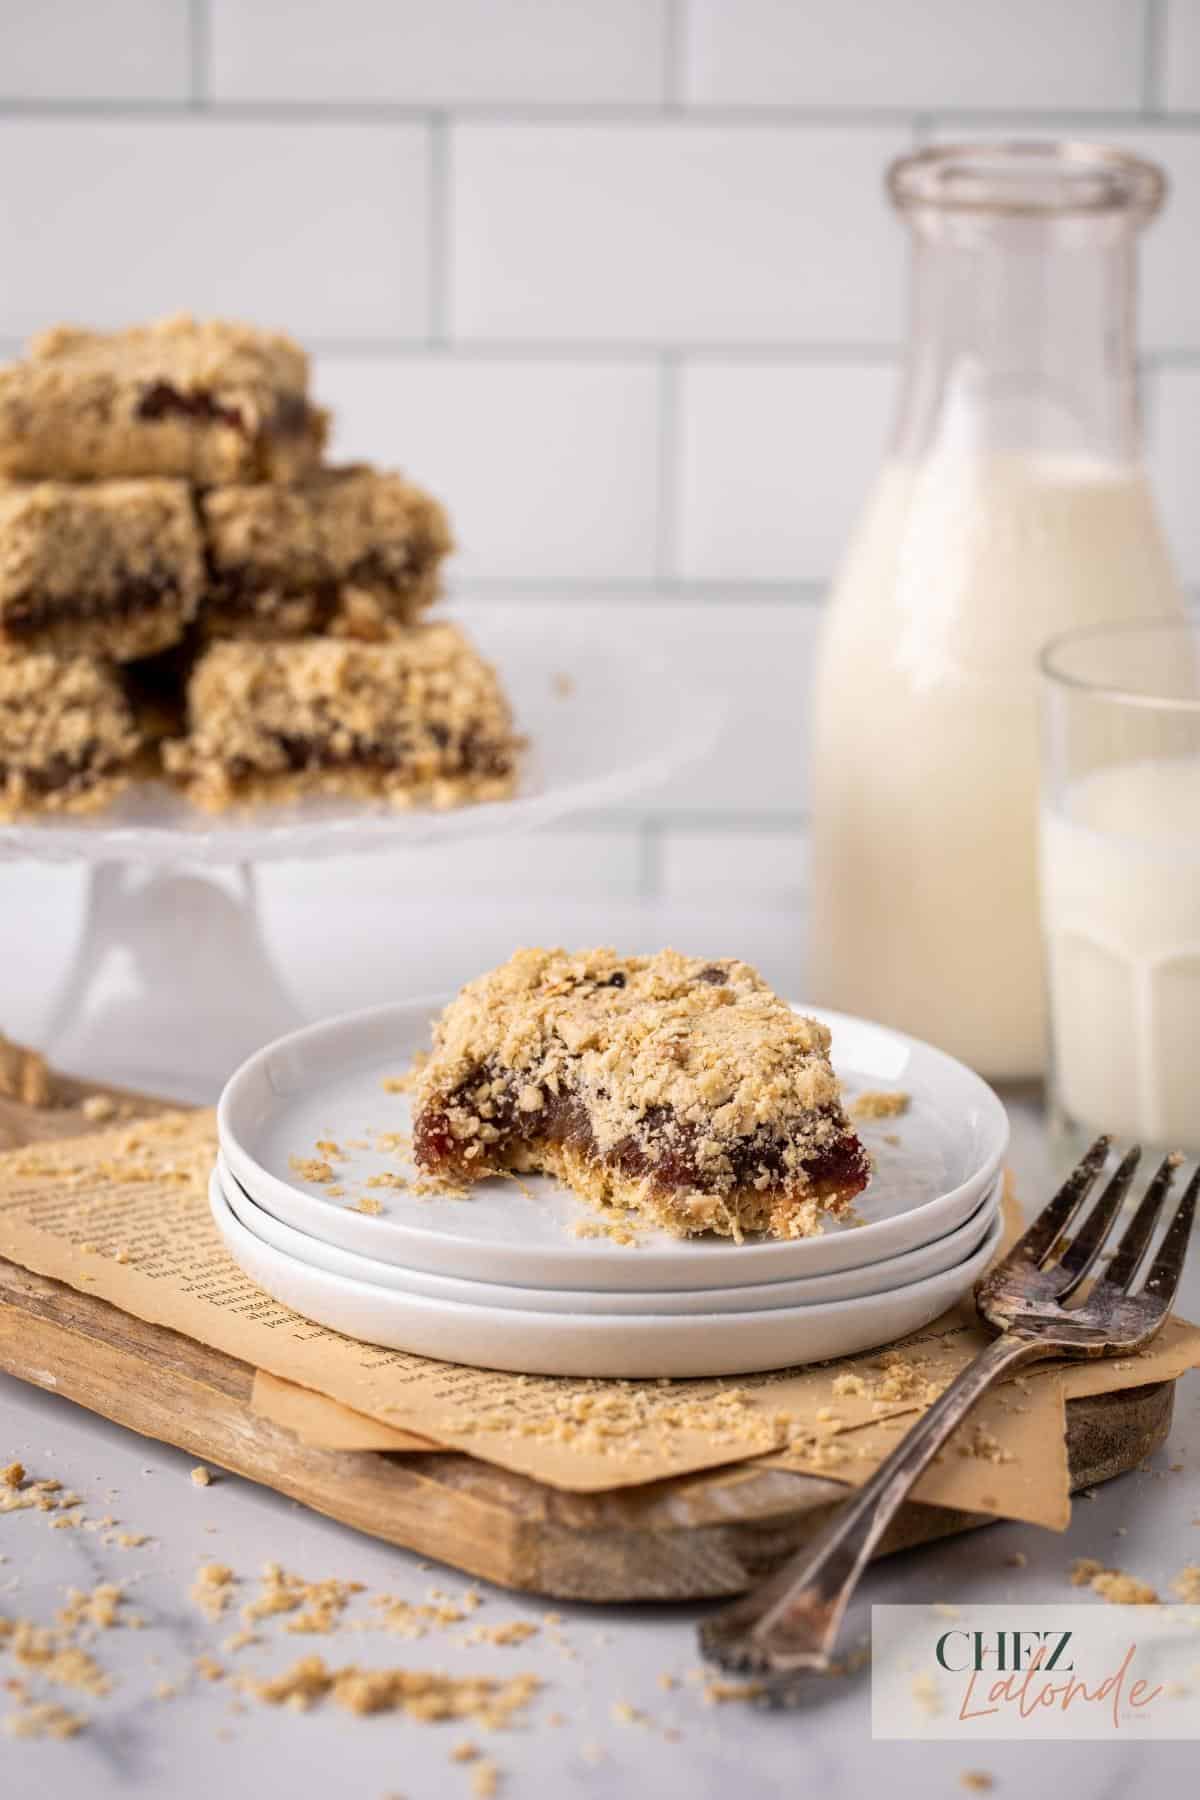
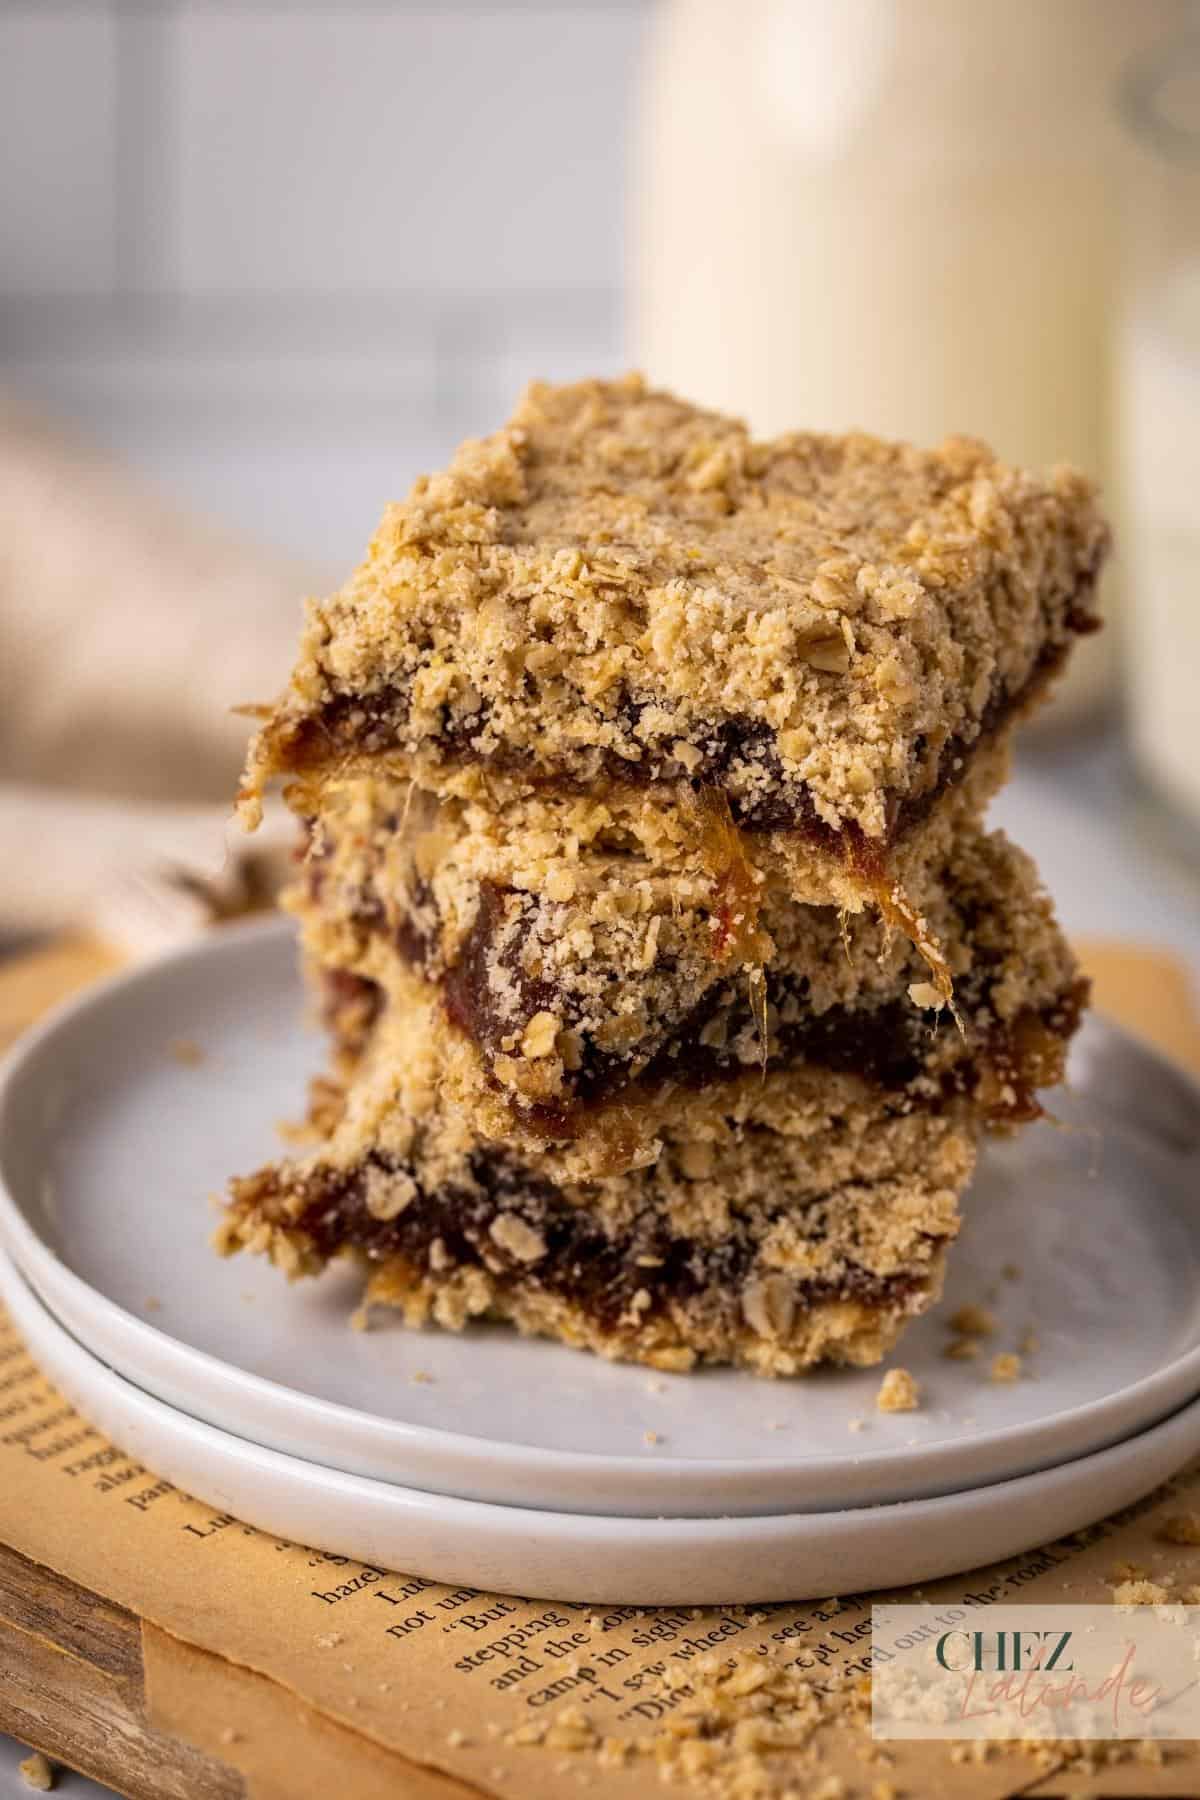
How to serve date squares?
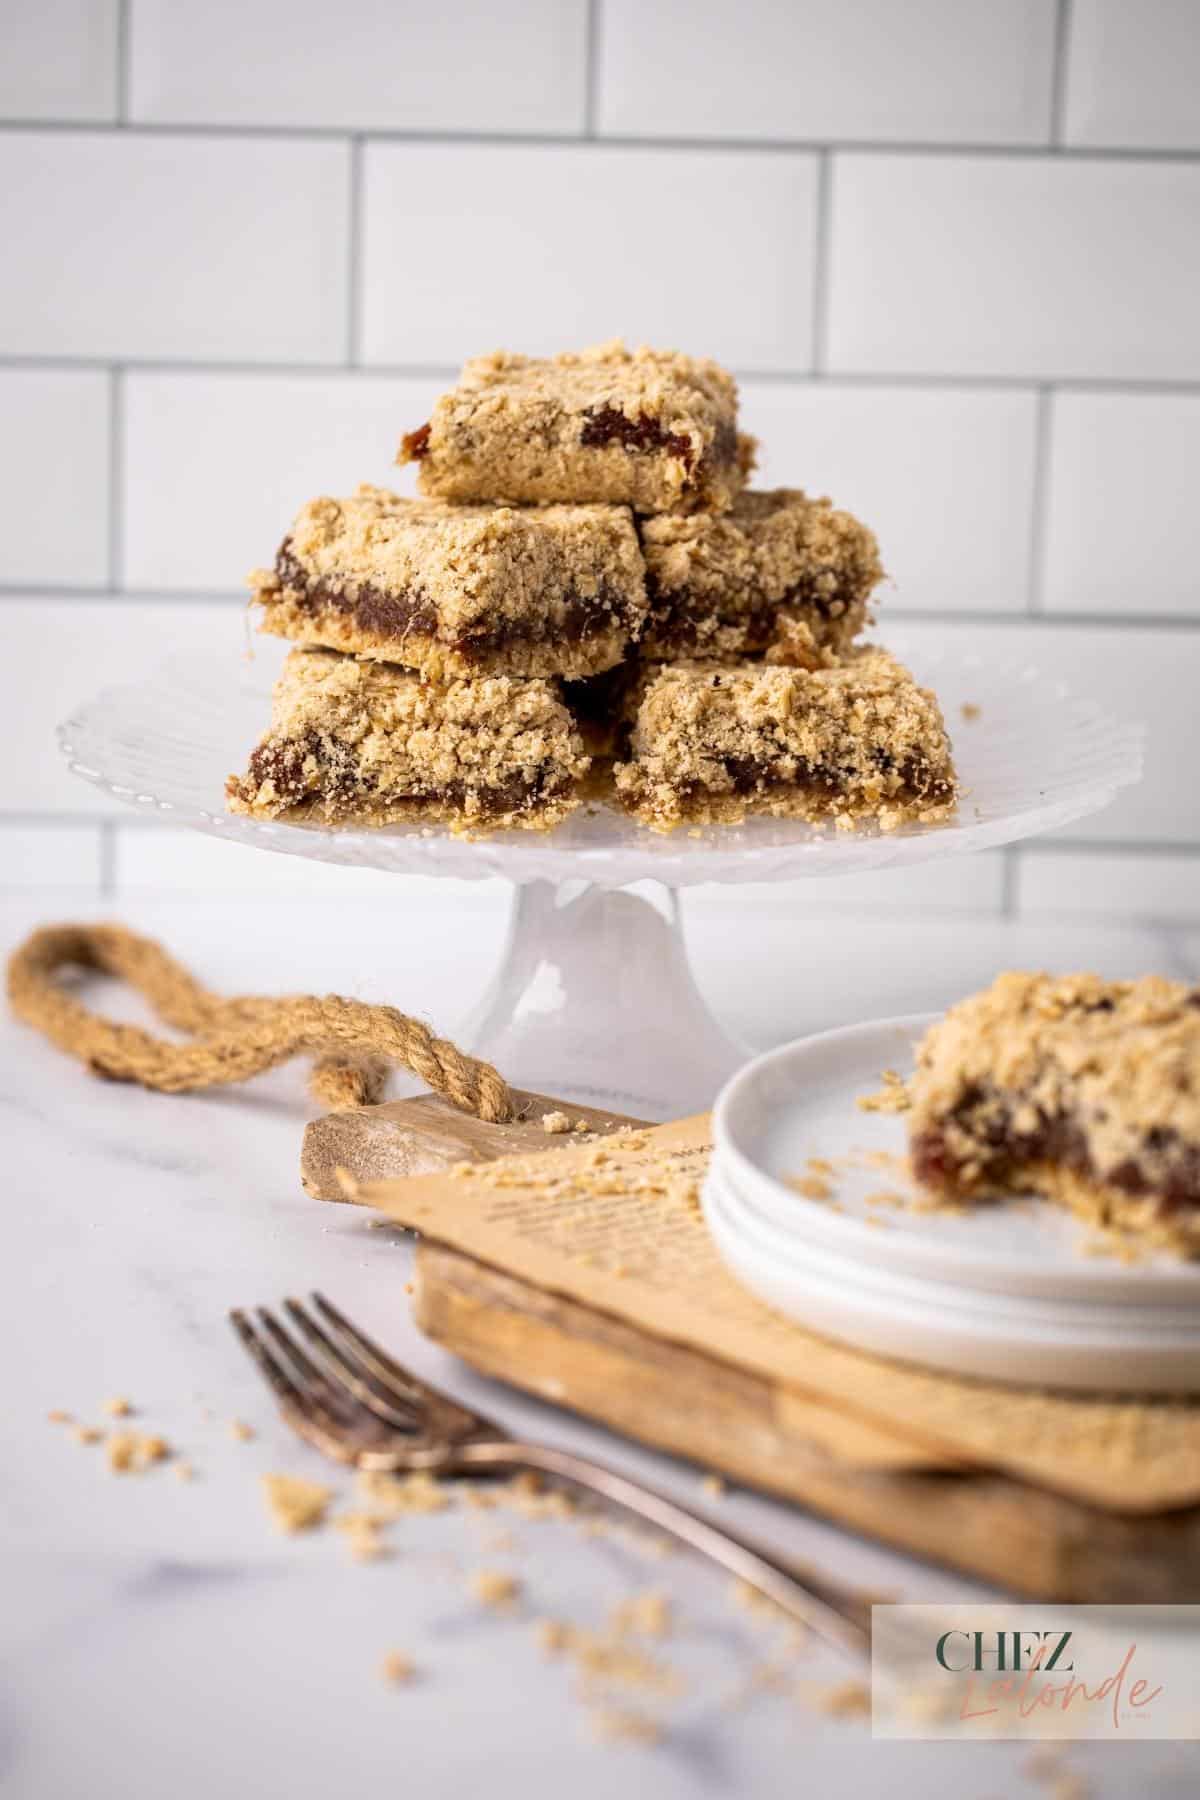
Don’t they look super tasty?
Date squares are a versatile treat that can be enjoyed warm or at room temperature and pair perfectly with coffee or tea. They make a great dessert or snack and can even be served as brunch or breakfast. For an extra indulgent touch, consider topping with whipped cream.
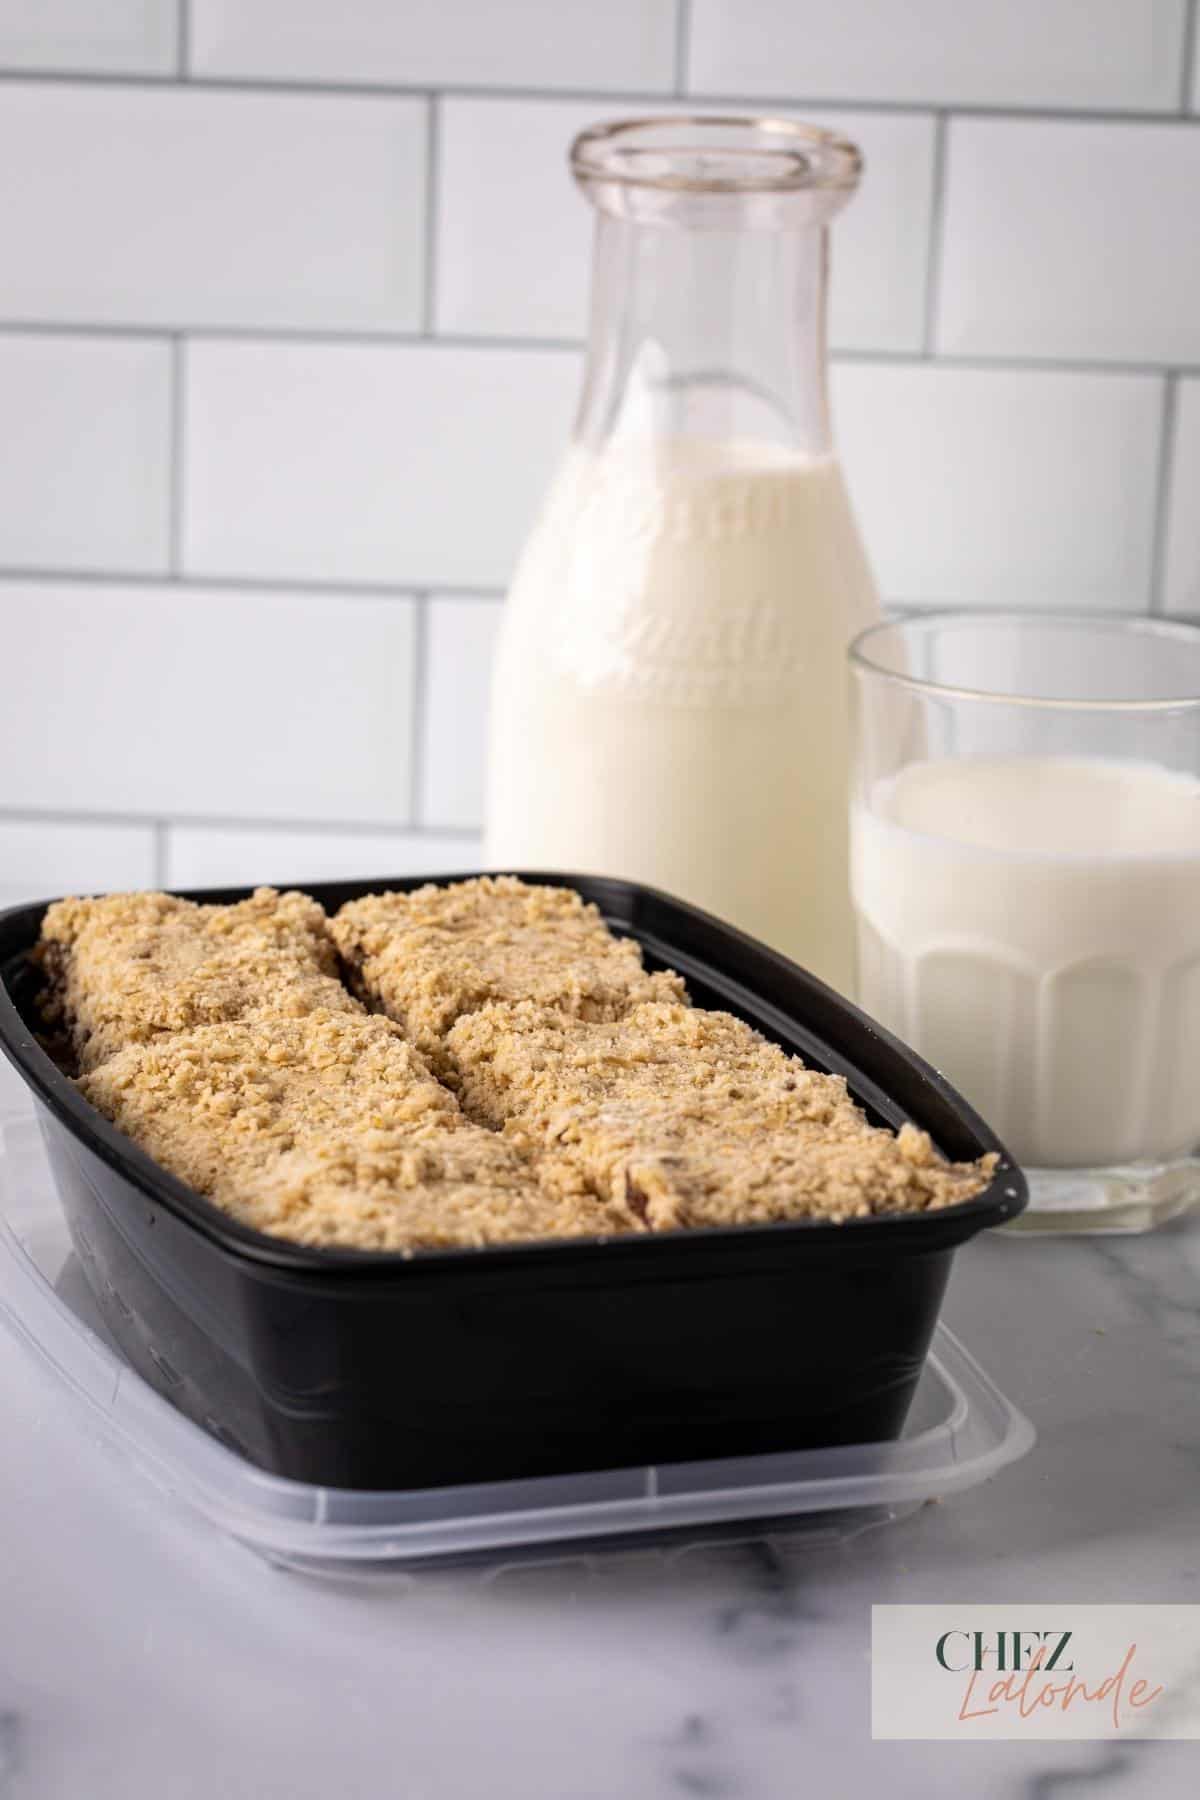
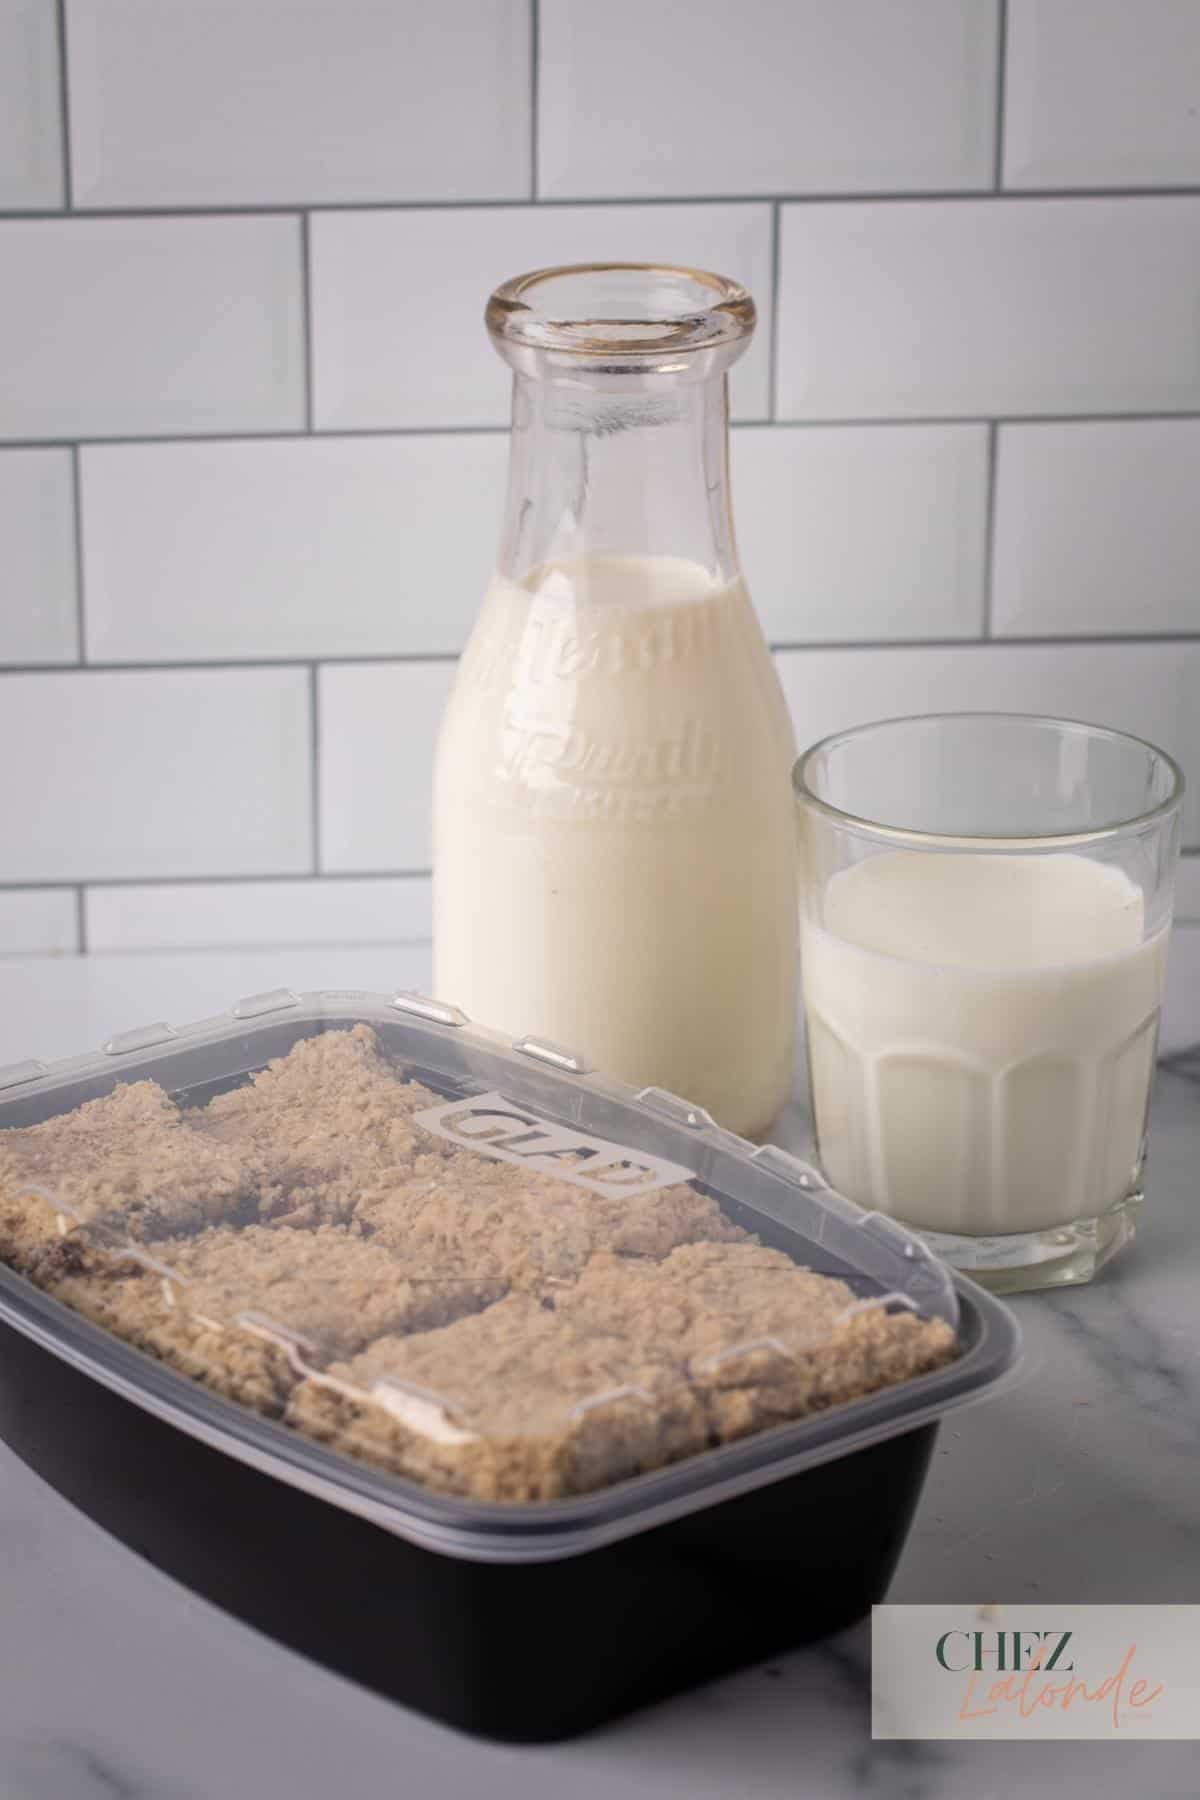
How to freeze and store this square recipe?
Date squares are freezer-friendly and can be stored for up to 6 months. Let them thaw at room temperature before you reheat them. You may pop them in the toaster oven for extra crunch for a few minutes. If you plan on consuming the date squares within a few days and don’t want to freeze them, simply store them in an airtight container and refrigerate them for up to a week.
For even more delicious dessert recipes, you may like to try these:

FAQs about this recipe
These date squares are such classic sweet treats that can be enjoyed any time of the year. They are the perfect combination of textures and flavors. By following my mother-in-law’s simple and easy-to-follow recipe and the tips she provided in this post, we are sure you can also make this old-fashioned treat successfully at home. Maybe you can follow the Canadian tradition and make this little delicious treats as a wedding dessert too. I am sure these date squares will be a crowd-pleaser for any occasion.
Thank you for reading about how to make this delightful Canadian dessert! I hope you found this recipe easy to follow and the variations helpful. If you enjoyed this post, please consider following my blog for more delicious recipes like this. You can also follow me on social media to stay updated on my latest posts and recipe ideas. Don’t forget to share your variations of this recipe with me in the comments below!
A Classic Canadian Dessert: Old-fashioned Date Squares
- Total Time: 55 minutes
- Yield: 15 servings
Description
Experience the timeless sweetness of classic Canadian cuisine with our Old-Fashioned Date Squares. This beloved dessert features a chewy date filling and buttery oatmeal crust perfect for satisfying any sweet tooth. Satisfy your cravings and taste the Canadian tradition today!
Ingredients
Date fillings:
1.5 lbs Pitted Dates
2 Tablespoons of Light brown sugar
1/8 Teaspoon of Sea salt.
1 Cup of Water
Oatmeal crust filling :
1 3/4 Cup of Quick one-minute oatmeal
1 3/4 Cup of All-purpose flour
3/4 Cup of Light brown sugar
1/2 Teaspoon of Baking Powder
1/4 Teaspoon of Baking Soda
1/2 Cup of Unsalted butter
Instructions
Making the date filling – (Microwave the mixture three separate times.)
Step 1 – Place pitted dates in a clean microwave-safe glass bowl to make a date filling. Mix well with ½ cup of water, two tablespoons of brown sugar, and a pinch of sea salt. Microwave the mixture for 3 minutes, then remove the bowl and use a potato masher to mash the date mixture into a paste-like texture.
Step 2 – Add 1/4 cup of water to the date mixture for the second round, mix well, and microwave for three more minutes. Mash the mixture again to achieve a paste-like consistency.
Step 3 – For the final step, microwave the date mixture and add 1/4 cup of water. Mix well and microwave for another 3 minutes. Once done, use a potato masher to mash the mixture until it forms a smooth and complete paste. Set the filling aside and let it cool.
Making the Oatmeal crust and toppings-
Step 4 – In a separate bowl, combine the dry ingredients, including oatmeal, flour, brown sugar, baking powder, and baking soda. Mix thoroughly using a spatula.
Step 5 – Incorporate room-temperature unsalted butter into the dry mixture using a fork or pastry cutter to create a crumbly texture. Test the mixture by picking up a small amount with your hand. If it is still sandy, add one tablespoon of butter until the mixture forms a dough-like consistency.
Assemble the squares –
Step 6 – First, preheat the oven to 350 F. Prepare an 8×12 baking dish by lining it with parchment paper or coating it with non-stick baking spray.
Step 7 – Add half of the oatmeal mixture into the tray, spreading it evenly. Then, pack the layer tightly with your palm or the bottom of a glass, ensuring the oatmeal mixture is compacted.
Step 8 – Spread the date filling evenly on top of the oatmeal mixture layer using a spatula.
Step 9 – Using a spatula, spread the remaining oatmeal mixture on top of the date-filling layer, making sure it is evenly distributed. Press firmly with your palm or the bottom of a glass to pack the oatmeal tightly.
Step 10 – Once the oatmeal mixture and date filling are evenly layered in the baking dish, place it in a preheated oven and bake for 20 to 25 minutes at 350F or until the top is golden brown.
Step 11 – After baking, allow the date squares to rest for at least 15 minutes to let the crust and filling settle before cutting them into small squares. Serve and enjoy with a hot cup of tea or coffee.
Notes
The recipe only requires a small amount of extra sugar due to the natural sweetness of dates, and the quantity listed has been tested to achieve the desired level of sweetness.
Add more dates for a thicker filling, but add water gradually to prevent it from getting too watery when microwaved.
Use a potato masher for an old-fashioned chunky date filling consistency instead of a food processor that may overprocess the filling.
Check the oatmeal mixture by squeezing a small amount in hand; if still sandy, add softened butter gradually until a firm dough consistency is achieved.
- Prep Time: 30 minutes
- Cook Time: 25 minutes
- Category: Desserts
- Method: Baking
- Cuisine: Canadian